Precision matters when laying tiles. A single misalignment can throw off the entire look of your project, yet over 80 percent of DIY tile installations fail due to uneven spacing or poor planning. Getting those perfect grout lines takes more than just patience. With the right steps and tools, you can achieve a clean, professional finish that transforms your space and stands the test of time.
Table of Contents
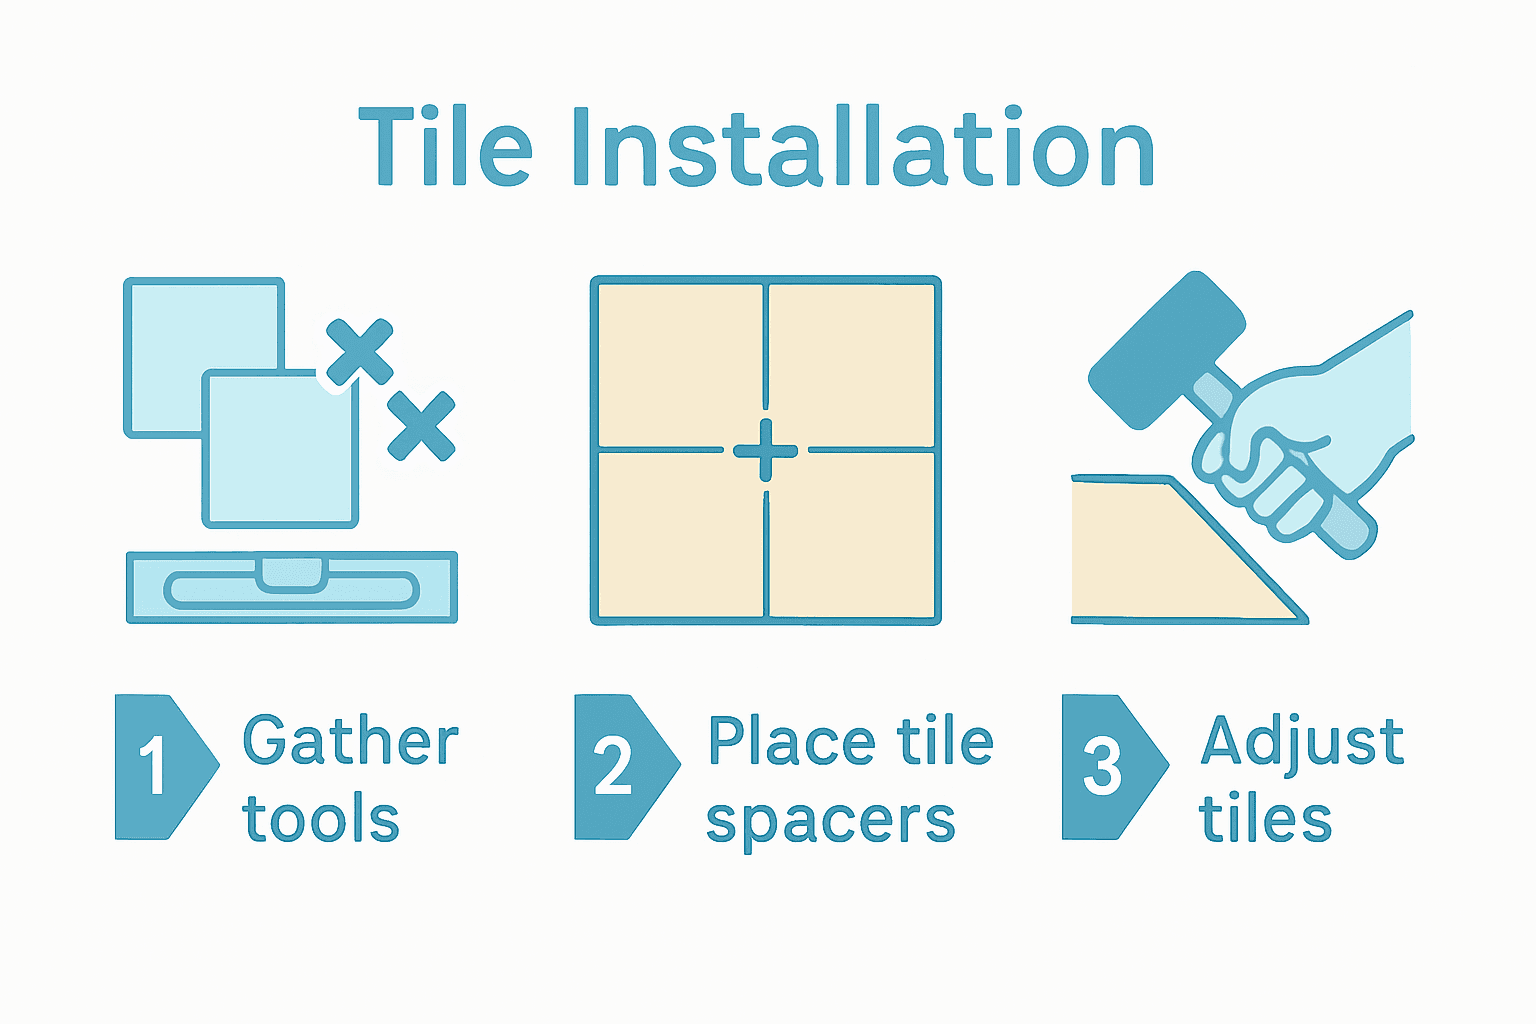
- Step 1: Gather Required Tools And Materials
- Step 2: Measure And Plan Tile Layout
- Step 3: Position Tile Spacers Between Tiles
- Step 4: Adjust Tiles For Accurate Spacing
- Step 5: Remove Tile Spacers Before Grouting
- Step 6: Inspect Tile Alignment And Make Final Checks
Quick Summary
| Key Point | Explanation |
|---|---|
| 1. Gather essential tile tools and materials | Prepare tile spacers, adhesive, a cutter, and a level to ensure a successful installation process. |
| 2. Measure and plan your tile layout | Identify the room’s centerline and perform a dry layout to achieve symmetry and minimize waste. |
| 3. Position tile spacers accurately | Insert spacers at each corner to maintain uniform gaps; they are crucial for even grout lines. |
| 4. Adjust tiles carefully during installation | Use a level to check alignment, making gentle adjustments for a flawless appearance before the adhesive sets. |
| 5. Inspect tile alignment before grouting | Conduct a final check on tile height and spacing with a level to ensure a polished and professional finish. |
Step 1: Gather Required Tools and Materials
Before diving into tile installation, you will need to collect specific tools and materials to ensure a smooth and professional result. According to The Constructor, having the right equipment is crucial for achieving precise tile alignment and a polished finish.
Your toolkit for tile spacing should include several key items. You will need tile spacers in various sizes (typically 1/8 inch, 1/4 inch, or 3/8 inch), depending on your project requirements. Additionally, gather these essential materials and tools:
- Tile adhesive or mortar
- Grout
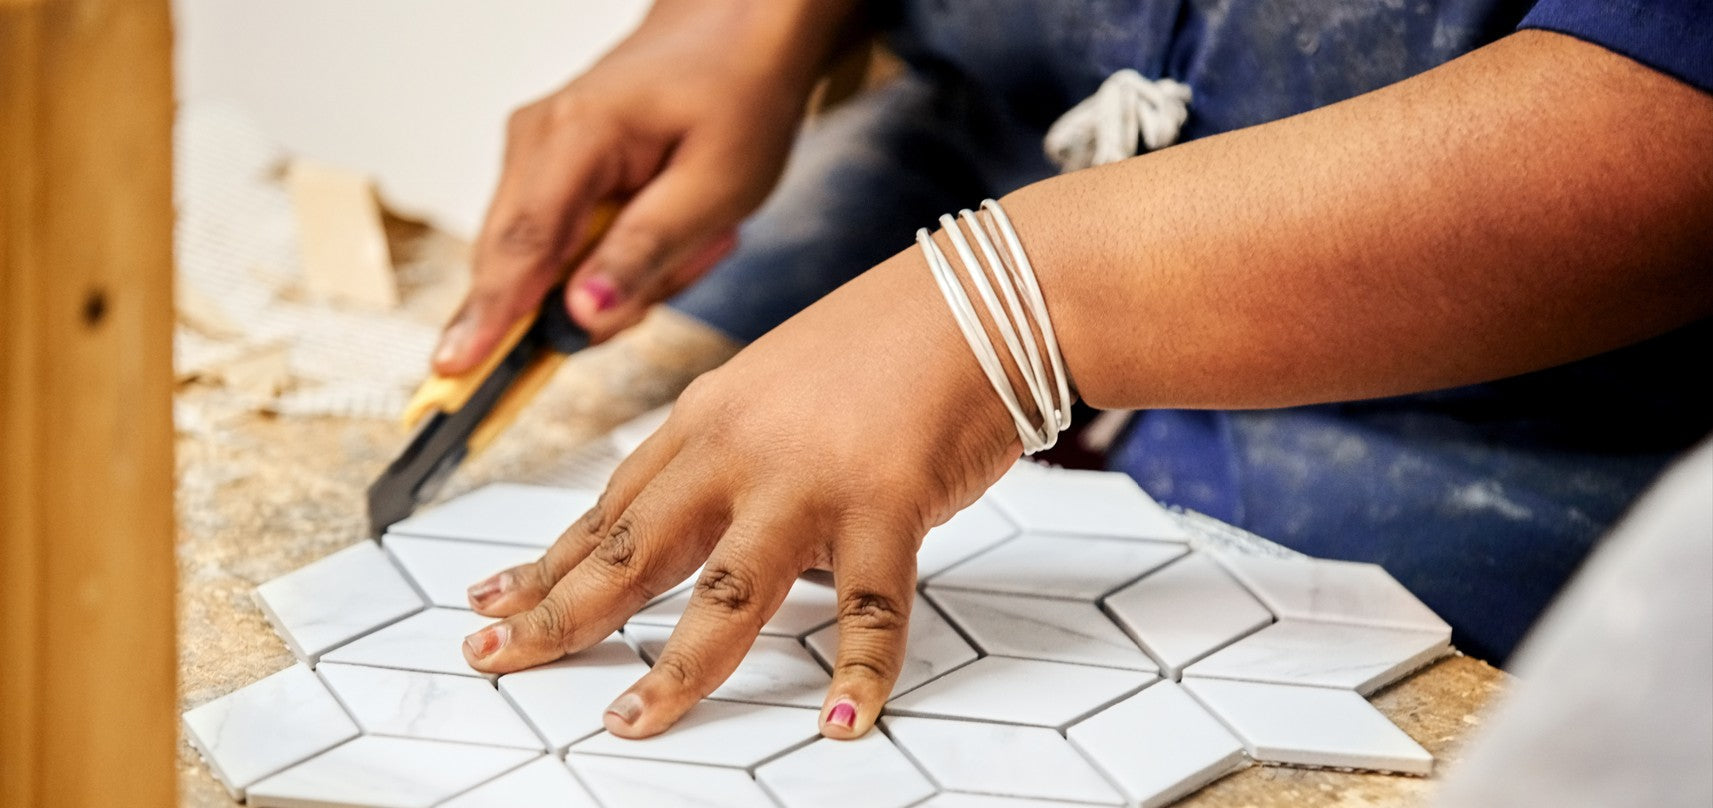
- Tile cutter or wet saw
- Notched trowel
- Rubber mallet
- Measuring tape
- Pencil
- Level
- Clean sponge and bucket
- Safety glasses
- Work gloves
Pro tip: Choose tile spacers that match the width of grout lines you want in your final design. Some professionals recommend purchasing spacers slightly larger than your desired grout line to allow for slight variations during installation.
With these tools prepared, you are now ready to begin the precision work of tile installation. The next step will involve preparing your surface and laying out your tile design with meticulous care.
Step 2: Measure and Plan Tile Layout
Careful measurement and strategic planning are critical for achieving a professional tile installation with minimal waste and perfect alignment. According to CSDC India, the key to successful tile placement begins with precise measurements and strategic layout preparation.
Start by identifying the room’s centerline using a tape measure and chalk line. Measure the room’s length and width, then divide each measurement in half to locate the precise center point. This centerline will serve as your primary reference for tile placement. When exploring creative tile design options, this central point helps you achieve symmetrical and visually balanced results.
Before laying any tiles, perform a dry layout by placing tiles without adhesive. This allows you to check tile positioning, verify cut requirements, and ensure even spacing. Adjust your layout to minimize small tile cuts at room edges. Pro tip: Start tiling from the center of the room and work outwards to maintain symmetry and create a balanced visual effect.
By meticulously measuring and planning your tile layout, you will set the foundation for a professional installation that looks seamless and polished. Your next step will involve preparing the surface and applying tile adhesive with precision.
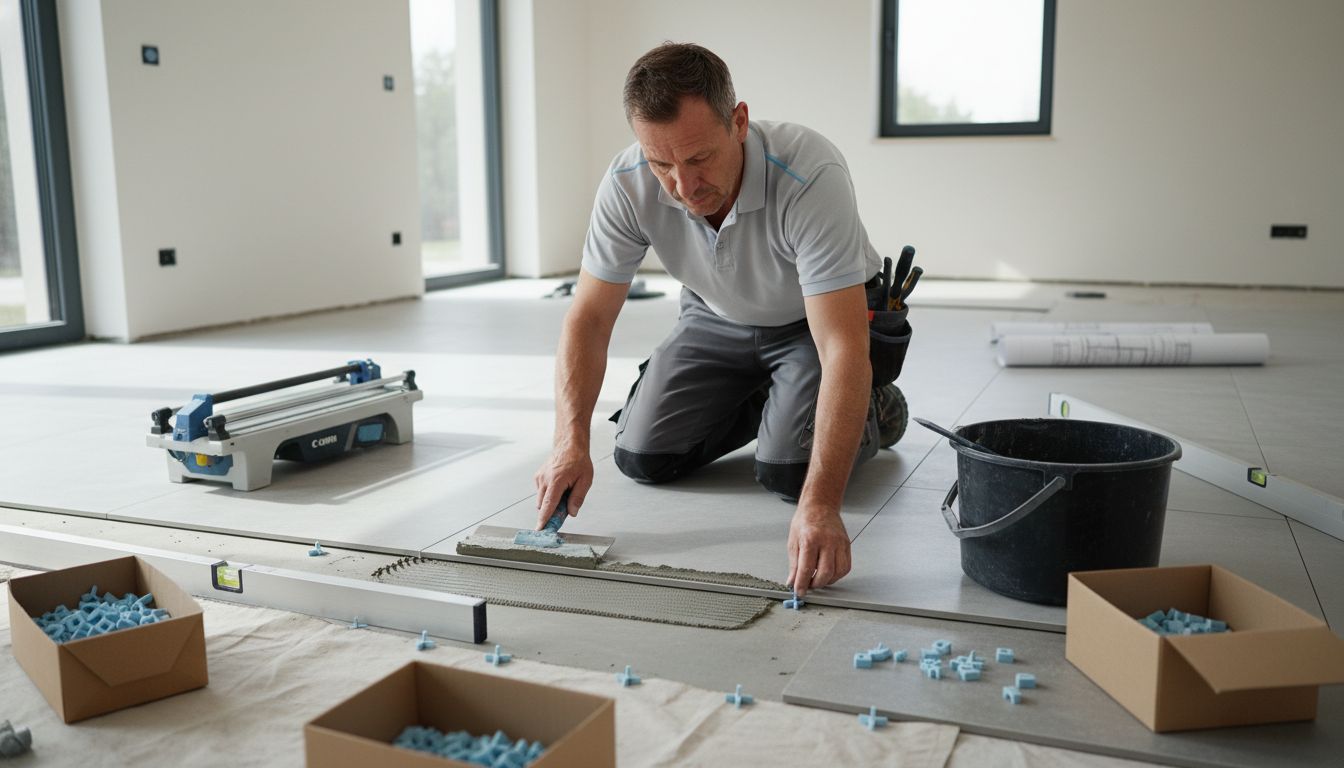
Step 3: Position Tile Spacers Between Tiles
Positioning tile spacers correctly is crucial for achieving a professional and uniform tile installation. According to The Constructor, the key to maintaining consistent gaps is placing spacers precisely at each corner of the tile during installation.
Begin by selecting the appropriate spacer size for your project typically 1/8 inch, 1/4 inch, or 3/8 inch depending on your desired grout line width. When placing spacers, insert them vertically at each corner where tiles meet, ensuring they stand upright and create equal gaps. Understanding tile lippage becomes important here, as proper spacer placement helps prevent uneven tile surfaces.
Work methodically across your surface, placing spacers between each tile as you go.
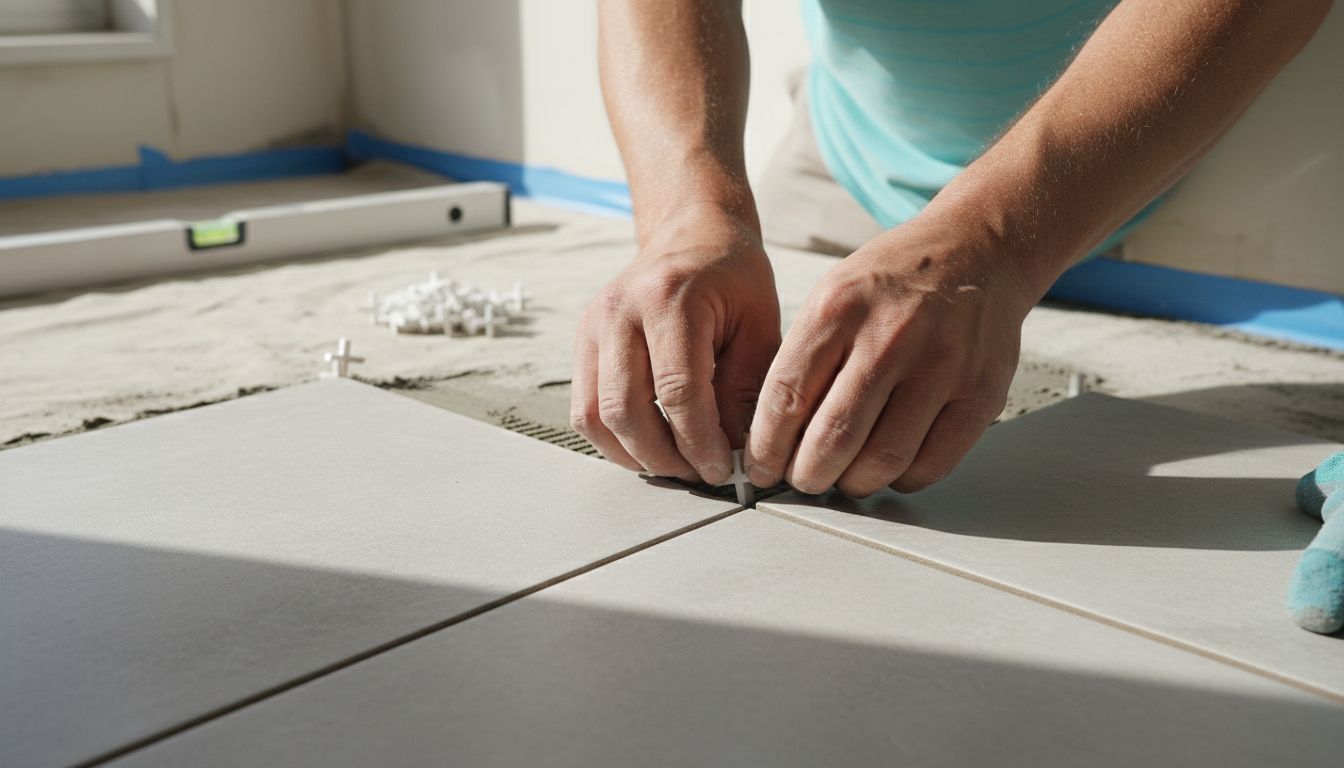 Press the spacers gently but firmly to maintain consistent positioning. Remember that spacers are temporary and will be removed after the adhesive sets. Pro tip: Keep your tile spacers clean and remove any excess adhesive immediately to prevent them from sticking permanently.
With spacers in place, you have created a foundation for uniform grout lines and a professional looking tile installation.
 The next step will involve allowing the adhesive to set and preparing for grout application.
Step 4: Adjust Tiles for Accurate Spacing
After positioning your initial tiles, precise adjustment becomes crucial for a professional installation. According to CSDC India, using a level to check tile alignment and making gentle adjustments is key to achieving uniform spacing and a flawless finish.
Begin by carefully examining the tiles you have already placed. Use a carpenter’s level to check that each tile sits evenly and maintains consistent spacing with its neighbors. When you notice slight misalignments, use a rubber mallet to tap tiles gently into the correct position. Soft tapping helps nudge tiles without damaging them. Learn how to match tiles for a seamless look to ensure your final layout appears professional and intentional.
Pro tip: Work slowly and methodically. Check your alignment frequently during installation, as small corrections are easier to make before the adhesive fully sets. Keep your spacers in place during this process to maintain consistent gaps. If a tile seems significantly off, remove it and reapply with fresh adhesive rather than forcing it into position.
By carefully adjusting each tile, you are creating a foundation for a stunning and professional tile installation. The next step will involve removing spacers and preparing for the grouting process.
Step 5: Remove Tile Spacers Before Grouting
Removing tile spacers at the right moment is critical for achieving clean and professional looking grout lines. According to The Constructor, the optimal time to remove spacers is 20 to 30 minutes after the adhesive sets, preventing them from becoming permanently stuck in the tile installation.
Begin by checking that the tile adhesive has partially set but is still slightly malleable. Use needle nose pliers or a spacer removal tool to gently extract each spacer at a 45 degree angle. Work systematically across your tiled surface, removing spacers from each corner and edge. Learn the details of grout application to ensure a smooth transition after spacer removal.
Pro tip: Clean any adhesive residue from the spacer removal immediately using a damp cloth. If a spacer breaks or becomes difficult to remove, do not force it as this might disrupt the tile alignment. Instead, carefully cut around the spacer with a utility knife before extraction.
With spacers successfully removed, you have prepared the surface for grouting. Your next step involves mixing and applying grout to complete the tile installation process.
Step 6: Inspect Tile Alignment and Make Final Checks
Your tile installation is nearly complete, but a thorough final inspection ensures a professional outcome. According to CSDC India, making careful adjustments before the adhesive sets is crucial for achieving a uniform and polished appearance.
Carefully examine your entire tiled surface using a long carpenter’s level and a straightedge. Check for any slight variations in tile height, uneven grout lines, or subtle misalignments. Pay special attention to corners, edges, and areas where multiple tiles meet. Explore our guide on tile subfloor preparation to understand how proper groundwork contributes to a flawless final result.
Pro tip: Use a bright light or work lamp positioned at an angle to highlight any imperfections that might be invisible under normal lighting. If you notice any tiles that are slightly raised or sunken, gently tap them into place with a rubber mallet before the adhesive completely sets. Remember that small corrections now can prevent significant issues with your tile installation later.
With your final inspection complete, you have set the stage for a beautiful and professional tile project. Your next steps will involve allowing the adhesive to fully cure and preparing for grouting.
Achieve Flawless Tile Alignment with Expert Tools and Quality Materials
Precise tile spacing is the key to a stunning tile installation. As this article highlights, using the right tile spacers and making careful adjustments prevents uneven grout lines and tile lippage, ensuring a balanced and professional finish. If you are eager to take your project to the next level, you will want access to a wide selection of high-quality tiles and essential installation supplies that make flawless alignment easier.
At TileChoices.com, you will find premium tile options—ranging from ceramic and porcelain to natural stone and glass—that fit your unique aesthetic. Pair your tiles with expert tools and accessories designed for precision, helping you maintain the perfect grout lines every step of the way. Don’t wait and risk costly errors or misaligned patterns that compromise your vision. Start your project right by exploring our curated collections and detailed product guides. Visit TileChoices.com now to discover how you can combine superior materials with smart techniques to create breathtaking spaces you will love.
Ready to master tile layout and installation? Check out our design inspiration and project tips to spark ideas and get professional guidance. Your flawless tile journey begins here.