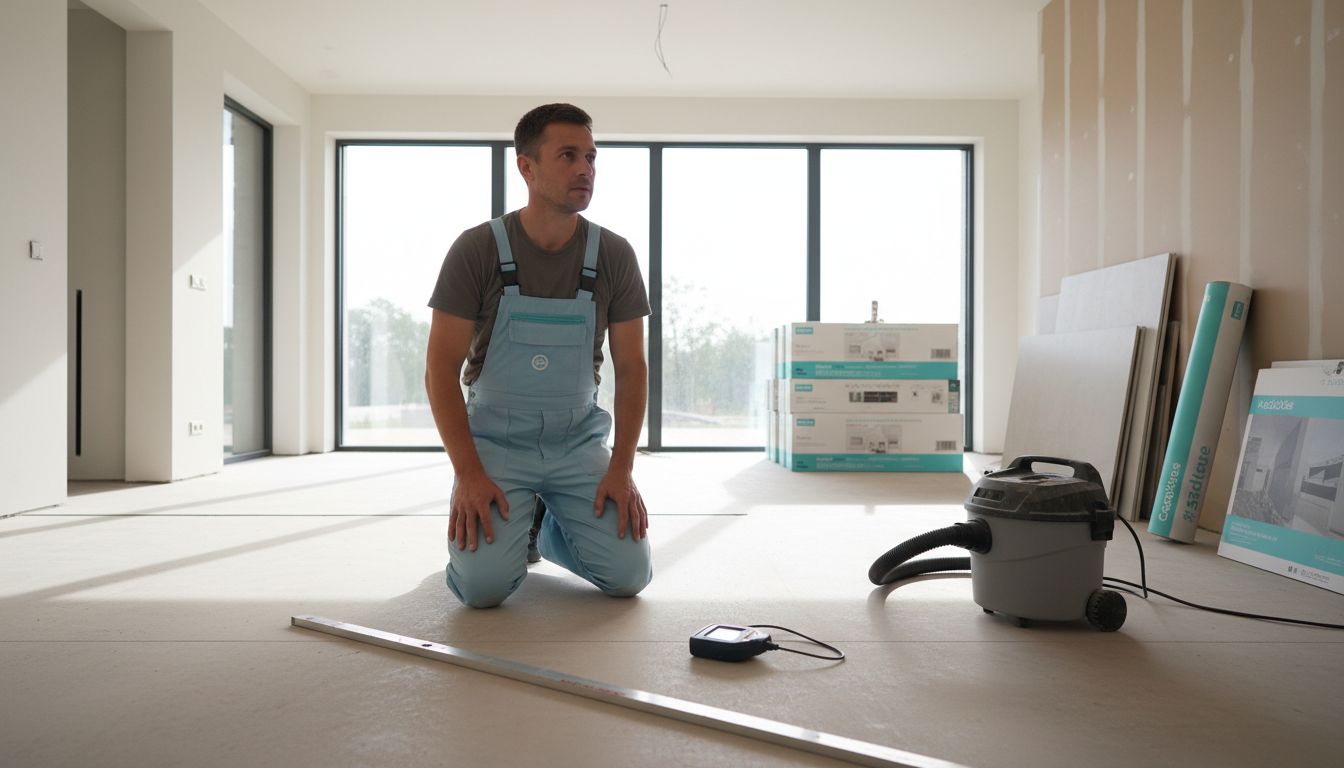
Did you know that over half of tile installation failures trace back to poor subfloor preparation? Before any tile meets the floor, the hidden layers underneath quietly decide how long your new space will last. Carefully addressing moisture, levelness, and support can make the difference between a flawless, professional result and years of repairs. Understanding what lies beneath your tiles helps you avoid expensive mistakes and ensures your floors stay beautiful and durable.
Table of Contents
- Defining Tile Subfloor Preparation Essentials
- Types of Subfloors and Compatibility Factors
- Moisture Testing and Leveling Procedures
- Repair and Reinforcement Best Practices
- Common Mistakes and How to Avoid Them
Key Takeaways
| Point | Details |
|---|---|
| Subfloor Preparation is Essential | Properly prepared subfloors ensure durability and performance of tile installations, including cleanliness, levelness, and structural integrity. |
| Compatibility Factors Matter | Choose the correct subfloor type (concrete, plywood, OSB) based on tile compatibility and preparation needs to avoid issues. |
| Moisture Management is Critical | Conduct moisture testing and address irregularities to prevent failures in tile adhesion and longevity. |
| Avoid Common Mistakes | Ensure thorough cleaning, appropriate reinforcement, and take time for preparation to prevent costly installation errors. |
Defining Tile Subfloor Preparation Essentials
Tile subfloor preparation represents the critical foundation for successful tile installation, determining the longevity and performance of your flooring project. According to the Ceramic Tile Foundation, proper preparation involves ensuring the substrate is clean, level, and structurally sound to support tile installation.
Subfloor Function is more than just a basic support layer. As experts from Home Inspector explain, subflooring serves as the foundational layer beneath finished flooring, providing essential structural integrity and a perfectly level surface for tile placement. This foundational work prevents future issues like tile cracking, uneven surfaces, and premature wear.
Key considerations for tile subfloor preparation include:
- Surface Cleanliness: Remove all debris, dust, and existing flooring materials
- Structural Integrity: Confirm the subfloor can support tile weight without flexing
- Levelness: Ensure surface is within 1/4 inch flatness over a 10-foot span
- Moisture Protection: Install appropriate moisture barriers where needed
Professional tile installers understand that subfloor preparation is not a step to rush or overlook. By investing time in meticulous groundwork, you create a stable platform that transforms your tile installation from a simple home improvement project into a lasting, professional-quality renovation. Understanding Underlayment for Tile Floors can provide additional insights into creating the perfect tile foundation.
Types of Subfloors and Compatibility Factors
Selecting the appropriate subfloor is crucial for successful tile installation. According to Engineering Civil, common subfloor types include plywood, oriented strand board (OSB), concrete, and particle board, each with unique characteristics that impact tile compatibility.
Flooring Tech explains that subfloors can be categorized into two primary structural systems: concrete slabs and timber/steel framed structures. Each system demands specific preparation techniques to ensure optimal tile installation and long-term performance.
Compatibility factors for tile installation vary significantly across different subfloor types:
-
Concrete Subfloors: - Require moisture testing
- Need surface grinding or leveling compound
- Typically most stable for tile installation
-
Wood-Based Subfloors:
- Demand additional reinforcement
- Need moisture barriers
- Require careful flatness assessment
-
Particle Board: Generally NOT recommended for tile installation due to poor moisture resistance
-
Plywood and OSB: Acceptable with proper reinforcement and underlayment
Professional tile installers recognize that understanding these nuanced compatibility factors is key to a successful project. Understanding the Different Types of Floor Tiles can provide additional context for matching your chosen tiles with the most suitable subfloor type.
Here’s a comparison of common subfloor types and their compatibility with tile installation:
![]()
| Subfloor Type | Tile Compatibility | Key Preparation Steps | Special Considerations |
|---|---|---|---|
| Concrete | Highly compatible | Moisture testing Grinding/leveling |
Requires full cure (28 days) Check for cracks |
| Plywood | Acceptable with reinforcement | Reinforce if needed Moisture barrier Level surface |
Use underlayment Check for flexing |
| OSB | Acceptable with reinforcement | Moisture barrier Leveling Reinforcement |
Not as stable as plywood Underlayment required |
| Particle Board | Not recommended | Replacement with plywood or OSB | Poor moisture resistance Risk of swelling |
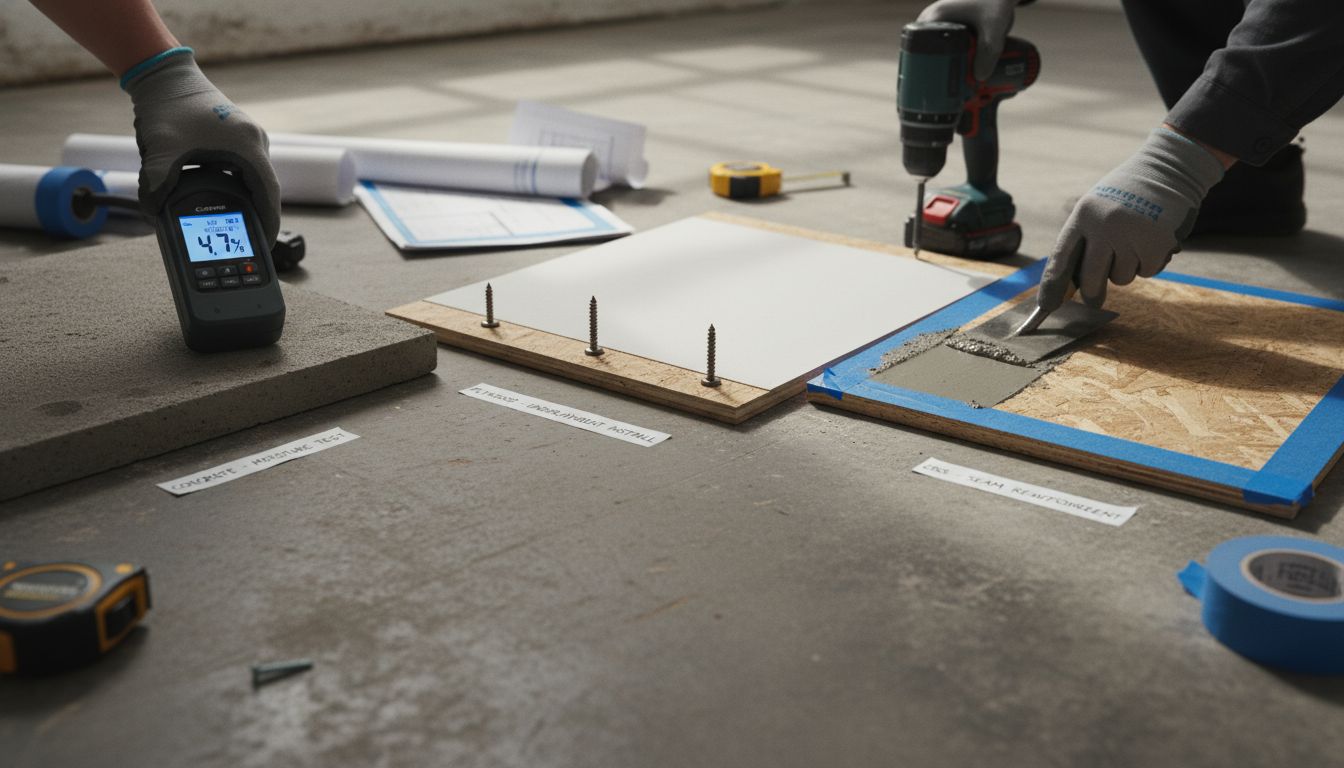
Moisture Testing and Leveling Procedures
Moisture management is a critical aspect of tile subfloor preparation that can make or break your entire installation. According to CFI Installers, moisture testing is crucial because excessive moisture can severely compromise tile adhesion. They specifically recommend that concrete slabs should cure for at least 28 days before conducting any moisture testing.
Professional installers use several precise methods to assess and manage subfloor moisture levels. Moisture meters and calcium chloride tests are two primary techniques for measuring moisture content. The goal is to ensure the subfloor meets specific moisture threshold requirements before tile installation begins.
Leveling procedures are equally important in creating a perfect tile foundation. Ceramic Tile Foundation emphasizes that ensuring a level subfloor is essential, with specific recommendations for addressing surface irregularities:
- High Spots: Must be ground down using specialized grinding equipment
- Low Spots: Require filling with appropriate leveling compounds
- Acceptable Tolerance: Surface should be within 1/4 inch flatness over a 10-foot span
The leveling process involves multiple steps:
- Thoroughly clean the subfloor surface
- Identify high and low areas using a long straightedge
- Grind down high spots carefully
- Apply leveling compound to fill low areas
- Allow compounds to dry completely
- Sand and recheck surface flatness
Pro tip: Always allow sufficient drying time after moisture mitigation and leveling. Rushing this process can lead to tile installation failures. For more comprehensive insights, Tile Transition Strips: Complete Guide for Installers can provide additional context for your tile project preparation.
Repair and Reinforcement Best Practices
Addressing subfloor damage is a critical step in preparing for tile installation. According to Home Inspector, addressing subfloor issues like rot, sagging, or structural damage is vital, and may require replacing damaged sections and adding additional support to ensure a stable foundation.
Structural integrity determines the long-term success of any tile installation. Wood subfloors, in particular, demand careful assessment and strategic reinforcement. Web MIT recommends applying a mortar bed or cement backer board to provide a stable base for tile, which significantly reduces movement-related installation problems.
Key repair and reinforcement strategies include:
-
Structural Assessment:
- Identify and remove rotted or damaged wood sections
- Check for underlying structural weaknesses
- Ensure joists are level and secure
-
Reinforcement Techniques:
- Install additional floor joists for extra support
- Use sister joists to strengthen existing framework
- Apply plywood or OSB overlay for increased stability
-
Moisture Protection:
- Seal any potential water entry points
- Apply waterproof membranes
- Ensure proper ventilation underneath subfloor
Professional installers understand that reinforcement is not a one-size-fits-all process. Each subfloor requires a tailored approach based on its specific condition and tile installation requirements. Sustainable Flooring Materials: Complete Guide for 2025 can provide additional insights into modern reinforcement techniques that balance durability with environmental considerations.
Common Mistakes and How to Avoid Them
Ceramic Tile Foundation highlights that inadequate subfloor preparation is the primary culprit behind tile installation failures. Proper cleaning, leveling, and moisture control are not optional luxuries but essential steps in creating a durable, long-lasting tile floor that can withstand daily wear and tear.
One of the most critical errors homeowners and inexperienced installers make involves direct bonding. According to CFI Installers, directly bonding tile to wood subfloors without appropriate underlayment is extremely risky. They strongly recommend using a mortar bed or cement backer board to prevent potential installation failures and ensure structural integrity.
Common mistakes to avoid during tile subfloor preparation include:
-
Moisture Negligence:
- Skipping moisture testing
- Ignoring humidity levels
- Failing to address potential water intrusion points
-
Structural Shortcomings:
- Overlooking subfloor flatness
- Neglecting to repair damaged sections
- Insufficient reinforcement of weak areas
-
Preparation Errors:
- Not cleaning the subfloor thoroughly
- Using incorrect adhesives or leveling compounds
- Rushing the preparation process
Professional installers understand that meticulous preparation prevents costly mistakes. Each step matters. Small oversights can lead to significant problems down the line. For those seeking additional guidance on avoiding installation pitfalls, Tile Transition Strips: Complete Guide for Installers offers valuable insights into creating seamless, professional tile installations.
Build a Lasting Foundation for Your Tile Project with TileChoices.com
Proper tile subfloor preparation is essential to prevent costly mistakes like cracked tiles or uneven surfaces that can ruin your hard work. The challenges of moisture management, structural integrity, and precise leveling demand quality materials and trusted guidance. At TileChoices.com, we understand the importance of a stable foundation to ensure your tile installation lasts for years to come.
Explore our extensive collection of durable tiles and discover how the right choice complements meticulous subfloor preparation. Whether you are renovating a kitchen backsplash, bathroom floors, or commercial spaces, our curated selections and expert insights will help you achieve professional results without hesitation.
Ready to start your next project with confidence? Visit TileChoices.com to find stylish, reliable tile solutions. Take advantage of our sample requests and detailed product descriptions to make the best choice today. Your perfect tile foundation begins here.
Frequently Asked Questions
What is the importance of tile subfloor preparation?
Tile subfloor preparation is essential for ensuring the longevity and performance of your tile installation. A properly prepared subfloor provides a stable, clean, and level foundation, preventing issues like cracking and premature wear.
What types of subfloors are suitable for tile installation?
Common subfloor types include concrete, plywood, oriented strand board (OSB), and particle board. Concrete and plywood/OSB are generally more compatible with tile, while particle board is not recommended due to its poor moisture resistance.
How do I test for moisture in my subfloor?
Moisture testing can be performed using moisture meters or calcium chloride tests. For concrete slabs, it’s vital to allow them to cure for at least 28 days before testing. Ensuring appropriate moisture levels is crucial to prevent tile adhesion issues.
What are the common mistakes to avoid when preparing a tile subfloor?
Common mistakes include neglecting moisture testing, overlooking structural damage, and not ensuring the subfloor is clean and level. Rushing the preparation process can lead to significant installation problems down the line.