
Sealing your tiles and grout might seem like a small detail, yet it can make a huge difference in the lifespan and look of your surfaces. Most people do not realize that quality sealers can protect tiles for up to three years before reapplication is needed. You might think sealing is just about skipping extra cleaning or keeping things shiny, but the real benefit is how it blocks deep moisture, stains, and even hidden mold from taking root where you cannot see.
Table of Contents
- Step 1: Prepare The Surface For Sealing
- Step 2: Choose The Right Sealer For Your Needs
- Step 3: Apply The Sealer Evenly On Tiles And Grout
- Step 4: Allow The Sealer To Cure Properly
- Step 5: Conduct A Water Test For Effectiveness
- Step 6: Maintain The Sealed Surface For Longevity
Quick Summary
| Key Point | Explanation |
|---|---|
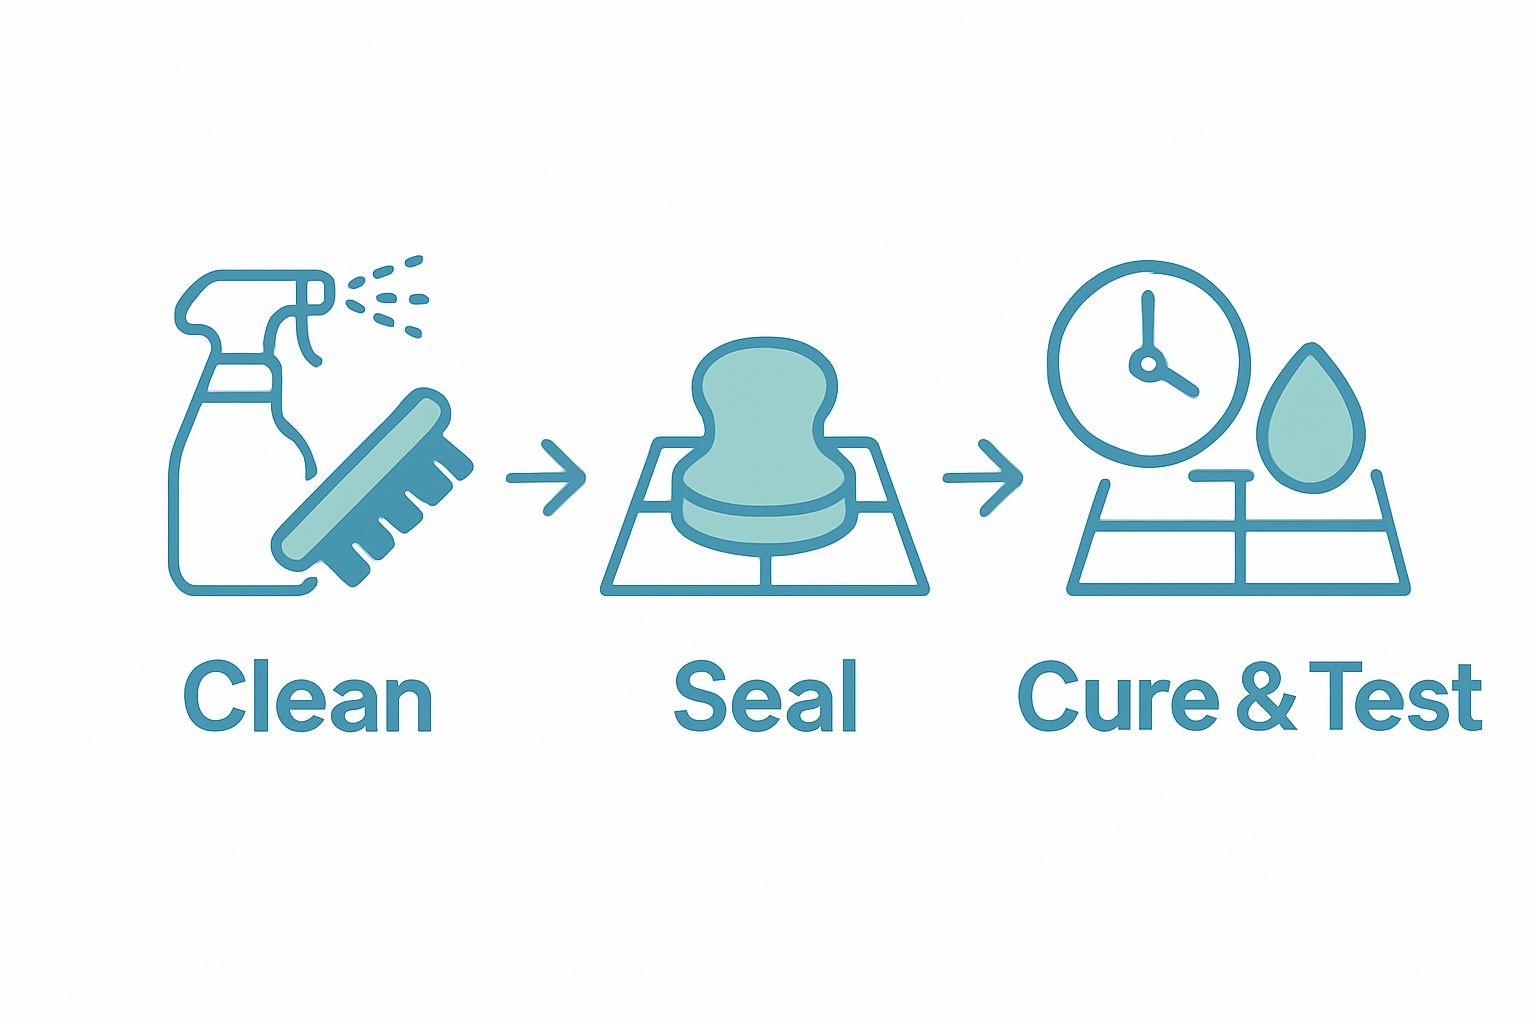
| 1. Thoroughly clean the surface | Use a professional-grade cleaner to remove dirt and residues for effective sealant adhesion. |
| 2. Choose the right sealer type | Select a sealer based on tile material and moisture exposure for optimal protection and appearance. |
| 3. Apply sealer evenly and patiently | Use consistent strokes and avoid oversaturation to ensure thorough coverage on tiles and grout. |
| 4. Allow proper curing time | Maintain ideal conditions and avoid moisture exposure during the curing process for maximum effectiveness. |
| 5. Regular maintenance is crucial | Use gentle cleaning solutions and inspect periodically to preserve the sealer and extend its lifespan. |
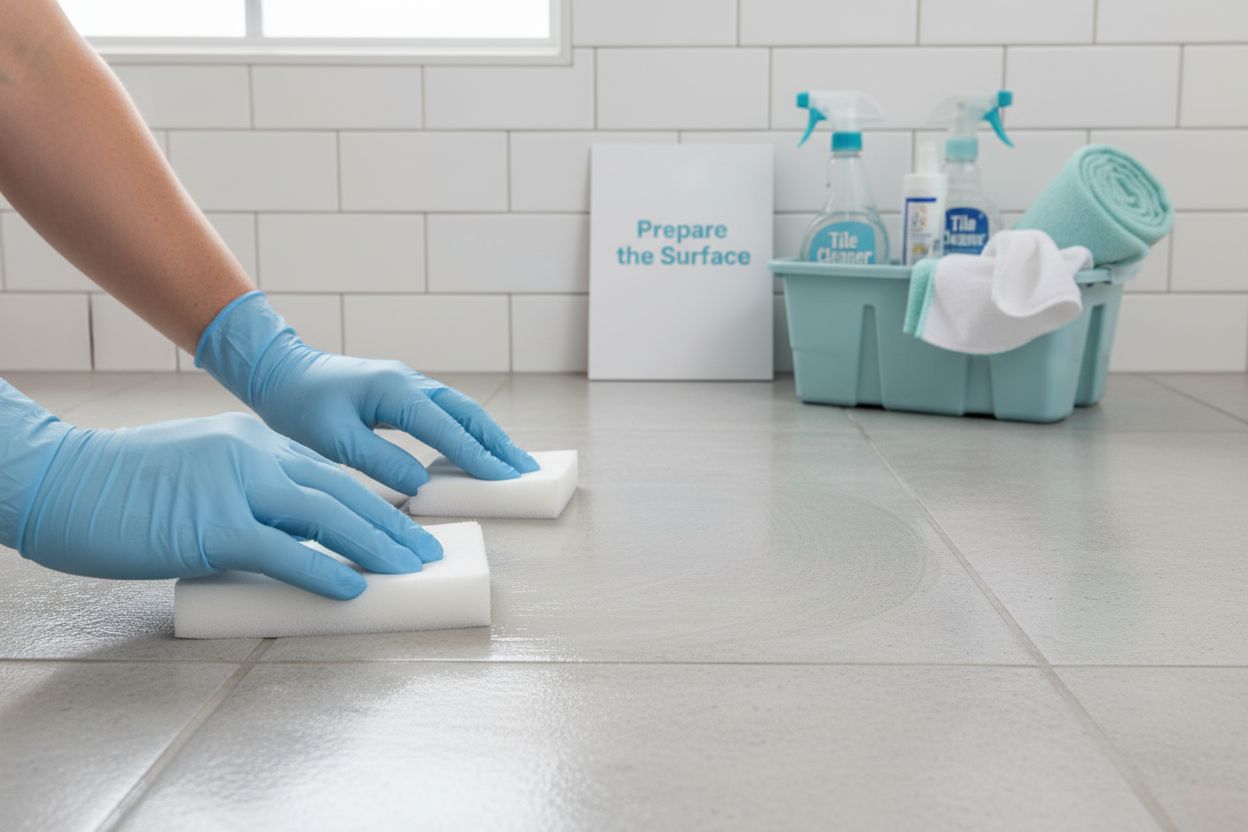
Step 1: Prepare the Surface for Sealing
Before you start sealing tiles and grout, proper surface preparation is critical to ensuring a successful and long-lasting protective treatment. The foundation of an excellent sealing job lies in creating a clean, dry, and smooth surface that will allow the sealant to bond effectively and provide maximum protection.
Begin by thoroughly cleaning the tile and grout surfaces, removing all dirt, debris, and existing residues that could interfere with the sealing process. Use a professional-grade tile and grout cleaner specifically designed to break down stubborn stains and eliminate microscopic contaminants. Pay special attention to high-traffic areas and spots prone to moisture accumulation, such as bathroom corners and kitchen backsplashes.
After cleaning, you will need to ensure the surface is completely dry. Moisture is the enemy of effective sealing, so use clean microfiber towels or allow sufficient air drying time. A moisture-free surface guarantees that the sealant will penetrate and adhere properly. For areas with persistent dampness, consider using a fan or dehumidifier to accelerate the drying process.
If you discover any damaged or cracked grout lines during your preparation, address these issues before sealing. Repair or replace compromised grout sections to create a uniform surface. This step prevents water infiltration and ensures the sealant can provide comprehensive protection. Check for loose tiles, hairline fractures, or areas where grout has deteriorated, and make necessary repairs using appropriate grout repair products.
Once the surface is clean, dry, and repaired, do a final inspection using bright, direct lighting to identify any missed spots or imperfections. Run your hand gently over the surface to feel for any rough patches or inconsistencies. This meticaneous approach guarantees that your sealing tiles and grout project starts on the right foot.
Here is a quick reference checklist table to help you verify that your tiles and grout are ready for sealing and avoid the most common preparation mistakes.
| Preparation Task | How to Complete | What to Look For |
|---|---|---|
| Clean Surface | Use professional-grade tile and grout cleaner | No visible dirt, debris, or stains |
| Dry Surface | Use clean microfiber towels or allow air drying | No moisture or damp patches |
| Repair Damaged Grout | Replace or repair cracking or missing grout lines | Smooth, uniform grout with no gaps |
| Check for Loose Tiles | Press each tile gently to detect movement | All tiles are firmly in place |
| Final Inspection | Use bright lighting and feel for rough spots | Surface is even and visually flawless |
| Learn more about effective tile maintenance in our comprehensive guide on waterproofing bathroom tiles. |
By dedicating time to thorough surface preparation, you set the stage for a superior sealing application that will protect your tiles and grout from moisture, stains, and daily wear for years to come.
Step 2: Choose the Right Sealer for Your Needs
Selecting the appropriate sealer is a critical decision that will determine the long-term protection and appearance of your tiles and grout. Not all sealers are created equal, and the wrong choice can lead to ineffective protection, unwanted aesthetic changes, or potential damage to your surfaces.
Start by understanding the specific type of tile material you are working with. Ceramic and porcelain tiles typically require different sealing approaches compared to natural stone surfaces like marble, granite, or slate. Porous materials such as travertine or limestone demand penetrating sealers that can fill microscopic gaps and prevent moisture absorption. In contrast, glazed ceramic tiles might only need a surface sealer to enhance their existing protective layer.
Consider the location and expected wear of the tiled surface. High-moisture areas like showers, kitchen backsplashes, and bathroom floors require water-resistant penetrating sealers that provide robust protection against moisture, mildew, and potential staining. For areas with less moisture exposure, such as decorative wall tiles or dry-zone flooring, you might opt for a surface sealer that primarily enhances color and provides a protective shine.
Pay close attention to the specific performance characteristics of different sealers. Some products offer enhanced stain resistance, while others focus on color enhancement or providing a matte or glossy finish. Penetrating sealers work by filling the tiny pores in tiles and grout, creating an invisible barrier that repels liquids and prevents stain absorption. Surface sealers, by comparison, create a protective layer on top of the tile that can alter its appearance and provide a specific sheen.
Before making a final decision, test the sealer on a small, inconspicuous area to ensure it delivers the desired results. Look for products specifically designed for your tile type, checking manufacturer recommendations and compatibility. Our comprehensive guide to waterproofing bathroom tiles offers additional insights into selecting the right protective solutions.
The following table compares popular types of tile and grout sealers based on materials, uses, and key characteristics to help you select the right one for your project.
| Sealer Type | Suitable Tile/Grout | Best For | Appearance Effect | Key Benefit |
|---|---|---|---|---|
| Penetrating Sealer | Porous tiles (travertine, limestone, marble) and unglazed grout | Bathrooms, kitchens, showers | Invisible, maintains natural look | Deep moisture and stain resistance |
| Surface Sealer | Glazed ceramic, porcelain tiles | Low-moisture, decorative areas | Adds shine or matte finish | Enhances color and provides surface barrier |
| Water-Resistant Sealer | Natural stone, high-exposure grout | High-humidity locations | Typically invisible | Robust water repellency in wet areas |
| Color-Enhancing Sealer | Slate, textured natural stone, faded grout | Surfaces needing color boost | Darkens or enriches color | Restores vibrancy and masks stains |
Remember that investing time in selecting the right sealer will pay dividends in protecting your tiles and grout from daily wear, moisture damage, and potential staining. A carefully chosen sealer not only preserves the beauty of your surfaces but also extends their functional lifespan.
Step 3: Apply the Sealer Evenly on Tiles and Grout
Applying the sealer is a precision task that requires patience, attention to detail, and the right technique to ensure comprehensive protection for your tiles and grout. The goal is to create an even, consistent layer that penetrates deeply and provides maximum coverage without leaving excess product or creating uneven spots.
Begin by gathering your application tools, which typically include high-quality foam or microfiber applicators, clean lint-free cloths, protective gloves, and safety glasses. Work in small, manageable sections to maintain control and ensure thorough coverage. Pour a modest amount of sealer into a clean paint tray or container, allowing for easy and controlled application.
Apply the sealer using smooth, consistent strokes, working systematically across the surface. For penetrating sealers, use a foam applicator or soft brush to work the product into grout lines and tile surfaces. Move in a single direction, overlapping slightly to guarantee complete coverage. Avoid oversaturating the surface, which can lead to pooling or uneven absorption. If you notice excess sealer accumulating, use a clean cloth to gently wipe away the surplus immediately.
Pay special attention to grout lines, which are typically more porous and require extra care during sealing. Use a smaller brush or specialized grout applicator to ensure these areas receive thorough protection. Take your time and apply the sealer methodically, focusing on creating a uniform layer that fills microscopic gaps and provides comprehensive protection against moisture and stains.
After application, allow the sealer to sit for the manufacturer’s recommended duration, typically between 10 to 15 minutes. This waiting period allows the product to penetrate and bond with the tile and grout surfaces. Wipe away any excess sealer with a clean, dry cloth to prevent potential residue or unwanted shine. Check out our comprehensive guide on cleaning grout for additional maintenance tips.
To verify successful application, look for an even, consistent appearance without pooling or streaking. The surface should look natural, with no visible film or discoloration. Allow the sealed surface to cure completely according to the product instructions before exposing it to water or heavy use, typically 24 to 72 hours depending on the specific sealer and environmental conditions.
Step 4: Allow the Sealer to Cure Properly
The curing process is a critical yet often overlooked stage in sealing tiles and grout that determines the effectiveness and longevity of your protective treatment. Proper curing ensures that the sealer fully penetrates and bonds with the surface, creating a robust barrier against moisture, stains, and daily wear.
Temperature and humidity play significant roles in the curing process**, so choose your application timing carefully. Ideal curing conditions typically range between 50 to 80 degrees Fahrenheit with moderate humidity levels. Avoid sealing surfaces during extreme temperature fluctuations or in direct sunlight, which can accelerate drying and potentially compromise the sealer’s performance. If working in an indoor space, maintain consistent environmental conditions by using fans for air circulation and keeping windows closed to prevent dust or debris from settling on the freshly sealed surface.
Most sealers require a specific waiting period before the surface can be used normally. This duration varies depending on the product type and manufacturer recommendations, typically ranging from 24 to 72 hours. During this critical curing time, keep the area completely dry and free from foot traffic. Place warning signs or temporary barriers to prevent accidental contact or moisture exposure. If you’re sealing bathroom or kitchen tiles, plan your project during a period when these spaces can remain unused.
Resist the temptation to test the sealed surface prematurely. Walking on newly sealed tiles, exposing them to water, or cleaning the surface too soon can interrupt the chemical bonding process and reduce the sealer’s effectiveness. Some penetrating sealers continue to cure and strengthen over several days, so patience is key to achieving maximum protection.
To verify proper curing, look for these signs of successful application: a consistent, uniform appearance without streaks or cloudiness, no sticky or tacky feeling when lightly touched, and a smooth, natural finish that enhances the tile’s original color and texture. For additional insights on maintaining your newly sealed surfaces, explore our comprehensive guide to tile maintenance.
Remember that different sealer types have unique curing characteristics. Penetrating sealers might feel completely dry within hours, while surface sealers could require more extended curing periods. Always follow the specific manufacturer’s instructions to guarantee optimal protection for your tiles and grout.
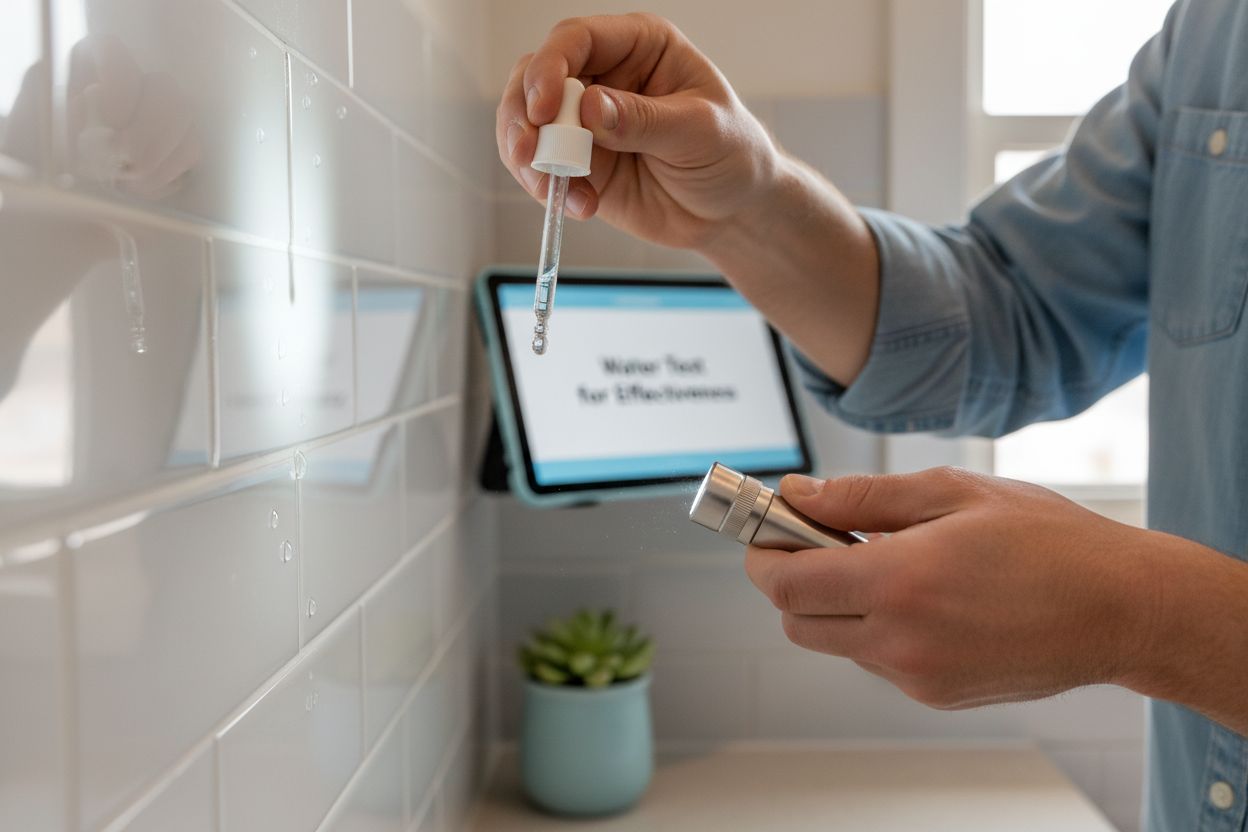
Step 5: Conduct a Water Test for Effectiveness
The water test is a crucial final step in verifying the success of your tile and grout sealing project. This simple yet powerful technique allows you to confirm that the sealer has created an effective protective barrier against moisture penetration and potential staining.
Wait at least 24 to 48 hours after the initial sealing process to perform the water test, ensuring the sealer has fully cured and bonded with the surface. Choose a small, inconspicuous area first to avoid potential visible water marks on prominent sections of your tiled surface. Drop several small beads of water onto the sealed tile and grout lines, observing how the liquid interacts with the surface.
A successful water test demonstrates several key characteristics of proper sealing. The water should bead up immediately and sit on top of the surface without being absorbed. Watch carefully as the water droplets maintain their rounded shape and do not spread or sink into the tile or grout. If the water remains in distinct, raised droplets for several minutes, it indicates that the sealer has created an effective protective barrier.
Should the water begin to absorb or darken the surface quickly, this suggests the sealing process was incomplete or ineffective. In such cases, you may need to reapply the sealer, ensuring more thorough coverage or selecting a different product that better matches your specific tile and grout type. Pay special attention to grout lines, which are typically more porous and can reveal sealing inconsistencies more readily than glazed tile surfaces.
Repeat the water test in multiple areas, especially those prone to moisture exposure like shower walls, kitchen backsplashes, and bathroom floors.
Use this troubleshooting table to quickly diagnose common sealing issues, their likely causes, and recommended solutions based on the article content.
| Problem | Possible Cause | Solution |
|---|---|---|
| Water does not bead up after sealing | Insufficient sealer application or incomplete coverage | Reapply sealer thoroughly, focusing on grout and missed spots |
| Sticky or tacky surface after curing time | Environmental conditions prevented proper curing (high humidity or low temperature) | Keep area dry and ventilated, allow more curing time |
| Uneven or streaky finish | Oversaturation or uneven application | Wipe away excess sealer immediately during application; apply in smooth, consistent strokes |
| Tiles look cloudy or discolored | Wrong sealer for tile type or sealer not wiped off | Test sealer on inconspicuous area first; promptly buff off excess |
| Areas of grout absorbing water faster | More porous grout or wear in high-traffic spots | Focus reapplication on those grout lines, use penetrating sealer if needed |
| Different sections of tiled surfaces may absorb sealant differently due to variations in tile composition, grout condition, and previous wear. For more detailed maintenance tips, check out our comprehensive guide on tile and grout care. |
Remember that the water test is not just a final verification step but an ongoing maintenance technique. Periodically repeating this test can help you monitor the long-term effectiveness of your sealer and determine when reapplication might be necessary. Most quality sealers provide protection for one to three years, depending on the product and the level of wear and moisture exposure.
Step 6: Maintain the Sealed Surface for Longevity
Maintaining your newly sealed tiles and grout is essential to preserving the protective barrier you’ve carefully applied and ensuring the long-term beauty and durability of your surfaces. Proper maintenance goes beyond simple cleaning, requiring a strategic approach that protects the sealer’s integrity and prevents premature degradation.
Regular cleaning is the foundation of surface maintenance, but it requires a gentle touch. Avoid harsh chemical cleaners that can strip away the protective sealer, instead opting for pH-neutral cleaning solutions specifically designed for sealed tiles and grout. Use soft microfiber mops or cloths that clean effectively without scratching the surface. For daily maintenance, a simple mixture of warm water and a mild, non-abrasive cleaner will help remove dust and light dirt without compromising the sealer’s protective properties.
Implement a proactive approach to preventing potential damage. Place protective mats at entryways to reduce dirt and moisture tracking, and use felt pads under furniture to prevent scratching. In high-moisture areas like bathrooms and kitchens, ensure proper ventilation to minimize humidity buildup that could potentially compromise the sealed surface. Quickly wipe up spills as they occur, preventing potential staining or moisture penetration.
Periodically inspect your sealed surfaces for signs of wear or breakdown. Look for areas where water no longer beads up or where the surface appears to absorb moisture more readily. These are indicators that the sealer may be wearing thin and might require reapplication. The frequency of resealing depends on the area’s usage, moisture exposure, and the specific type of sealer used, typically ranging from one to three years.
Consider the unique challenges of different spaces. Bathroom tiles endure more moisture and potential chemical exposure from personal care products, while kitchen tiles face cooking splashes and food stains. Adjust your maintenance strategy accordingly, potentially using more frequent gentle cleaning in high-stress areas. For additional insights on maintaining your tiled surfaces, explore our comprehensive guide to tile care.
Remember that consistent, gentle care is the key to maintaining the protective seal. By investing a small amount of time in regular maintenance, you’ll protect your initial sealing investment, keeping your tiles and grout looking pristine and well-protected for years to come.
Take the Stress Out of Sealing—Upgrade Your Tile Experience Today
You have just learned how vital it is to choose the right products and follow the correct steps to achieve lasting protection when sealing tiles and grout. Many struggle with finding reliable, high-quality tiles that stay resilient against moisture and staining even after careful sealing and maintenance. If you want the confidence that comes from using durable tiles and expert-recommended care methods, make your next tile investment count.

Do not let all your hard preparation go to waste by settling for second-rate materials. Discover our extensive selection of tested and trusted tiles at TileChoices.com. Explore our detailed guides on waterproofing bathroom tiles and cleaning grout for ultimate tile care. Shop now so your surfaces will look beautiful and stay protected for years. Take action today and trust TileChoices.com to help you seal and maintain your investment the right way.
Frequently Asked Questions
How do I prepare the surface before sealing tiles and grout?
Start by thoroughly cleaning the tile and grout surfaces to remove dirt, debris, and residues. Use a professional-grade cleaner, then ensure the area is completely dry before applying any sealant to allow for proper adhesion.
What type of sealer should I use for different tile materials?
Use penetrating sealers for porous tiles like travertine or limestone and surface sealers for glazed ceramic tiles. Always check the manufacturer’s recommendations to select the right sealer that aligns with your specific tile and grout type.
How can I apply the sealer evenly on tiles and grout?
Work in small sections using a high-quality foam applicator or microfiber cloth to apply the sealer in smooth, consistent strokes, ensuring no pooling occurs. Pay extra attention to grout lines, which may need additional sealant for full protection.
How do I know when the sealer is fully cured?
Typically, sealers require a curing period of 24 to 72 hours, depending on the product. Keep the area dry and free from foot traffic during this time, and check for a uniform appearance that indicates proper curing before use.
What should I do if the water test shows that the sealer is ineffective?
If water absorbs into the surface instead of beading up, the sealing may have been inadequate. Reapply the sealer carefully, ensuring complete coverage, especially in porous grout areas to regain protection from moisture.
How can I maintain sealed tiles and grout for longevity?
Use pH-neutral cleaning solutions and soft microfiber cloths for regular cleaning to avoid damaging the sealer. Inspect the surface periodically for signs of wear, and plan to reseal every one to three years based on usage and moisture exposure.


