
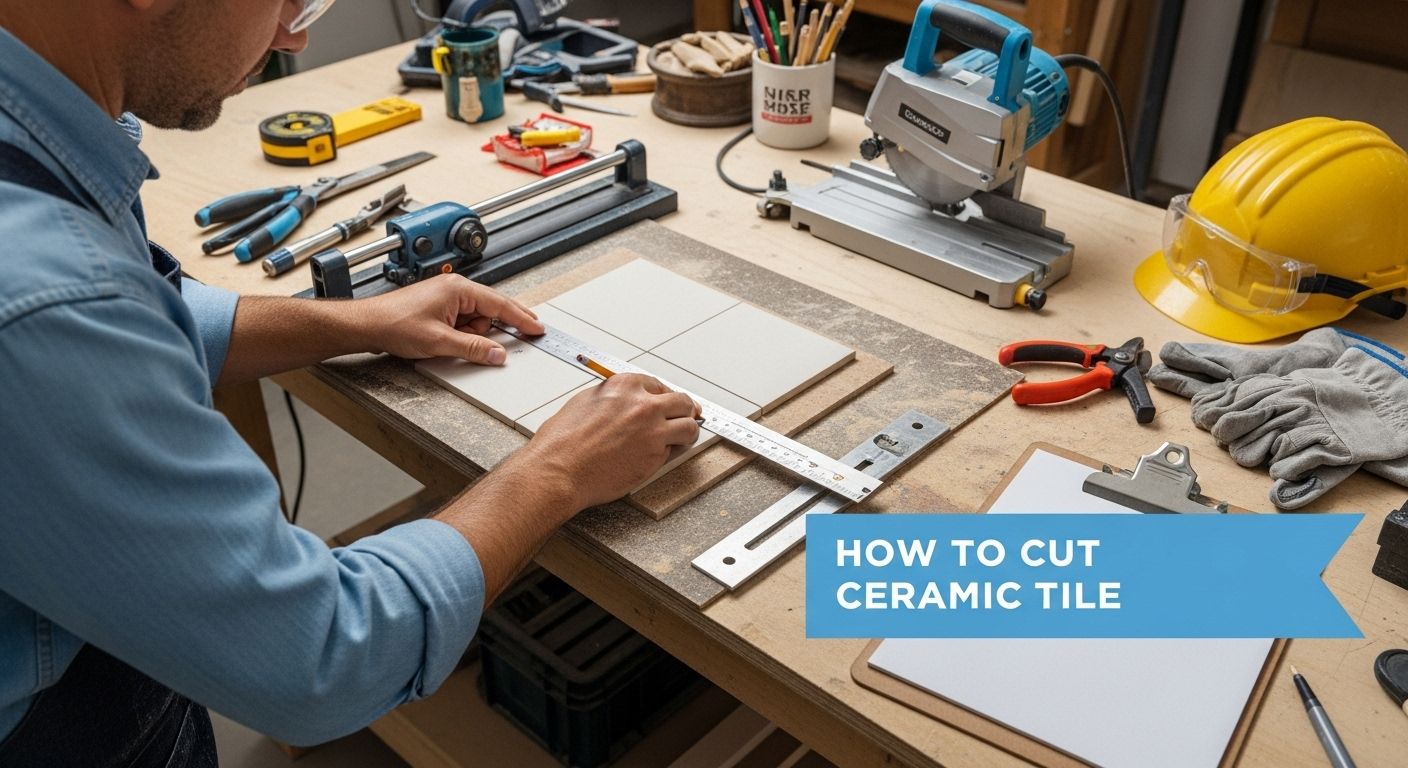
Cutting ceramic tiles sounds simple enough, but one slip can ruin an entire project and cost you hours of work. More surprising is how even DIYers can achieve professional results with the right approach. In fact, using the proper technique and tools can reduce tile breakage by as much as 70 percent, turning a frustrating task into a process that feels almost effortless. So what does it really take to transform your tile cutting game and avoid those costly mistakes?
Table of Contents
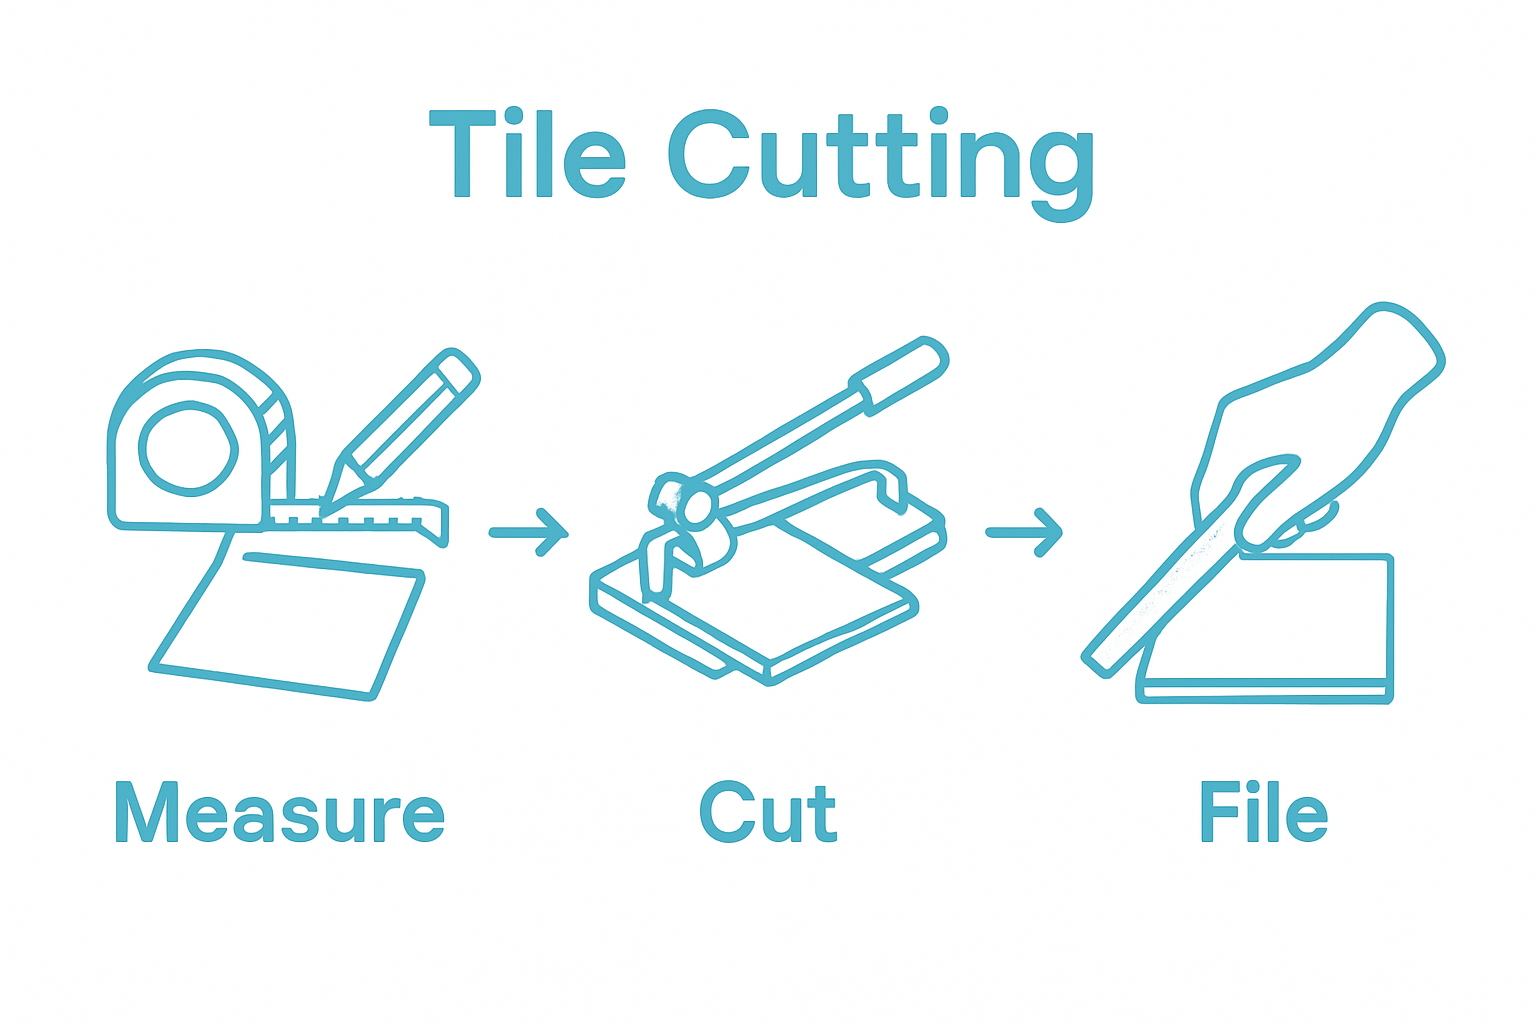
- Step 1: Gather Your Tools And Materials
- Step 2: Measure And Mark Your Tile
- Step 3: Choose The Right Cutting Method
- Step 4: Cut The Tile Safely And Accurately
- Step 5: Smooth Edges And Clean Up
- Step 6: Verify Precision And Fit
Quick Summary
| Key Point | Explanation |
|---|---|
| 1. Gather essential tools first | Collect measuring tape, safety goggles, and cutting tools to ensure accuracy and safety during tile cutting. |
| 2. Measure and mark with precision | Accurate measurements and clear markings are crucial for achieving a professional look in tile installation. |
| 3. Choose the right cutting method | Use manual tools for straight cuts and wet saws for complex shapes to achieve clean, precise results. |
| 4. Perform dry fitting before installation | Lay out cut tiles without adhesive to verify fit and to identify any necessary adjustments for a seamless installation. |
| 5. Smooth edges and clean workspace | Smoothing sharp edges improves grout adhesion, while proper cleanup ensures safety and tool maintenance after cutting. |
Step 1: Gather Your Tools and Materials
Successful ceramic tile cutting starts with having the right equipment and preparing your workspace carefully. Before making a single cut, you need to assemble a collection of tools that will help you achieve precise, clean results while keeping yourself safe.
For your tile cutting project, you’ll want to collect these essential tools:
- Measuring tape (for accurate measurements)
- Pencil or chalk (for marking cutting lines)
- Square or straight edge (to ensure straight cuts)
- Safety goggles (to prevent eye injuries)
- Work gloves (to shield your hands)
- Tile cruncher or wet saw (depending on tile type)
- Dust mask (for protection from tile debris)
According to The Tile Foundation, selecting the appropriate cutting tool is critical. Manual tile cutters work perfectly for standard ceramic tiles, while wet saws provide superior precision for more complex cutting tasks. If you’re working with porcelain or thicker tiles, a wet saw with a diamond blade will deliver the most professional results.
Before beginning, inspect all your tools carefully. Check that cutting wheels on manual tile cutters are sharp and undamaged, and ensure wet saw blades are clean and properly aligned. Your cutting surface should be sturdy, level, and positioned near a power outlet if using electric tools. A workbench or sturdy table covered with a protective cloth will help minimize potential damage to both your tools and the surrounding area.
Always prioritize safety by wearing protective gear. Safety goggles shield your eyes from tile fragments, while work gloves prevent cuts and abrasions. A dust mask is crucial when cutting tiles, as ceramic dust can be harmful if inhaled. Position your workspace in a well-ventilated area, preferably near an open window or with a fan to help disperse dust.
By methodically gathering and preparing your tools and workspace, you set the foundation for a successful ceramic tile cutting project. Taking these preparatory steps ensures not just better results, but also your personal safety throughout the process.
Step 2: Measure and Mark Your Tile
Precise measurement and marking are the cornerstones of professional ceramic tile cutting. This critical step determines the accuracy of your final installation, ensuring tiles fit perfectly and look seamless. Your goal is to create clear, precise guidelines that will direct your cutting tool with absolute precision.
Begin by laying out your ceramic tiles on a flat, clean surface. Use your measuring tape to determine the exact dimensions of the space where the tiles will be installed. For complex areas like corners or around fixtures, create a paper template that captures the precise shape and cutouts needed. When measuring, always add a small buffer—typically 1/8 inch—to accommodate grout lines and potential minor adjustments.
Transfer your measurements onto the tile surface using a fine-tipped pencil or tile chalk. Mark your cutting lines boldly and clearly, ensuring the lines are straight and visible. A metal square or straightedge will help you create perfectly perpendicular lines, which is crucial for professional-looking tile installations. If you’re cutting tiles to fit around irregular shapes like pipes or electrical outlets, create a paper template first and trace its outline onto the tile surface.
Before making any cuts, double-check your measurements. This is where many DIY tile projects go wrong. Measure twice, cut once is more than just an old carpenter’s saying—it’s a fundamental rule in tile installation. Take time to verify your markings from multiple angles. Hold the tile up to the installation area or use your template to confirm the measurements match exactly.
For complex cuts like curves or intricate shapes, consider creating a precise cutting guide for tile patterns. Some cuts might require multiple approaches or specialized techniques depending on the tile material and the complexity of the shape you need to create.
Verification is key to this step. Your markings should be:
- Clear and visible
- Straight and precise
- Made with a sharp pencil or chalk
- Double-checked against your original measurements
By taking your time during the measuring and marking phase, you set yourself up for a successful tile cutting experience. Precision at this stage prevents costly mistakes and ensures a professional-looking final result.
Step 3: Choose the Right Cutting Method
Selecting the appropriate cutting method is crucial for achieving clean, precise ceramic tile cuts. Different tile materials and project requirements demand specific cutting techniques that can make the difference between a professional-looking installation and a disappointing result.
For standard ceramic tiles with straight cuts, a manual tile cruncher is often the most straightforward and cost-effective tool. These handheld devices allow you to score and snap tiles with minimal effort. Position the tile on a flat surface, align your scoring wheel along the marked cutting line, and apply firm, consistent pressure to create a clean score. Then, use the breaker portion of the tool to snap the tile along the scored line. This method works best for thinner ceramic tiles and straight cuts.
When dealing with more complex cutting requirements, such as thick porcelain tiles, curved cuts, or intricate shapes, a wet saw becomes your best ally. Learn more about advanced tile cutting techniques to understand the nuances of different cutting methods. Wet saws use a water-cooled diamond blade that provides smoother cuts and prevents tile chipping. These tools are particularly useful for:
- Cutting thick or hard ceramic tiles
- Creating precise curved or angular cuts
- Handling multiple tile cutting tasks efficiently
- Reducing dust and heat during the cutting process
For small, intricate cuts around outlets, pipes, or complex shapes, consider using an angle grinder with a diamond blade. This tool offers maximum flexibility for detailed work. However, it requires a steady hand and careful technique. Always use a guide or template when making complex cuts to ensure accuracy and prevent mistakes.
Before selecting your cutting method, consider these key factors:
- Tile thickness and material
- Type of cut required (straight, curved, angular)
- Your comfort level with different tools
- Project complexity and precision needed
Successful tile cutting is about matching the right tool to your specific needs.
Here’s a quick reference table to help you select the best cutting method for your project based on tile type and cut requirements.
| Cutting Method | Best For | Tools Needed | Key Advantages |
|---|---|---|---|
| Manual Tile Cruncher | Straight cuts on standard tiles | Manual tile cutter, square | Simple, cost-effective, low dust |
| Wet Saw | Thick, hard, or porcelain tiles | Wet saw, diamond blade, water | Precise, chip-free, handles curves |
| Angle Grinder | Small, intricate or curved cuts | Grinder with diamond blade | Maximum flexibility, detailed shapes |
| Diamond Hole Saw | Circular cuts (e.g., pipes) | Diamond hole saw | Clean, precise holes in tile |
| Take time to practice on spare tiles if you’re unfamiliar with a particular cutting method. Each technique has its learning curve, and confidence comes with careful practice. By choosing the most appropriate cutting method, you’ll ensure clean, precise cuts that make your tile installation look professionally done. |
Step 4: Cut the Tile Safely and Accurately
Cutting ceramic tiles requires precision, patience, and a methodical approach. Your goal is to transform those carefully measured tiles into perfectly sized pieces that will seamlessly fit your project space. Safety and accuracy are paramount during this critical stage of tile installation.
When using a manual tile cruncher, position the tile on a flat, stable surface with your scored cutting line aligned precisely with the tool’s cutting wheel. Apply steady, even pressure to create a clean score line. The key is consistency—move the scoring wheel in one smooth, uninterrupted motion. Once scored, position the tile over the breaking mechanism and apply controlled pressure to snap the tile cleanly along the line. Practice on spare tiles to develop confidence and technique.
For wet saw cutting, set up your workspace carefully. Ensure the saw is on a level surface with adequate water supply to cool the blade and minimize dust. Adjust the fence or guide to match your marked cutting line exactly. When feeding the tile into the blade, move slowly and steadily, letting the diamond blade do the work. Pushing too hard can cause chipping or uneven cuts. Explore advanced tiling techniques to refine your cutting skills and prevent common mistakes.
Special cutting scenarios require extra attention:
- Circular cuts around pipes need a diamond hole saw
- Intricate shapes require careful tracing and gradual cutting
- Curved cuts should be approached with multiple small, precise cuts
According to The Ceramic Tile Foundation, using the appropriate blade for your specific tile type dramatically improves cut quality. Porcelain and harder ceramic tiles demand diamond blades with higher tooth count, while standard ceramic tiles can be cut with less specialized blades.
After each cut, inspect the tile carefully. A perfect cut should have:
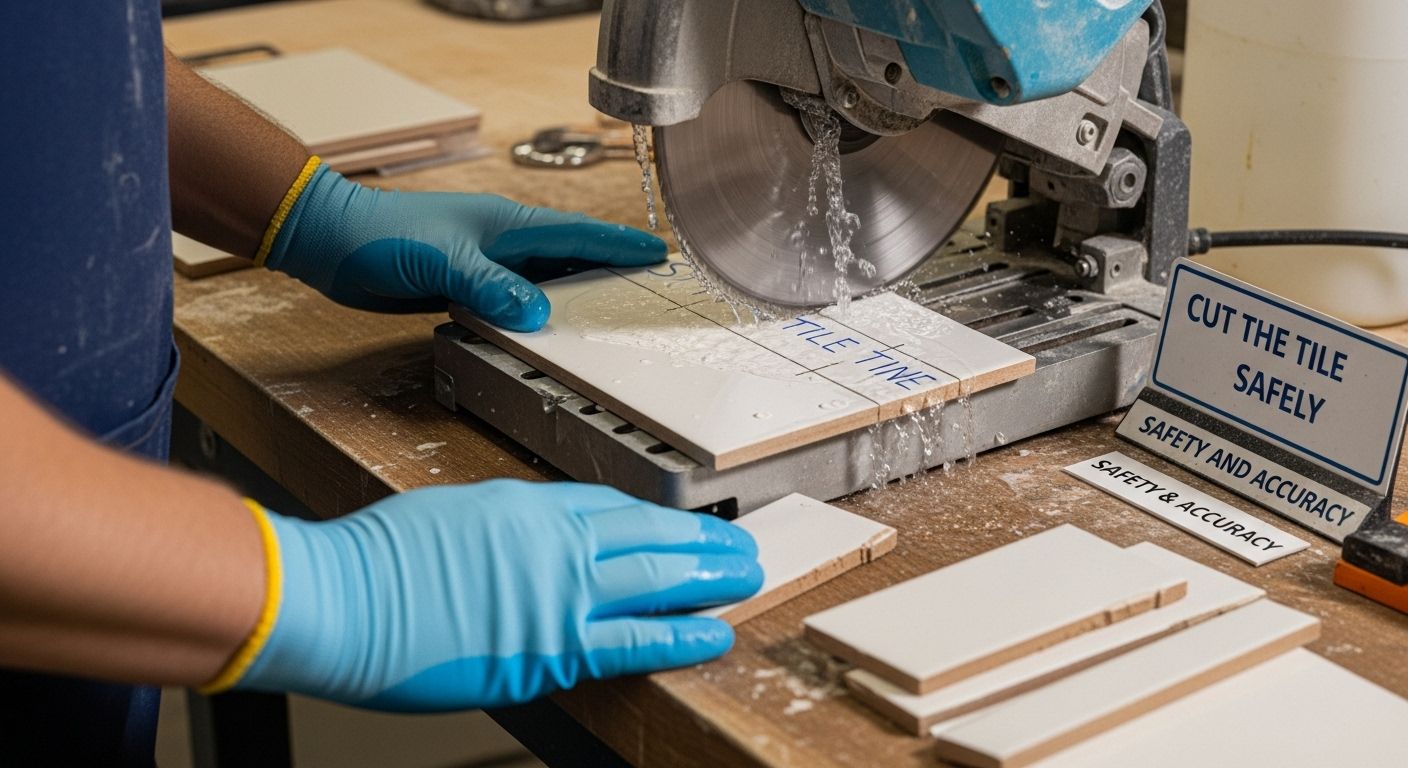
- Smooth, chip-free edges
- Precise alignment with your original measurement
- No visible fractures or stress lines
Remember that tile cutting is a skill that improves with practice. Take your time, prioritize safety by wearing protective gear, and maintain a clean, well-lit workspace. Each careful cut brings you closer to a professional-looking tile installation that will enhance your space for years to come.
Step 5: Smooth Edges and Clean Up
The final stage of ceramic tile cutting is just as crucial as the cutting itself. Smoothing tile edges and thoroughly cleaning your workspace ensures a professional finish and prepares your tiles for installation. This step transforms rough-cut tiles into polished, installation-ready pieces while maintaining a safe and orderly work environment.
After cutting, tile edges can be surprisingly sharp and uneven. Use a rubstone or tile file to carefully smooth any rough or chipped edges. Hold the stone at a 45-degree angle and work along the tile’s cut edge with gentle, consistent strokes. Move in one direction to prevent additional chipping. For more delicate work, a diamond-grit sandpaper can provide a fine, smooth finish that prepares the tile for seamless installation.
Careful edge treatment is essential for both aesthetic and practical reasons. Smooth edges ensure better grout adhesion and prevent potential injury during installation. Take your time with this process, rotating the tile and checking each edge carefully. Pay special attention to corners and intricate cut areas that might have additional rough spots or micro-chipping.
Workspace cleanup is more than just tidying up—it’s a critical safety procedure. Explore professional tile installation best practices to understand the importance of a clean work environment. Ceramic tile cutting generates significant dust and debris that can be hazardous if not properly managed. Begin by wearing a dust mask and safety glasses during the cleanup process.
Your cleanup checklist should include:
- Collect all tile fragments and dust using a shop vacuum
- Wipe down cutting surfaces with a damp cloth
- Dispose of tile pieces in appropriate waste containers
- Clean and store your cutting tools
According to The Ceramic Tile Foundation, proper cleanup is essential for both workspace safety and tool maintenance. Silica dust from ceramic tiles can be harmful if inhaled, so thorough cleaning is not just about aesthetics—it’s about protecting your health.
Verify your work by checking that:
- Tile edges are smooth and free from significant chips
- No sharp protrusions remain on cut tiles
- Workspace is completely clear of tile dust and fragments
- Cutting tools are cleaned and stored properly
Taking the time to smooth edges and clean thoroughly transforms your raw cut tiles into professional-quality installation materials. This final step bridges the gap between cutting and installation, ensuring your tile project looks polished and precise.
Use this checklist table to ensure your tiles are smooth, your workspace is clean, and everything is ready for a flawless installation.
| Task | How to Verify |
|---|---|
| Tile edges are smooth | Run finger along edges; check for chips |
| No sharp protrusions | Inspect all cut sides carefully |
| Workspace free of dust/fragments | Vacuum and wipe down all surfaces |
| Cutting tools are cleaned and stored | Check for no dust/debris; store safely |
| Proper disposal of tile pieces | Use appropriate waste containers |
Step 6: Verify Precision and Fit
The verification stage is where your careful cutting and preparation meet the ultimate test of precision. This critical step ensures that each cut tile will fit perfectly in its intended space, preventing potential installation issues and guaranteeing a professional-looking final result.
Dry fitting is the cornerstone of precision verification. Carefully place your cut tiles into the intended installation area without using any adhesive. This allows you to make visual and physical assessments of each tile’s fit. Pay close attention to the edges, corners, and how tiles align with surrounding surfaces. Even the most precise cuts can reveal subtle imperfections that weren’t apparent during the cutting process.
Use a combination of tools to verify your tiles’ accuracy. A carpenter’s level helps check tile flatness and alignment, while a steel square ensures perfect 90-degree angles for corners and edges. Gaps of more than 1/8 inch will need additional trimming or adjustment. Run your fingers along tile edges to feel for any irregularities that might not be immediately visible. Sometimes, tactile inspection reveals imperfections that escape visual examination.
Learn more about professional tile fitting techniques to understand the nuanced approach to tile installation. When dry fitting, create a complete mock layout of your tiles before permanent installation. This approach allows you to identify and correct any potential issues before committing to adhesive and grout.
Your precision verification checklist should include:
- Checking tile alignment with surrounding surfaces
- Measuring consistent spacing between tiles
- Verifying cut edges meet installation requirements
- Examining tiles for potential stress fractures
According to The Ceramic Tile Foundation, professional installerss recommend a systematic approach to tile verification. Take photographs of your dry fit layout from multiple angles. This provides a reference point and allows you to review the installation plan critically.
Final verification involves several key indicators of success:
- Tiles sit flush with surrounding surfaces
- No visible gaps larger than recommended tolerances
- Cuts are clean and precise
- Tile edges align smoothly
Remember that patience during this verification process can save hours of potential rework later. Each carefully checked tile brings you closer to a flawless installation that will look professional and stand the test of time.
Transform Your Tile Cutting Success Into Stunning Results
Struggling with chipped edges, imperfect cuts, or uncertainty when working with ceramic tile? Our step-by-step guide gives you the confidence to cut with precision, but the right tools and materials are only one part of the equation. If you want flawless installation and eye-catching spaces, choosing superior tiles makes all the difference. Get peace of mind knowing every piece you install is backed by reliable quality and the support you need for a seamless project.

Explore how TileChoices.com takes your tiling project from concept to completion. Shop a huge selection of ceramic, porcelain, and specialty finishes, all carefully curated for projects like kitchen backsplashes, bathroom walls, and custom designs. Not sure what to choose? Discover our blog for more pro techniques and inspiration, or request samples to see and feel the difference before you commit. Don’t let your hard work go to waste—visit TileChoices.com today and get everything you need for beautiful, professional results from the first cut to the final fit.
Frequently Asked Questions
How do I measure and mark ceramic tiles for cutting?
To measure and mark ceramic tiles accurately, lay the tiles on a flat surface and use a measuring tape to determine the dimensions required for the installation area. Transfer your measurements onto the tile surface with a fine-tipped pencil or tile chalk, ensuring clear and straight lines. Remember to double-check your measurements before cutting.
What tools do I need to cut ceramic tile?
Essential tools for cutting ceramic tile include a measuring tape, pencil or chalk for marking, a manual tile cutter or wet saw for cutting, a square or straight edge for straight cuts, safety goggles, work gloves, and a dust mask to protect against debris and dust.
What is the difference between a manual tile cutter and a wet saw?
A manual tile cutter is ideal for standard ceramic tiles and allows for straight cuts by scoring and snapping. A wet saw, on the other hand, uses a water-cooled diamond blade, which is better for thicker or harder tiles, providing smoother cuts and preventing chipping, especially for complex shapes and intricate cuts.
How can I smooth the edges of cut ceramic tiles?
To smooth the edges of cut ceramic tiles, use a rubstone or tile file at a 45-degree angle to gently smooth any rough areas. For a finer finish, you can also use diamond-grit sandpaper. This step is crucial to ensure a safe, professional look and good adhesive adhesion during installation.


