
Matching new tiles to your existing space seems simple enough. Anyone can just pick a color and hope for the best, right? Yet experts say over 60 percent of DIY tile projects end up needing costly fixes because homeowners skip the planning and matching phase. This upfront step actually saves the most money and stress down the line.
Table of Contents
- Step 1: Assess Your Existing Tiles And Style
- Step 2: Select Coordinating Colors And Patterns
- Step 3: Gather Samples For Comparison And Testing
- Step 4: Lay Out Tiles To Visualize The Arrangement
- Step 5: Finalize Your Selection And Purchase Needed Tiles
Quick Summary
| Key Point | Explanation |
|---|---|
| 1. Assess your existing tiles carefully | Examine color, texture, and pattern of current tiles to ensure cohesive design before selecting new options. |
| 2. Create a cohesive color palette | Use complementary colors and patterns to enhance visual harmony, following the color wheel technique for guidance. |
| 3. Gather a variety of tile samples | Request samples from retailers, allowing flexibility in comparisons and testing different tiles in your actual space. |
| 4. Lay out tiles to visualize arrangement | Arrange tiles on a clean surface to preview and adjust the design before installation for an accurate representation. |
| 5. Measure and order extra tiles | Calculate the square footage needed, plus an additional 10-15%, to compensate for cuts and damages during installation. |
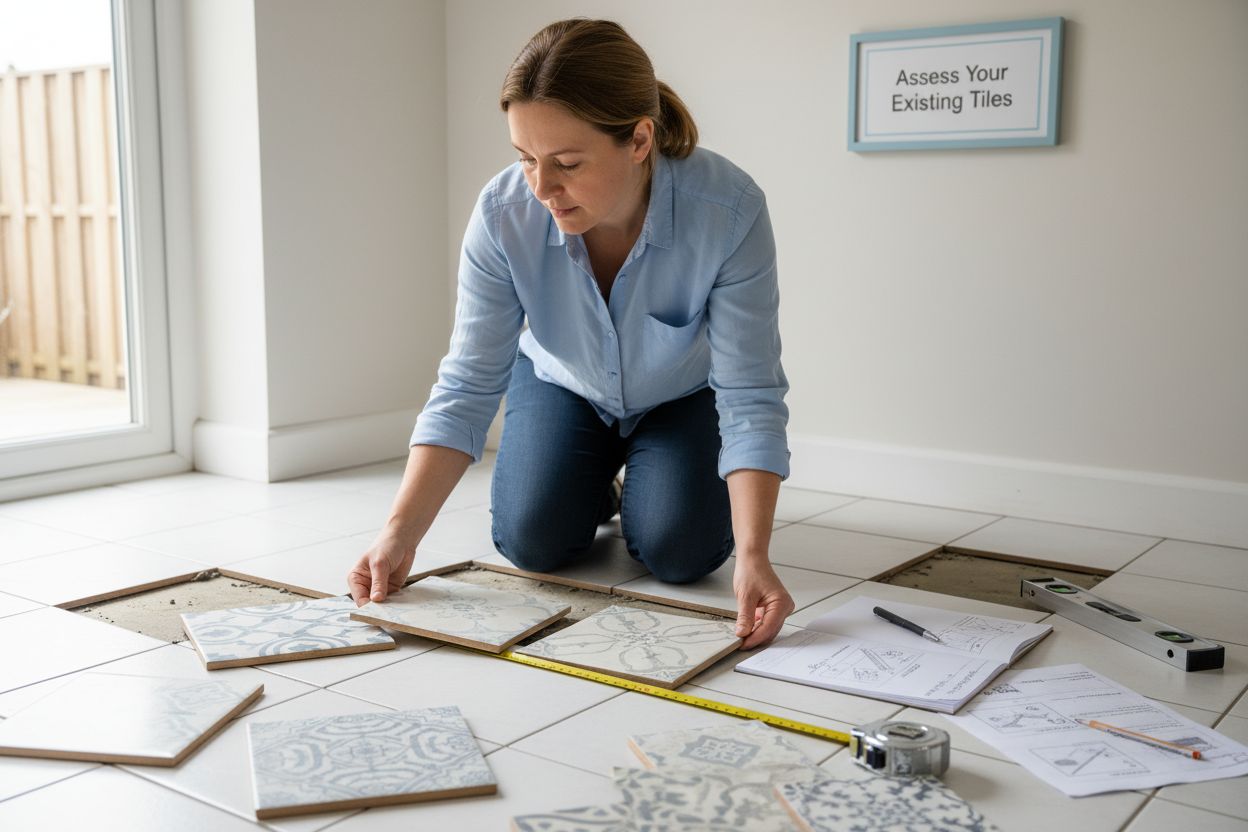
Step 1: Assess Your Existing Tiles and Style
Before diving into tile matching, understanding your current space is crucial. Assessing your existing tiles and overall interior style sets the foundation for a seamless design transformation. This initial step helps you make informed decisions that will create a cohesive and visually appealing environment.
Begin by conducting a thorough visual inspection of your current tiles. Walk through each room and carefully observe the color, texture, pattern, and condition of existing tile surfaces. Take clear photographs from multiple angles to help you analyze the space objectively. Pay special attention to natural lighting conditions, as different light sources can significantly impact how tile colors and textures appear throughout the day.
Consider the broader design context of your space. Are your current interior design elements modern and minimalist, or do they lean towards a more traditional or eclectic aesthetic? Understanding your existing style helps determine which tile matching strategies will work best. For instance, a contemporary kitchen with sleek stainless steel appliances might require different tile approaches compared to a rustic farmhouse-style bathroom.
Color coordination is another critical aspect of tile assessment. Examine the dominant and accent colors in your current space. Look at wall paint, flooring, cabinetry, countertops, and furniture. Create a color palette that highlights these existing elements. This will guide your tile selection process and ensure a harmonious visual flow.
Texture plays an equally important role in tile matching. Some spaces benefit from complementary textures that add depth and visual interest, while others might require more uniform surfaces. Read more about mastering tile pattern combinations to understand how different textures can transform your space.
Measure your existing tile areas carefully. Document the dimensions, noting any irregularities or specific spatial constraints. This information becomes crucial when selecting new tiles or planning potential replacements. Understanding your space’s precise measurements prevents costly mistakes and ensures a perfect fit.
Finally, evaluate the practical requirements of your space. High-moisture areas like bathrooms and kitchens demand different tile considerations compared to living rooms or hallways. Consider factors such as slip resistance, durability, and maintenance needs when assessing your existing tiles and planning future selections.
By meticulously assessing your current tiles and space, you create a solid foundation for making informed tile matching decisions that will elevate your interior design.
To help you systematically assess your existing tiles and interior style, use this checklist to track all vital details before proceeding to new tile selection.
| Assessment Area | What to Document | Why It Matters |
|---|---|---|
| Tile Color | Take photos and note tones | Ensures color harmony with new tiles |
| Tile Texture | Smooth, matte, glossy, etc. | Impacts look, feel, and compatibility |
| Tile Pattern | Geometric, organic, mosaic | Influences pattern matching choices |
| Condition | Chips, cracks, wear | Identifies if replacement is needed |
| Lighting Conditions | Daylight, evening, artificial | Affects color and texture appearance |
| Room Style | Modern, traditional, eclectic | Guides the matching strategy |
| Space Measurements | Length, width, and irregularities | Prevents sizing and fit issues |
| Practical Requirements | Slip resistance, durability | Ensures appropriate tile selection |
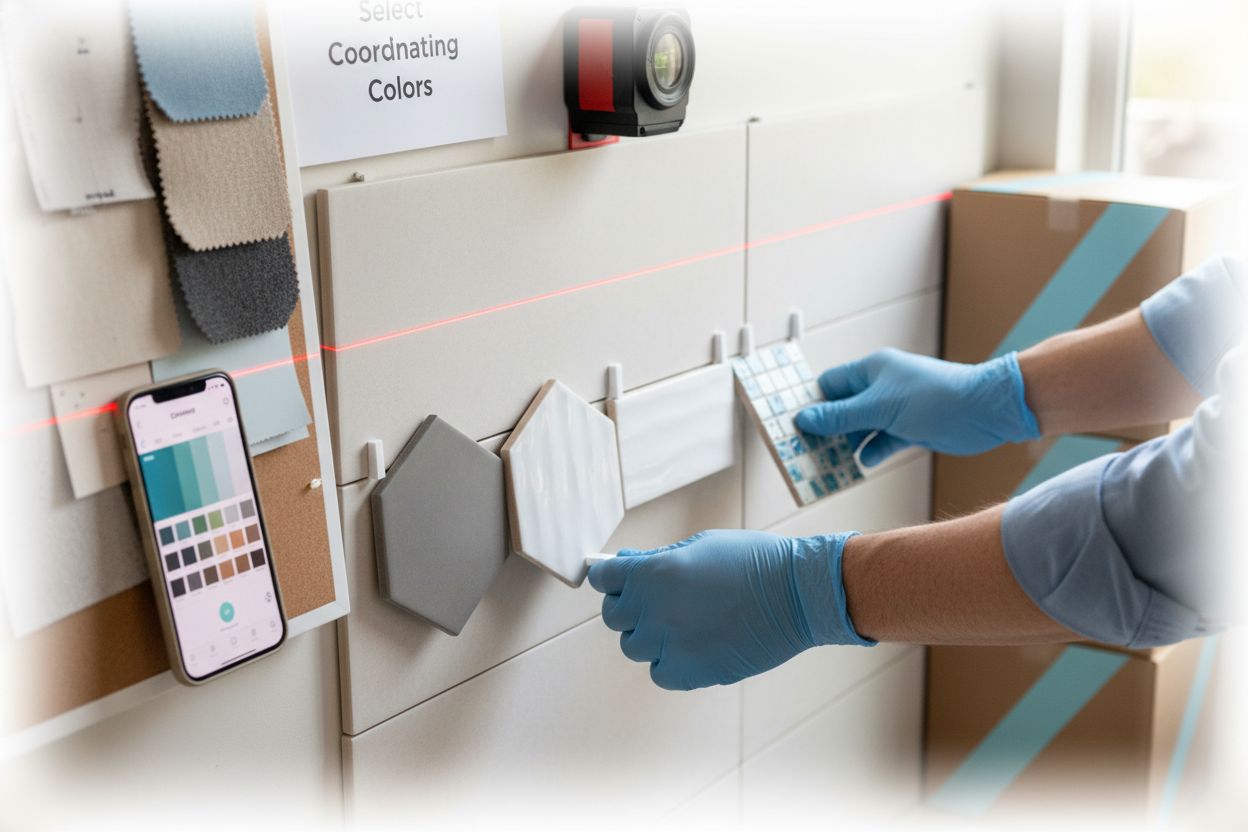
Step 2: Select Coordinating Colors and Patterns
Selecting coordinating colors and patterns is an artful process that transforms your tile design from ordinary to extraordinary. After assessing your existing space, you are now ready to strategically choose tiles that will create visual harmony and elevate your interior aesthetic.
Start by establishing a cohesive color palette that complements your existing design elements. Professional designers recommend using the color wheel technique to identify harmonious color relationships. Look for colors that are adjacent or complementary, which create visual interest without overwhelming the space. For instance, if your existing tiles have warm terracotta undertones, consider selecting coordinating tiles in soft beige, muted orange, or deep brown shades.
Pattern selection requires careful consideration and thoughtful balance. While mixing patterns can add visual dynamism, too much complexity can create visual chaos. A general rule is to choose one dominant pattern and use secondary patterns sparingly as accent elements. Learn more about mixing tile patterns for stunning spaces to understand sophisticated design techniques.
Consider the scale and proportion of your tile patterns. Large format tiles can make smaller spaces feel more expansive, while intricate mosaic patterns can add visual texture and depth to larger areas. When combining different tile patterns, aim for a sense of visual rhythm. For example, pair geometric tiles with more organic, fluid designs to create sophisticated visual contrast.
Understand the psychological impact of color and pattern. Cool tones like blues and greens can create a calming atmosphere, while warmer colors like reds and oranges generate energy and warmth. The intensity and saturation of colors also play crucial roles in defining the mood of your space. Soft, muted tones promote tranquility, whereas bold, vibrant colors make strong design statements.
Practical considerations are equally important when selecting coordinating tiles. Consider the tile’s finish and texture in relation to its intended use. Glossy tiles reflect more light and can make spaces feel larger, while matte finishes provide a more subdued, sophisticated look. In high-traffic areas or spaces prone to moisture, prioritize tiles with adequate slip resistance and durability.
Before making final selections, always obtain tile samples and view them in your actual space under different lighting conditions. Natural daylight and artificial evening lighting can dramatically alter how colors and patterns appear. Arrange samples next to existing tiles, wall colors, and furniture to evaluate their visual compatibility.
Remember that successful tile matching is about creating a balanced, harmonious design that reflects your personal style while maintaining practical functionality.
 Trust your aesthetic instincts and don’t be afraid to experiment with unexpected color and pattern combinations.
Step 3: Gather Samples for Comparison and Testing
Gathering tile samples is a critical step in achieving a seamless and successful tile design. This hands-on approach allows you to experience the texture, color, and overall feel of potential tiles in your actual space, preventing costly design mistakes and ensuring a perfect match.
Start by requesting physical tile samples from tile retailers or manufacturers. Most suppliers offer sample tiles that you can take home and test in your specific environment. When collecting samples, aim to gather more options than you initially think you might need. This provides flexibility and allows for comprehensive comparison and testing. Pro tip: Request samples that represent a range of colors, patterns, and textures within your chosen design palette.
Create a dedicated testing area where you can lay out and compare tile samples. This space should have similar lighting conditions to the area where the tiles will be installed. Natural light is ideal for assessing true colors and textures, so position your sample board near a window or in an area with consistent daylight. Explore our guide on vintage tile pattern selection to understand how different lighting can impact tile appearance.
Photograph your tile samples in different lighting conditions and at various times of day. Digital photographs can help you objectively compare colors and patterns, revealing subtle nuances that might be difficult to perceive in person. Create a digital mood board by arranging these photos side by side, which allows for easier comparison and design visualization.
Consider the practical aspects of your tile samples beyond aesthetic appeal. Test tile durability by simulating real-world conditions. Place samples in areas exposed to moisture, heat, or frequent traffic. Observe how they respond to potential stains, scratches, or wear. Some tile suppliers provide sample testing kits or specific guidelines for evaluating tile performance in different environments.
Engage family members or design-savvy friends in the sample evaluation process. Multiple perspectives can reveal insights you might have overlooked. Ask for honest feedback about how the samples complement existing design elements and contribute to the overall aesthetic of the space.
Organize your samples systematically. Create a tracking method that allows you to compare and contrast different options easily. This might involve labeling samples, creating a spreadsheet with notes, or using a physical board where you can move and rearrange tiles to test different combinations.
Be patient and thorough during the sample gathering and testing phase. Rushing this process can lead to design choices you may later regret. Allow yourself time to live with the samples, observing how they interact with your space’s lighting, furniture, and overall atmosphere. The right tile samples will not only look beautiful but also feel like a natural extension of your existing design.
Here is an at-a-glance summary of important considerations when gathering and testing tile samples, so you can compare options and avoid common pitfalls.
| Task | Purpose | Tips for Success |
|---|---|---|
| Request physical samples | See actual color and texture in your space | Gather a wide range beyond initial favorites |
| Test under real lighting | Assess how tiles look in day/night conditions | Use an area with natural daylight if possible |
| Photograph samples | Objectively compare colors and patterns | Create a digital mood board for side-by-side |
| Test sample durability | Ensure suitability for high-moisture/traffic | Simulate spills, scratches, and wear |
| Seek feedback | Get other perspectives on aesthetic fit | Ask family or design-savvy friends |
| Organize and track samples | Stay organized during comparisons | Label tiles or use a spreadsheet for notes |
| Live with samples | See compatibility with furniture and lighting | Observe over several days before deciding |
Remember that gathering and testing samples is an investment in your design process. The time and effort you spend now will pay dividends in creating a truly harmonious and stunning tile installation.
Step 4: Lay Out Tiles to Visualize the Arrangement
Laying out tiles before installation is a crucial step that helps you visualize the final design, identify potential challenges, and make informed adjustments. This process transforms abstract design concepts into a tangible preview of your tile project, allowing you to fine-tune the arrangement with precision and confidence.
Begin by preparing a clean, flat surface that mimics the actual installation area. If you’re tiling a floor, use a large piece of plywood or a clean, level section of the existing floor. For wall tiles, create a mock-up using a sturdy board or directly on the wall surface. Important preparation tip: Ensure the surface is clean, dry, and free from any debris that might interfere with your tile layout.
Start your tile arrangement by establishing a central reference point. In most rooms, this means finding the center of the floor or wall space. Use a measuring tape and chalk line to create precise reference lines that will guide your tile placement. Explore our guide on understanding geometric tile shapes to help you plan more complex arrangements.
Begin laying out your tiles without using adhesive, allowing you to experiment and adjust the arrangement freely. Start from the center point and work outwards, paying close attention to how individual tiles align and interact. Look for symmetry, balance, and visual flow. Consider how cut tiles will look at room edges and around obstacles like cabinets, fixtures, or architectural features.
Photograph your tile layout from multiple angles. These images serve as valuable reference points and allow you to compare different arrangements objectively. Digital documentation helps you step back and analyze the design more critically, revealing potential issues that might not be immediately apparent during the physical layout process.
Pay special attention to tile pattern matching and grout line consistency. Irregular grout lines or misaligned patterns can significantly impact the overall aesthetic. Use spacers to maintain uniform gaps between tiles, which helps you accurately visualize the final look. Experiment with different grout color options during this stage to see how they complement your chosen tile design.
Consider the visual impact of tile cuts, especially near room edges or around complex architectural elements. Aim to minimize narrow, awkward tile cuts that can disrupt the overall design flow. If possible, adjust your layout to ensure more balanced and visually pleasing tile cuts. Sometimes, this might involve slightly shifting your starting point or choosing a different tile layout pattern.
Involve other perspectives by asking family members or design-savvy friends to review your tile layout. Fresh eyes can offer valuable insights and help you identify potential design improvements you might have overlooked. Be open to constructive feedback and willing to make adjustments.
Remember that the tile layout stage is about experimentation and refinement. Take your time, be patient, and don’t hesitate to disassemble and restart your layout multiple times. The goal is to create a design that not only looks beautiful but also feels harmonious within your space.
Step 5: Finalize Your Selection and Purchase Needed Tiles
Finalizing your tile selection and making a strategic purchase is the culmination of your careful design process. This step transforms your creative vision into a tangible project, requiring precision, planning, and attention to critical details that will ensure a successful tile installation.
Begin by calculating the exact square footage needed for your project. Measure your space meticulously, accounting for any complex architectural features, niches, or irregular surfaces. Pro tip: Always purchase 10-15% more tiles than your calculated area to accommodate cuts, potential breakage, and future repairs. This extra buffer prevents potential delays or design compromises if some tiles are damaged during installation.
Carefully review the technical specifications of your chosen tiles. Examine factors such as water absorption rates, durability ratings, recommended installation methods, and maintenance requirements. Learn essential techniques for ceramic tile cutting to understand potential installation challenges and prepare accordingly.
Consider the long-term performance of your selected tiles. Evaluate how they will withstand the specific conditions of your intended space. Bathroom and kitchen tiles, for instance, require different performance characteristics compared to tiles used in living rooms or entryways. Look for tiles with appropriate slip resistance, moisture tolerance, and wear ratings that match your specific environmental needs.
Budget planning is crucial during the tile purchasing phase. Compare prices across multiple suppliers, but don’t compromise quality for cost savings. Factor in additional expenses beyond the tiles themselves, including adhesives, grout, installation tools, and potential professional installation fees. Create a comprehensive budget that provides some financial flexibility for unexpected expenses.
When purchasing, request a comprehensive product documentation package. This should include detailed manufacturer specifications, recommended installation guidelines, care instructions, and warranty information. Retain these documents for future reference, as they will be invaluable for maintenance and potential warranty claims.
Carefully inspect your tile order upon delivery. Check each tile for consistent color, texture, and quality. Minor variations are normal in natural stone or handcrafted tiles, but significant defects should be immediately reported to the supplier. Organize and store your tiles in a clean, dry area away from potential damage, maintaining their pristine condition until installation.
Consider scheduling a professional consultation if you have any uncertainties about your tile selection or installation process. Many tile suppliers offer expert advice that can help you refine your design and avoid potential pitfalls. Their insights can provide additional confidence in your final tile choices.
Remember that your tile purchase is an investment in your space’s aesthetic and functional quality. Take your time, ask questions, and approach the process with both creativity and methodical planning. The right tiles will not only enhance your space’s visual appeal but also provide lasting durability and performance.
Transform Your Space with Expert Tile Matching Solutions
Struggling with mismatched tiles or unsure how to create harmony between colors, patterns, and textures in your space? The process of assessing your existing tiles, selecting coordinated styles, and visualizing the perfect arrangement can be overwhelming. Many readers like you are searching for the right materials and solid guidance to achieve a seamless look—where every tile fits like it was meant to be there. Don’t let confusion or missed details disrupt your vision for beautiful interiors.

Bring your tile project to life with confidence. At TileChoices.com, discover a huge variety of high-quality tiles, sample request options to help you compare in your own home, detailed product information, and inspiring design ideas. Explore resources like our blog on mastering tile pattern combinations to solve your toughest design challenges right now. Take the next step—visit TileChoices.com today and find all the materials and expert guidance you need to achieve the seamless look you want.
Frequently Asked Questions
How do I assess my existing tiles before selecting new ones?
Begin by visually inspecting the color, texture, and pattern of your current tiles. Take photographs, assess lighting conditions, and evaluate your overall interior style to inform your tile selection process.
What factors should I consider when selecting coordinating colors for tiles?
Establish a cohesive color palette that complements existing elements in your space. Use the color wheel technique to identify harmonious color relationships, considering the overall mood and aesthetic you wish to achieve.
How can I effectively test tile samples in my space?
Request physical tile samples and arrange them in a dedicated testing area with similar lighting to the installation site. Observe how the colors and textures interact with your existing design elements, and document your findings with photographs.
What steps should I follow to lay out tiles before installation?
Prepare a clean surface to mimic the actual installation area and establish a central reference point. Lay out the tiles without adhesive, experimenting with alignment and spacing to visualize the final design and identify any necessary adjustments.


