
Small bathroom renovations can feel like a puzzle with too many pieces and not enough space. Yet, the real surprise comes when you realize that even a change as simple as switching to compact toilets measuring just 24-25 inches deep instead of the standard 28-30 inches can instantly reclaim critical inches. Most people chase expensive fixtures or designer tiles, but the layout and careful measurement actually unlock the hidden potential in tiny bathrooms. Get ready to discover why your tape measure may be the most powerful design tool you own.
Table of Contents
- Step 1: Assess Your Space And Requirements
- Step 2: Create A Functional Layout Plan
- Step 3: Choose Space-Saving Fixtures And Materials
- Step 4: Implement Effective Lighting Solutions
- Step 5: Add Finishing Touches And Decor
- Step 6: Verify Functionality And Aesthetics
Quick Summary
| Key Point | Explanation |
|---|---|
| 1. Precise Measurements are Crucial | Accurately measure your bathroom dimensions to ensure effective planning and maximize available space. |
| 2. Prioritize Functional Layout | Design a layout that enhances traffic flow and ergonomics, ensuring comfortable navigation and efficient use of space. |
| 3. Choose Space-Saving Fixtures | Select compact, wall-mounted fixtures to avoid overcrowding and maintain a spacious atmosphere in your small bathroom. |
| 4. Implement Layered Lighting | Use a combination of ambient, task, and accent lighting to enhance depth and perception of space in your bathroom. |
| 5. Add Thoughtful Finishing Touches | Incorporate colors, textures, and decorations that not only beautify but also optimize function and create visual continuity. |
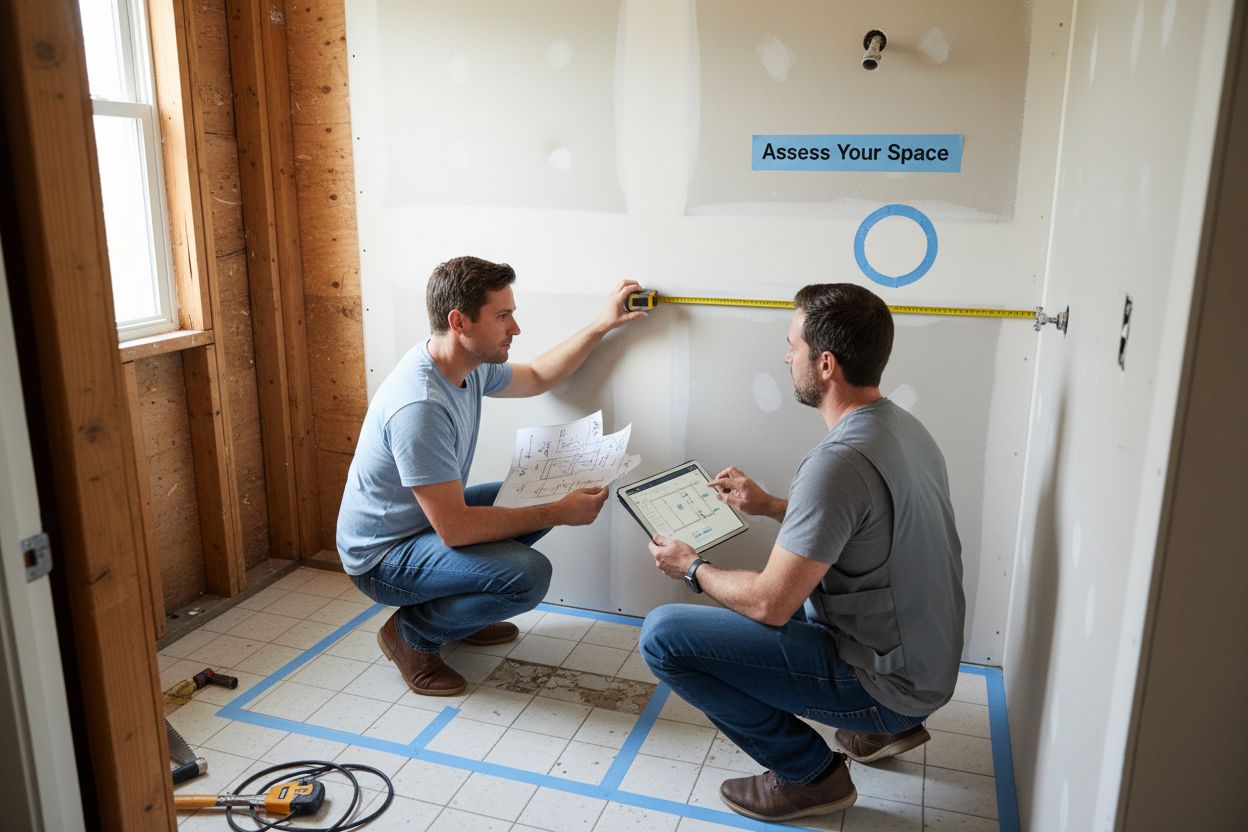
Step 1: Assess Your Space and Requirements
Successful designing small bathrooms begins with a meticulous and strategic assessment of your existing space. Understanding the precise dimensions, architectural constraints, and functional requirements will transform a cramped bathroom into an efficient, stylish sanctuary. Before purchasing a single tile or fixture, you need a comprehensive spatial evaluation that considers every square inch of potential.
Start by measuring your bathroom with precision. Use a reliable metal tape measure and record exact wall lengths, ceiling height, and floor dimensions. Capture measurements in both inches and feet, creating a detailed sketch or digital blueprint that will serve as your primary planning document. Pay special attention to critical elements like window placements, door swing directions, existing plumbing locations, and electrical outlet positions. These immovable features will significantly influence your design strategy.
Next, conduct a thorough analysis of your functional needs. Consider who will use this bathroom most frequently and what specific requirements they might have. A master bathroom differs dramatically from a guest powder room or a children’s bathroom. Think about user demographics: Are you designing for mobility-challenged individuals? Young children? Busy professionals? Each user group demands unique spatial considerations and accessibility features.
Careful measurement allows you to maximize every available inch. Consider creating a scaled digital or physical model that helps visualize potential layout configurations. Read our guide on mixing tile patterns to understand how different design elements can create visual expansiveness in compact spaces.
As you complete this assessment, verify your measurements multiple times. A quarter-inch discrepancy can derail an entire renovation plan. Photograph your space from multiple angles, noting natural light sources, existing color schemes, and potential design challenges. This comprehensive approach ensures that your small bathroom design will be both beautiful and supremely functional.
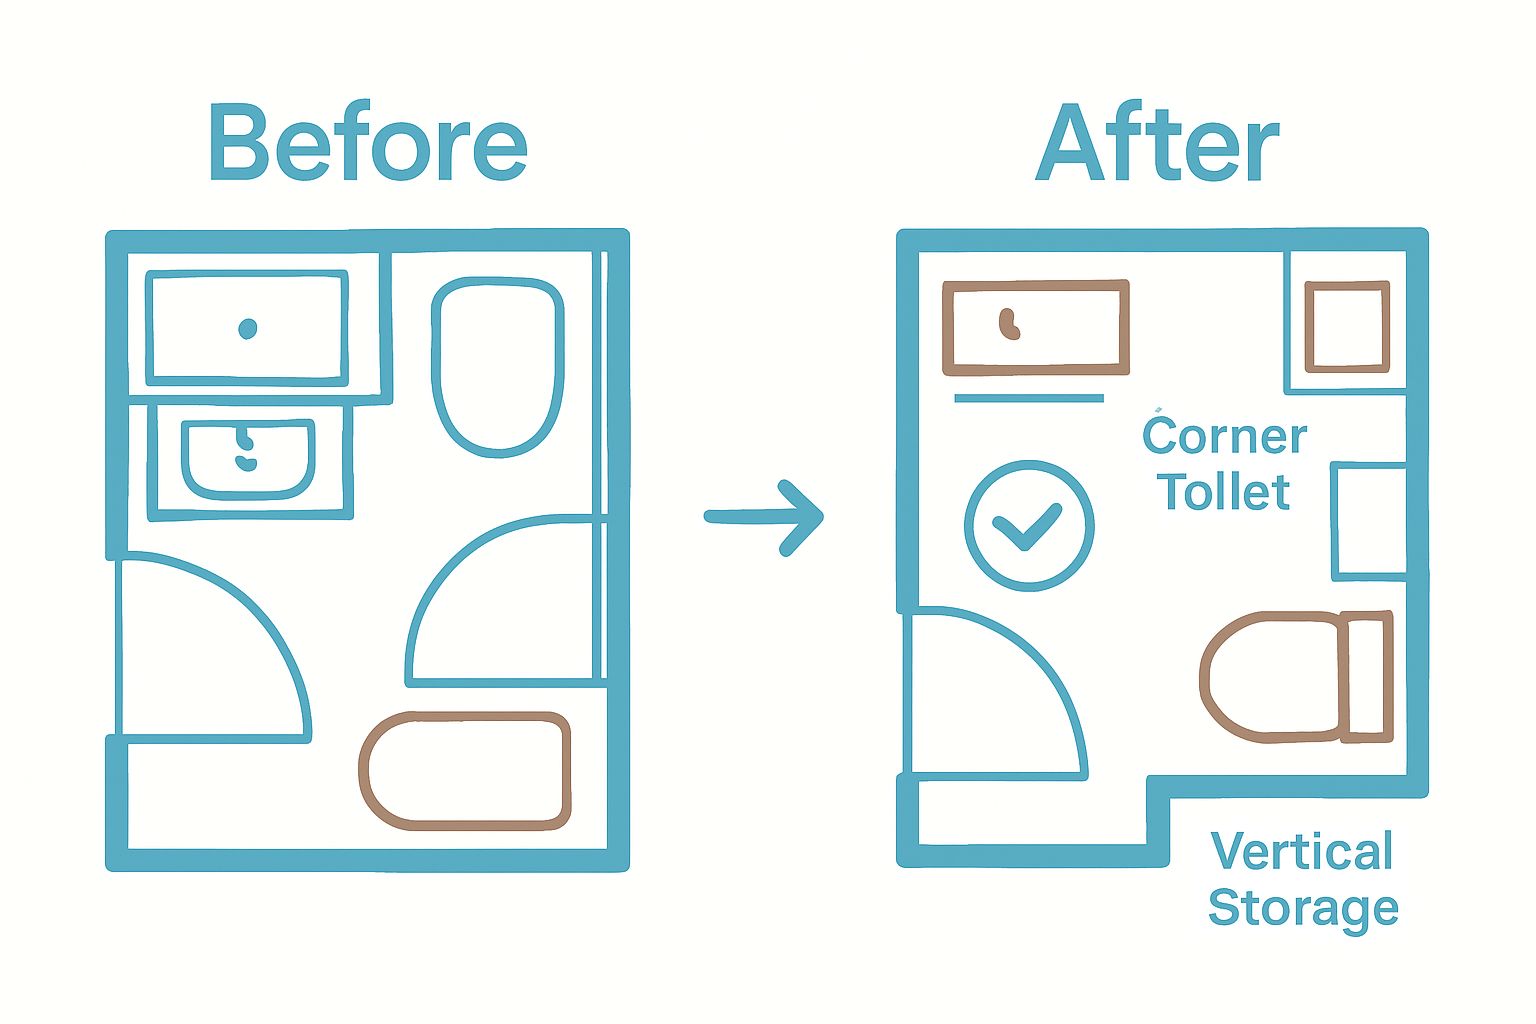
Step 2: Create a Functional Layout Plan
Designing small bathrooms requires strategic planning that transforms limited square footage into a highly efficient space. The layout plan serves as your architectural blueprint, determining how every element will work together to create a functional and visually appealing environment. Your goal is to craft a design that maximizes utility without feeling cramped or overwhelming.
Prioritize traffic flow and ergonomics as the foundation of your layout strategy. Consider the natural movement patterns within the bathroom and ensure there is adequate clearance around fixtures. Typically, you want at least 24 inches of clear space in front of toilets, sinks, and shower entries. This seemingly small detail prevents the room from feeling congested and allows comfortable navigation, especially in tight spaces.
Vertical space becomes your greatest ally when designing small bathrooms. Instead of spreading fixtures horizontally, think about stacking and layering functional elements. Wall mounted vanities create visual openness by revealing floor space underneath. Tall, narrow storage cabinets can provide significant storage without consuming precious floor area. Consider recessed shelving in shower walls or above toilet areas to eliminate protruding storage solutions that eat into your limited square footage.
Explore our guide on mixing tile patterns to understand how visual design can complement your functional layout. Strategic tile placement can create optical illusions that make your bathroom feel larger and more cohesive.
When developing your layout, sketch multiple configurations. Digital design tools or graph paper can help you experiment with different arrangements. Test each potential layout against three critical criteria: functionality, comfort, and visual harmony. A successful small bathroom design balances these elements seamlessly. Pay attention to how natural and artificial light interacts with your proposed layout, as lighting can dramatically influence the perceived spaciousness of the room.
Finally, verify your layout plan by creating a full-scale mockup using painter’s tape on the floor. This hands-on approach allows you to physically walk through the proposed design, identifying potential obstacles or inefficiencies before making any permanent changes. Your layout should feel intuitive, allowing smooth movement while providing all necessary bathroom functions in a compact, elegant solution.
Step 3: Choose Space-Saving Fixtures and Materials
Selecting the right fixtures and materials is crucial when designing small bathrooms, transforming limited space into a functional and visually appealing environment. Your choices will determine not just the aesthetic appeal but also the practical usability of your compact bathroom. Compact doesn’t mean compromise - it means strategic selection and intelligent design.
When approaching fixture selection, wall-mounted options become your primary strategy for maximizing spatial efficiency. Floating vanities create an illusion of openness by revealing floor space underneath, making the room feel larger and more breathable. Consider compact toilets with integrated tanks or wall-hung models that free up valuable floor area. Corner sinks and triangular vanities can transform awkward spaces into clever storage solutions, turning potential dead zones into functional elements.
Material selection plays an equally critical role in creating a sense of spaciousness. Light-colored tiles with minimal grout lines can make your bathroom feel significantly larger and more open. Large format tiles reduce visual fragmentation, creating a seamless look that visually expands the space. Reflective materials like glazed ceramics or glass tiles bounce light around the room, enhancing the perception of depth and airiness.
Check out our luxury bathroom tile ideas to understand how strategic material choices can transform compact spaces. Multipurpose fixtures become essential in small bathrooms - think medicine cabinets with integrated lighting, shower niches that eliminate the need for external shelving, and towel racks that double as structural support elements.
Pay special attention to scale and proportion. Every fixture should be intentionally selected to fit your specific dimensions. Compact toilets measuring 24-25 inches deep instead of standard 28-30 inch models can save crucial inches. Slim-profile sinks, narrow bathtubs, and space-saving shower enclosures with sliding or bifold doors can dramatically improve your bathroom’s functionality.
Here is a quick reference table summarizing key space-saving fixtures and materials mentioned in the article, including their advantages for small bathroom design.
| Fixture or Material | Space-Saving Benefit | Key Consideration |
|---|---|---|
| Wall-mounted vanity | Frees up floor space, creates visual openness | Must ensure sturdy wall installation |
| Compact toilet (24-25 in) | Saves critical inches compared to standard models | Confirm plumbing compatibility |
| Corner sink/triangular vanity | Transforms awkward corners into usable space | Be mindful of user comfort and access |
| Large format tiles | Reduces visual breaks, makes space feel larger | Select non-slip finishes for flooring |
| Light-colored tiles | Enhances openness and reflects light | Use minimal grout lines |
| Recessed shelving | Provides storage without protruding into floor space | Plan around wall structure and plumbing |
| Sliding or bifold shower door | Saves clearance space compared to swinging doors | Check for unobstructed operation |
As a final verification, create a physical mockup or use digital design tools to confirm your fixture selections truly optimize your available space. Your goal is a bathroom that feels comfortable, efficient, and visually expansive despite its compact footprint.
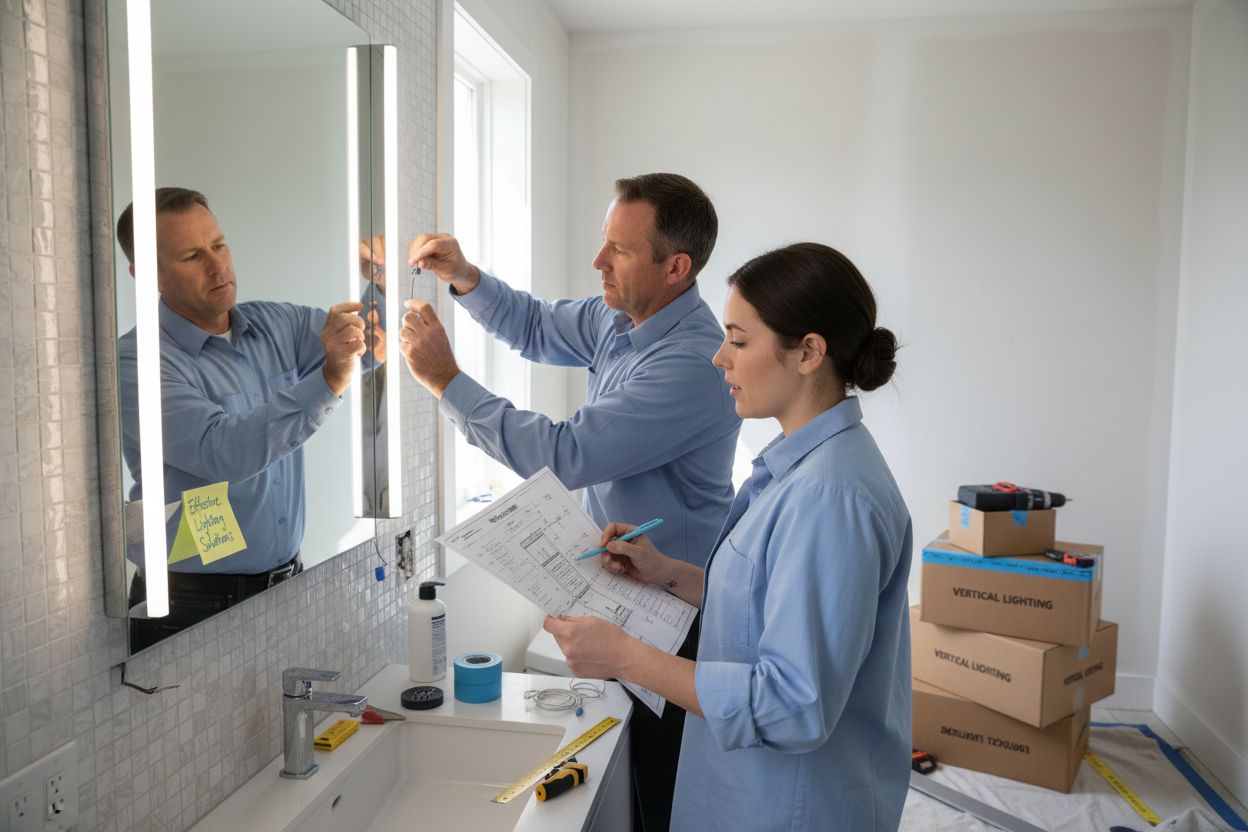
Step 4: Implement Effective Lighting Solutions
Lighting transforms small bathrooms from cramped spaces into inviting sanctuaries, creating depth, dimension, and visual expansion. Strategically designed lighting becomes more than illumination - it’s an architectural tool that can dramatically alter perception and functionality of your compact bathroom.
Begin with layered lighting approaches that combine ambient, task, and accent lighting. Ambient lighting provides overall room illumination, typically achieved through ceiling fixtures or recessed lights that distribute soft, even light. Task lighting focuses on specific functional areas like mirrors and vanities, where precise illumination supports grooming activities. Accent lighting adds drama and depth, highlighting architectural features or creating visual interest through subtle wall-mounted fixtures or LED strip lighting.
Vertical lighting strategies become crucial in small spaces." According to energy efficiency experts, wall sconces positioned at eye level can make rooms feel taller and more spacious. Consider installing slim vertical light fixtures alongside mirrors or using backlit mirror designs that eliminate harsh shadows and create an illusion of expanded space. Avoid large, protruding light fixtures that consume valuable visual and physical real estate.
Mirror placement plays a critical role in lighting design. Positioning lights on both sides of the mirror eliminates unflattering shadows and provides balanced illumination. LED strip lights integrated behind mirrors or along vanity edges create a modern, floating effect while providing functional lighting. Choose fixtures with adjustable brightness and color temperature to accommodate different times of day and personal preferences.
When selecting light fixtures, prioritize slim profiles and compact designs that complement your space-saving approach. Flush-mounted ceiling lights, wall-mounted LED panels, and minimalist sconces can provide excellent illumination without overwhelming the room. Color temperature matters - opt for neutral white light between 3000-4000 Kelvin, which provides a clean, natural illumination that makes spaces feel open and inviting.
Verify your lighting design by creating multiple light scenarios. Use dimmer switches to adjust brightness levels and test how different lighting configurations impact the room’s perceived size and ambiance. A successful lighting plan in a small bathroom should feel intentional, functional, and transformative.
Step 5: Add Finishing Touches and Decor
The final stage of designing small bathrooms transforms your carefully planned space from functional to extraordinary. Finishing touches are not mere decorative elements - they are strategic design decisions that amplify your room’s personality and perceived spaciousness. Your goal is to select decor that enhances functionality while creating visual depth and interest.
Color becomes your most powerful design tool in compact spaces. Select a cohesive palette that creates visual continuity and depth. Light neutral tones like soft grays, warm whites, and subtle beiges expand the perceived space, while carefully placed bold accent colors can create focal points that draw the eye and distract from the room’s limited dimensions. Consider using a single bold color in small doses - perhaps through towels, artwork, or a statement tile - to inject personality without overwhelming the space.
Storage solutions double as decorative elements in small bathrooms. Open shelving with carefully curated items can make walls feel less heavy. Glass jars for cotton balls, minimalist metal containers for toiletries, and strategically placed hooks can transform necessary storage into design features. Learn more about organizational strategies that maximize both aesthetic and functional potential.
Texture plays a crucial role in adding depth without consuming physical space. Consider textured tiles, woven baskets, plush towels, and small decorative elements that create visual interest through subtle variations. Mirrors with interesting frames, artwork with depth, and strategically placed plants can make the bathroom feel more expansive and alive. Choose items that serve multiple purposes - a beautiful tray that corrals toiletries, a decorative ladder that functions as a towel rack.
Vertical decor elements help draw the eye upward, creating an illusion of height. Tall, slim artwork, vertical tile arrangements, or a statement mirror can make ceiling heights feel more generous. Avoid cluttering surfaces - every decorative element should be intentional and contribute to the overall sense of openness.
Finally, verify your design by stepping back and assessing the overall composition. The perfect small bathroom feels intentional, not cramped. Each element should contribute to a sense of calm, functionality, and visual harmony. Your finishing touches should whisper, not shout, creating a space that feels both intimate and expansive.
Step 6: Verify Functionality and Aesthetics
The final validation of your small bathroom design requires a comprehensive, multi-dimensional assessment that goes beyond visual appeal. Functionality and aesthetics must work in perfect harmony, creating a space that not only looks stunning but serves its practical purpose with exceptional efficiency.
Begin with a thorough circulation test. Walk through the bathroom multiple times, simulating real-world scenarios. Observe how easily you can move between fixtures, open and close doors, and access storage areas. Pay close attention to potential friction points - areas where movement feels restricted or awkward. Check clearance around toilets, sink access, and shower entry. Ensure that when cabinet doors or drawers open, they do not obstruct movement or bump into other fixtures.
Lighting becomes a critical factor in your verification process. Test your lighting design under different conditions - morning, afternoon, and evening. Observe how natural and artificial light interact with surfaces, checking for harsh shadows, glare, or areas of insufficient illumination. A well-designed small bathroom should provide consistent, flattering light that makes the space feel open and comfortable.
Explore our luxury bathroom tile ideas to understand how visual elements contribute to the overall design verification. Your tile selections should not just be aesthetically pleasing but also practical. Check grout lines for potential maintenance challenges, assess slip resistance, and confirm that your chosen materials can withstand the humidity and temperature variations typical in bathrooms.
Ergonomics play a crucial role in small bathroom design. Test the height and placement of mirrors, towel racks, and shelving. Ensure that these elements are comfortably accessible for all potential users. Consider the needs of different height ranges and potential mobility challenges. A truly successful design anticipates and accommodates varied user requirements.
As a final verification, photograph your completed bathroom from multiple angles. Review these images critically, looking for visual balance, color harmony, and spatial flow. The most successful small bathroom designs create an illusion of spaciousness through intelligent fixture placement, strategic lighting, and a cohesive design language. Your goal is a space that feels larger than its actual dimensions, functional without compromise, and aesthetically compelling.
Use this checklist table to verify that your small bathroom design meets both functionality and aesthetic requirements before finalizing your project.
| Verification Item | What to Check | Why It Matters |
|---|---|---|
| Circulation and movement | Easy access to fixtures and storage, smooth traffic flow | Prevents congestion and frustration |
| Fixture clearance | Adequate spacing around toilets, sinks, showers, and doors | Ensures comfort and usability |
| Lighting effectiveness | Even illumination, no harsh shadows or glare | Enhances ambiance and visibility |
| Material durability | Tiles/grout resist moisture, stains, and slipping | Maintains safety and long-term beauty |
| Ergonomics | Comfortable heights for mirrors, racks, shelving | Accommodates all users’ needs |
| Visual balance and color harmony | Consistent palette, balanced decor, visualization from photos | Achieves cohesive, attractive design |
Unlock the Full Potential of Your Small Bathroom with TileChoices.com
Struggling to achieve a stylish look and spacious feel in your compact bathroom? Even after careful planning, the details matter—choosing the right tiles and finishes is essential for maximizing every square inch and creating an airy, modern space. If you have wrestled with awkward layouts or limited daylight, you already know how much impact the right tile pattern or light-reflective surface can have. Our article highlighted the importance of precision, light, and material selection for both beauty and function. Now it is time to eliminate design compromises and realize your vision.

Browse the vast collections at TileChoices.com for inspiration and solutions tailored to small bathrooms. Discover expertly curated luxury bathroom tile ideas or learn how mixing tile patterns can open up a compact room. With access to high-quality finishes, sample requests, and project guidance, you can start your renovation confidently. Visit us now and see how the right tiles will transform your bathroom into the bright, functional retreat you deserve.
Frequently Asked Questions
How do I measure my small bathroom accurately for space-saving design?
To measure your small bathroom accurately, use a reliable metal tape measure to record exact wall lengths, ceiling height, and floor dimensions. Create a detailed sketch or digital blueprint with these measurements to guide your design.
What are the best space-saving fixtures for a small bathroom?
Wall-mounted fixtures, such as floating vanities and compact toilets, are excellent choices for maximizing space. Prioritize fixtures that have a smaller footprint to optimize floor area and enhance visual openness.
How can I improve the lighting in my small bathroom?
To improve lighting in a small bathroom, implement layered lighting strategies that include ambient, task, and accent lighting. Aim for multiple light sources to create even illumination and consider wall sconces or backlit mirrors to enhance the perceived space.
What strategies can I use for storage in a small bathroom?
Utilize vertical space with tall, narrow cabinets and open shelving to maximize storage without consuming floor area. Incorporate multifunctional items, such as mirrors with built-in storage, to help keep your space organized and visually open.
How do I choose the right colors for a small bathroom design?
Opt for light neutral tones to create an expansive feel in your small bathroom. Use bold accent colors sparingly to create focal points and maintain a cohesive palette that avoids overwhelming the space.
What final checks should I do before completing my small bathroom design?
Before completing your design, perform circulation tests to ensure comfortable movement between fixtures and verify that lighting provides even illumination. Review your design visually to ensure balance and spatial harmony, making adjustments as necessary.


