Installing mosaic tiles can transform any room into a work of art. Most people focus on picking patterns, but incorrect surface preparation is the top reason why mosaic projects fail, with up to 45 percent of installations facing early issues. Getting the design right means nothing if you skip the basics that make the whole thing last.
Table of Contents
- Step 1: Prepare Your Surface For Installation
- Step 2: Gather Necessary Tools And Materials
- Step 3: Design And Plan Your Mosaic Layout
- Step 4: Apply Adhesive And Install Mosaic Tiles
- Step 5: Grout The Mosaic Tiles And Clean The Surface
- Step 6: Inspect And Seal Your Finished Work
Quick Summary
| Key Point | Explanation |
|---|---|
| 1. Thoroughly prepare your surface | Ensure the installation surface is clean, level, and structurally sound to prevent future issues like cracking or shifting. |
| 2. Gather essential tools and materials | Collect high-quality tools, including a tile cutter and notched trowel, that are necessary for a smooth installation process. |
| 3. Plan your mosaic layout carefully | Measure the area accurately and sketch designs to visualize patterns, minimizing complicated cuts and ensuring aesthetic appeal. |
| 4. Apply adhesive methodically | Mix adhesive properly, spread evenly, and position tiles from the center outward to maintain symmetry and alignment. |
| 5. Inspect and seal your work | Conduct a thorough final inspection for imperfections, then apply a sealer to protect the mosaic and enhance durability. |
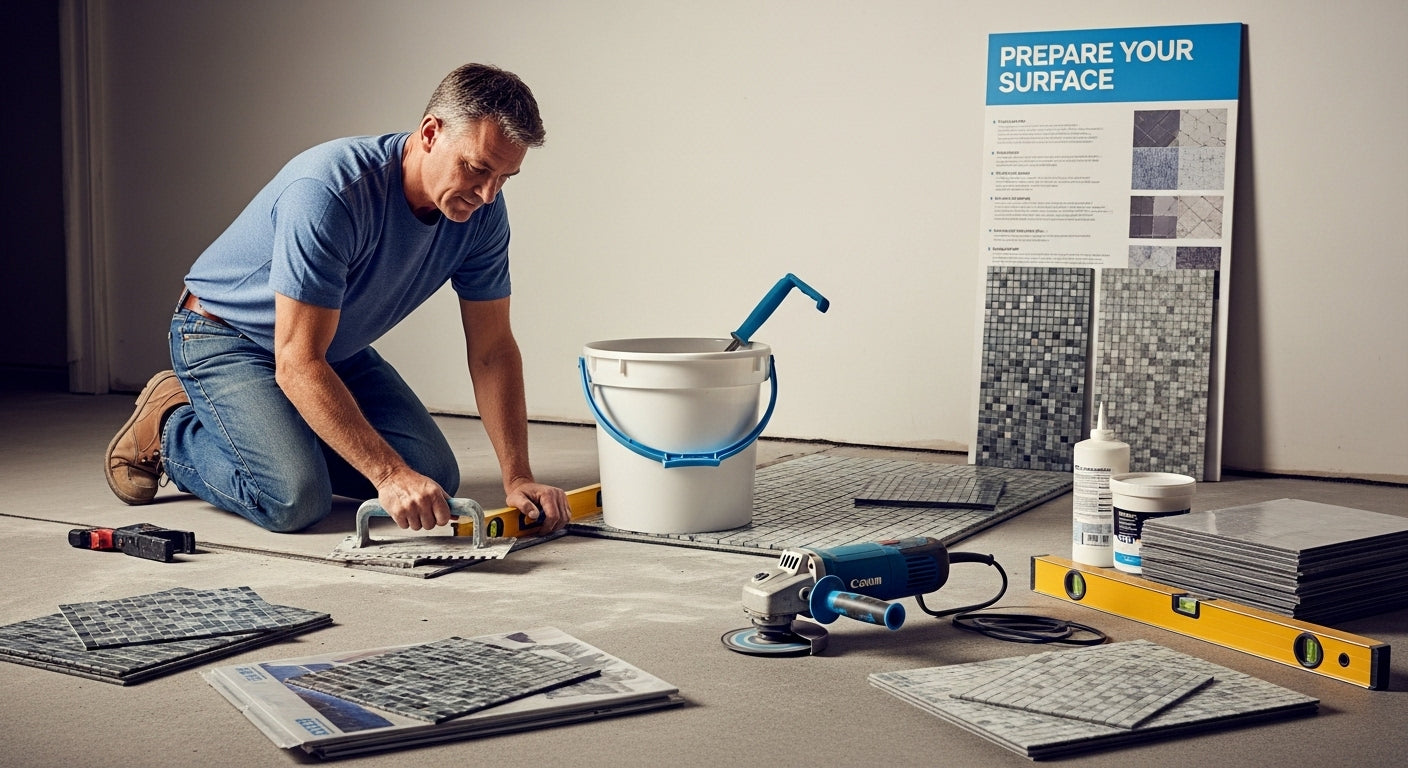
Step 1: Prepare Your Surface for Installation
Successful mosaic tile installation begins with meticulous surface preparation. This foundational step determines the entire project’s durability and aesthetic quality, making it crucial to approach with precision and care. Proper substrate readiness ensures your tiles adhere correctly, preventing future issues like cracking, shifting, or premature wear.
Start by thoroughly examining your installation surface. Whether you’re working with concrete, plywood, cement board, or an existing tile surface, the area must be structurally sound, clean, and completely level. Remove any existing flooring, baseboards, or trim that might interfere with your new mosaic installation. Sweep and vacuum the area comprehensively, eliminating dust, debris, and loose particles that could compromise tile adhesion.
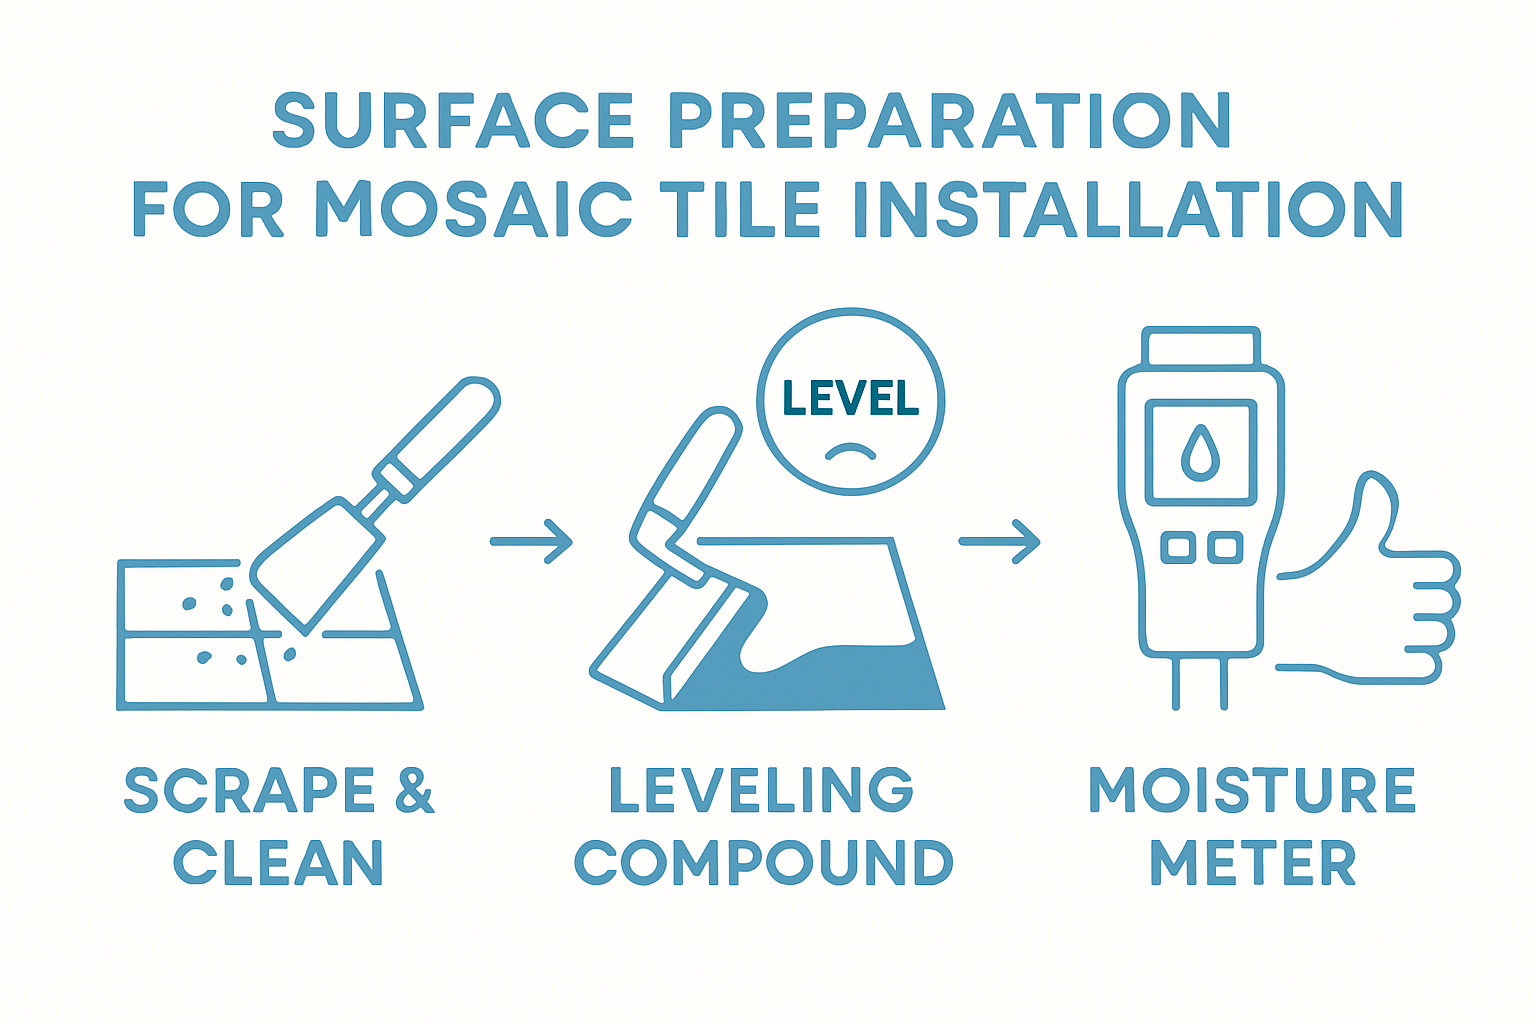
For optimal results, you’ll need specific tools and materials to prepare your surface effectively. Learn more about tile installation tools to ensure you have everything required. Essential items include:
- Angle grinder or floor scraper
- Leveling compound
- Sandpaper or floor sander
- Cleaning solution
- Trowel
- Protective safety gear
If your surface has minor imperfections, use a leveling compound to create a smooth, even base. Apply the compound with a trowel, working systematically to fill small holes, cracks, or uneven areas. Allow the compound to dry completely according to manufacturer instructions. For concrete surfaces, mechanically scarify the area using a floor grinder to create optimal adhesion conditions. This process removes any existing sealants or rough patches that might prevent proper tile attachment.
Before proceeding, conduct a final surface inspection. The area should feel firm, smooth, and completely dry. Press your hand across the surface, checking for any remaining irregularities. Moisture testing is critical for concrete or cement surfaces to prevent future tile failure. Use a moisture meter to confirm the substrate meets recommended humidity levels, typically below 3% for concrete installations. By investing time in thorough surface preparation, you set the stage for a professional-grade mosaic tile project that will look stunning and last for years.
Step 2: Gather Necessary Tools and Materials
Preparing for your mosaic tile installation requires assembling a comprehensive toolkit that will streamline your project and ensure professional results. Proper tool selection is as critical as the tiles themselves, transforming a potentially complex task into a manageable and enjoyable home improvement experience.
Start by creating a dedicated workspace with ample room to organize your materials and maneuver comfortably. Professional installers understand that efficiency begins with strategic preparation. You’ll want to collect both specialized tile installation tools and general construction equipment that will support your mosaic project.
Your core toolkit should include precise measuring and cutting instruments. A high-quality tile cutter is essential for creating clean, accurate cuts that will determine the overall aesthetic of your mosaic design. Consider investing in a wet saw for intricate mosaic tile work, which provides smoother edges and greater precision than manual cutters. Complementing your cutting tools, gather additional critical equipment:
- Notched trowel (1/4 inch recommended for mosaic tiles)
- Tile spacers
- Rubber mallet
- Level
- Tape measure
- Pencil
- Safety glasses
- Waterproof grout
- Tile adhesive
- Mixing bucket
- Sponges
Materials selection requires equal attention. Choose high-quality adhesive compatible with your specific mosaic tile type and substrate. Ceramic, glass, and natural stone mosaics each demand specific adhesive formulations. Read manufacturer recommendations carefully to ensure proper bonding. Grout selection is equally important grout color can dramatically impact your final design, either complementing or contrasting with your mosaic tiles.
Learn more about tile installation tools to understand specialized equipment nuances. By methodically gathering and organizing your tools before beginning installation, you set yourself up for a smooth, professional-grade mosaic tile project. Each tool serves a specific purpose, working together to transform your space with precision and artistic flair.
The following table summarizes essential tools and materials for mosaic tile installation, listing each item’s main purpose to streamline your project preparation.
| Tool/Material | Purpose |
|---|---|
| Tile cutter (manual/wet saw) | Cutting mosaic tiles cleanly and precisely |
| Notched trowel (1/4 in) | Spreading adhesive evenly over surface |
| Tile spacers | Ensuring uniform grout line spacing |
| Rubber mallet | Tapping tiles into position without damage |
| Level | Checking evenness of tile and surface |
| Safety glasses | Eye protection during cutting and sanding |
| Cleaning solution/sponges | Cleaning surface and removing excess grout |
| Waterproof grout/adhesive | Bonding tiles and sealing gaps |
Step 3: Design and Plan Your Mosaic Layout
Designing a mosaic tile layout transforms your space from ordinary to extraordinary, requiring thoughtful planning and creative vision. Your mosaic design is the visual blueprint that will guide every subsequent installation step, making this stage critically important to your project’s ultimate success.
Begin by measuring your installation area precisely, recording exact dimensions and noting any architectural features like corners, edges, or irregular spaces. These measurements become your design canvas, helping you visualize how mosaic tiles will interact with the existing environment. Sketch your proposed layout on graph paper, which allows for accurate scale representation and helps you experiment with tile placement before actual installation.
Consider your design aesthetic carefully. Do you want geometric precision or a more organic, free-flowing pattern? Explore creative ways of mixing tile patterns to inspire your mosaic vision. Some homeowners prefer symmetrical designs with uniform tile distribution, while others embrace asymmetrical arrangements that create visual tension and interest.
Color selection plays a pivotal role in your mosaic design. Choose a color palette that complements your existing room decor, considering how different tile shades and textures will interact. Create a sample board by collecting tile pieces, arranging them together to assess how colors and patterns work in relationship to one another. This preliminary step helps prevent costly mistakes and ensures a cohesive final look.
Practical considerations are equally important. Account for tile cutting requirements by planning your design to minimize complex cuts. Strategic tile placement can reduce waste and simplify installation. Assess your mosaic’s visual flow, ensuring that patterns align with room dimensions and architectural lines. If working in a bathroom or kitchen, consider how lighting will interact with your mosaic design, potentially creating stunning visual effects through reflection and shadow.
Before finalizing your layout, verify your design meets these critical criteria:
- Balanced visual composition
- Minimal complex tile cuts
- Harmonious color integration
- Proper tile spacing
- Alignment with room architecture
By investing time in meticulous planning, you set the foundation for a mosaic installation that will be both structurally sound and visually captivating.
Step 4: Apply Adhesive and Install Mosaic Tiles
The moment of transformation arrives as you begin applying adhesive and positioning your mosaic tiles. This critical step demands precision, patience, and a methodical approach that will determine the final quality and durability of your installation. Your carefully planned design now transitions from concept to reality.
Start by preparing your adhesive according to manufacturer specifications. Mix the tile adhesive in small batches to prevent premature hardening, ensuring a workable consistency similar to smooth peanut butter. Use a notched trowel held at a consistent 45-degree angle to spread an even layer of adhesive across your prepared surface. Work in small sections to prevent the adhesive from drying before tile placement, which can compromise your installation.
Learn strategies for waterproofing your tile installation to protect your mosaic from potential moisture damage. When positioning tiles, begin at the center of your design and work outward. This approach helps maintain symmetry and allows for more precise adjustments. Press each mosaic tile gently but firmly into the adhesive, using a slight twisting motion to ensure complete contact and remove potential air pockets.
Maintain consistent spacing between tiles using spacers, which will create uniform grout lines and professional-looking results. Periodically step back and verify your design alignment, checking that tiles remain true to your original layout. If a tile is misaligned, remove and readjust it immediately before the adhesive sets. Some adhesives provide a short working window, typically 15-20 minutes, so work efficiently and deliberately.
Be prepared for potential challenges during installation. Mosaic tiles often come in mesh-backed sheets, which can simplify placement but require careful handling. Ensure the mesh remains intact during installation, and use tile nippers for any necessary cuts around edges or obstacles. Keep a damp sponge nearby to quickly clean excess adhesive from tile surfaces.
Verify your installation meets these critical criteria:
- Tiles are level and evenly spaced
- Adhesive coverage is complete and uniform
- Design matches original layout
- No visible adhesive remains on tile surfaces
- Tiles are firmly embedded without air gaps
By executing this step with care and attention to detail, you transform your mosaic from a design concept into a stunning visual masterpiece.
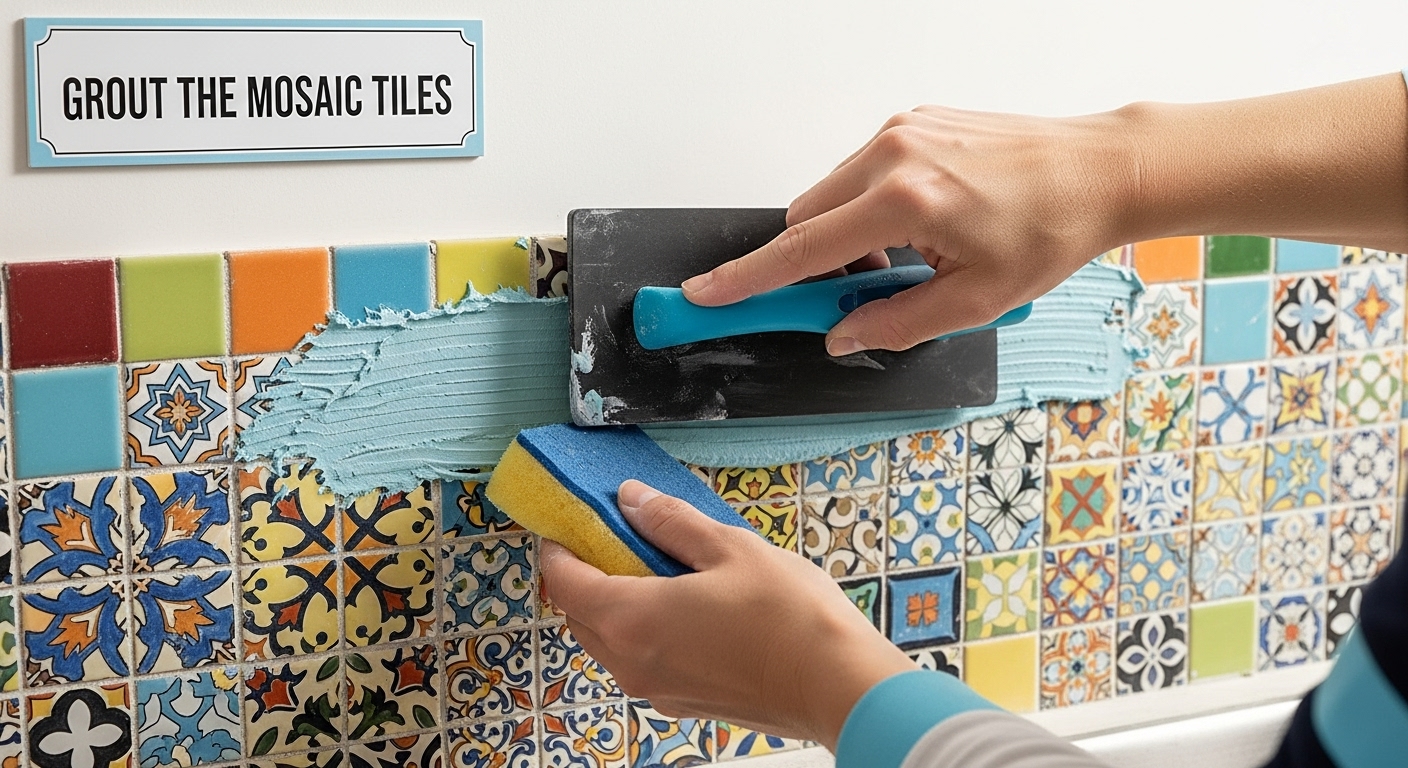
Step 5: Grout the Mosaic Tiles and Clean the Surface
Grouting represents the final transformative stage of your mosaic tile installation, where individual tiles merge into a cohesive, polished design. This crucial step not only fills the spaces between tiles but also provides structural integrity and aesthetic refinement to your entire project. Proper grouting technique will determine the longevity and visual appeal of your mosaic masterpiece.
Begin by selecting a grout color that complements your mosaic design. Some installers prefer a matching grout that creates a seamless look, while others choose contrasting colors to highlight individual tiles and create visual interest. Mix your grout according to manufacturer instructions, achieving a smooth, consistent texture comparable to thick frosting. Work in small sections to prevent the grout from drying before you can clean and shape it properly.
Apply the grout using a rubber float held at a 45-degree angle, pressing firmly to ensure complete coverage between tiles. Move diagonally across the mosaic to avoid dislodging tiles or creating uneven grout lines. Work methodically and deliberately, filling every joint completely while removing excess grout from tile surfaces. After initial application, wait approximately 15-20 minutes for the grout to slightly set before beginning the cleanup process.
Cleaning requires a delicate touch and precise timing. Use a damp sponge to gently wipe the tile surfaces, rotating the sponge frequently to prevent redepositing grout. Rinse your sponge in clean water, wringing it out thoroughly to avoid oversaturating the grout lines. Multiple light passes are more effective than aggressive scrubbing, which can remove fresh grout from between tiles.
After the initial cleaning, allow the grout to cure for the time recommended by the manufacturer. Some projects might require sealing the grout to protect against moisture and staining. Learn strategies for waterproofing and protecting your tile installation to extend the life of your mosaic.
Verify your grouting meets these critical criteria:
-
Grout lines are consistently filled
-
No air pockets or gaps between tiles
-
Surface is clean with minimal grout haze
-
Grout color matches design intention
-
Tiles remain firmly in place
A meticulously grouted mosaic transforms your space, creating a professional-quality installation that will be admired for years to come.
Step 6: Inspect and Seal Your Finished Work
As you approach the final stage of your mosaic tile installation, careful inspection and sealing will protect your artistic investment and ensure long-lasting beauty. This concluding step transforms your meticulously crafted mosaic from a raw installation into a protected, professional-quality surface that will withstand daily wear and environmental challenges.
Begin your comprehensive inspection by examining the entire mosaic surface under bright, natural light. Look closely for any imperfections such as uneven grout lines, loose tiles, or areas where adhesive might be visible. Run your hand gently across the surface, feeling for any raised edges or inconsistencies that might have been missed during previous installation stages. Use a bright flashlight at different angles to highlight subtle irregularities that might not be immediately apparent.
Learn strategies for waterproofing and protecting your tile installation to extend the life of your mosaic. Sealing is particularly crucial for porous tiles like natural stone or unglazed ceramic. Choose a high-quality penetrating sealer appropriate for your specific tile material. Apply the sealer using a clean, lint-free cloth or foam applicator, working in small sections and following manufacturer instructions precisely. Ensure complete coverage while avoiding pooling or excessive application.
Pay special attention to grout lines during the sealing process. These areas are most vulnerable to moisture, staining, and potential damage. Use a narrow brush or specialized grout sealer applicator to ensure thorough coverage. Allow the sealer to penetrate for the recommended duration, typically 10-15 minutes, then wipe away any excess with a clean, dry cloth. Some sealers require multiple applications for maximum protection, so carefully read and follow the product’s specific guidelines.
Be mindful of environmental conditions during the sealing process. Ideal temperature ranges and humidity levels can significantly impact sealer effectiveness. Most sealers perform best in temperatures between 50-80 degrees Fahrenheit with moderate humidity. Avoid sealing in direct sunlight or extremely humid conditions, which can compromise the product’s ability to penetrate and protect the surface.
Verify your final installation meets these critical criteria:
- No visible adhesive or grout residue
- Tiles are level and firmly attached
- Grout lines are clean and consistent
- Sealer is applied evenly
- Surface feels smooth and uniform
By investing time in this final inspection and sealing process, you protect your mosaic and ensure it remains a stunning visual centerpiece for years to come.
Below is a checklist table to help verify your mosaic tile installation at each key stage and ensure a professional-quality result.
| Stage | Completion Criteria | How to Check |
|---|---|---|
| Surface Preparation | Surface is clean, level, dry, and sound | Inspect by hand and eye |
| Adhesive Application | Adhesive spread evenly, proper consistency | Visual and tactile check |
| Tile Installation | Tiles level, spaced, aligned per layout | Stand back and adjust as needed |
| Grouting | Grout lines filled, no air pockets, minimal haze | Use sponge and visual check |
| Final Inspection & Sealing | No residue, tiles secure, sealer applied evenly | Hand feel and flashlight check |
Transform Your Mosaic Vision Into Reality With TileChoices.com
You have read about the detailed process of installing mosaic tiles—the need for quality tiles, precise tools, flawless surface preparation, and a worry-free finish. But turning that inspiration into a stunning real space can feel overwhelming if you lack high-quality materials or expert support. Choosing the wrong tile type or not having the right installation supplies makes all your hard work vulnerable to cracks, uneven results, or wasted effort. Your dream of a professionally styled mosaic backsplash, accent wall, or bathroom deserves better results and lasting satisfaction.

Ready to put your new skills into practice and elevate your project results? Shop the best selection of stylish, durable mosaic tiles and installation materials at TileChoices.com. Explore a curated range perfect for any room, get guidance through our blog with installation tips, and order samples so you can plan with confidence. Start your next project now for flawless results you will love for years to come.
Frequently Asked Questions
How do I prepare my surface for mosaic tile installation?
To prepare your surface, ensure it is clean, structurally sound, and level. Remove any existing flooring and debris. Use sandpaper or a floor sander to smooth out imperfections and apply a leveling compound if necessary.
What tools do I need for installing mosaic tiles?
Essential tools include a notched trowel, tile cutter, tile spacers, rubber mallet, level, tape measure, pencil, and a mixing bucket. It’s also good to have safety glasses and a damp sponge on hand for cleanup.
How do I design my mosaic tile layout?
Begin by measuring your installation area and sketching your proposed design on graph paper. Consider the aesthetics, color palette, and practical tile placement to minimize cutting and ensure harmonious integration with your space.
What should I consider when selecting grout for my mosaic tiles?
Choose a grout color that complements or contrasts with your tiles, according to your design intention. Make sure the grout is suitable for the type of tiles used, considering factors like moisture exposure and durability.