Measuring for floor tile might seem simple but even a tiny error can add up fast. In fact, experts say buying at least 10 percent extra tile is a must to cover mistakes and future repairs. Most people focus only on the big dimensions but it’s the small, overlooked corners and odd angles that really cause problems if you skip double-checking the details.
Table of Contents
- Step 1: Gather Your Measuring Tools
- Step 2: Evaluate The Space To Be Tiled
- Step 3: Measure Length And Width Precisely
- Step 4: Calculate The Total Area For Tiles
- Step 5: Account For Tile Size And Layout
- Step 6: Double-Check Your Measurements
Quick Summary
| Key Point | Explanation |
|---|---|
| 1. Use essential measuring tools | Equip yourself with a tape measure, carpenter’s square, and spirit level for accurate measurements. |
| 2. Evaluate the space meticulously | Assess surface characteristics, dimensions, and irregularities to plan effectively. |
| 3. Measure twice for accuracy | Confirm all measurements to reduce errors that can lead to tile waste or misalignment. |
| 4. Calculate tile area accurately | Multiply length and width to determine total square footage, adding extra for waste. |
| 5. Double-check all measurements | Verify your initial measurements to ensure precision and avoid costly mistakes during installation. |
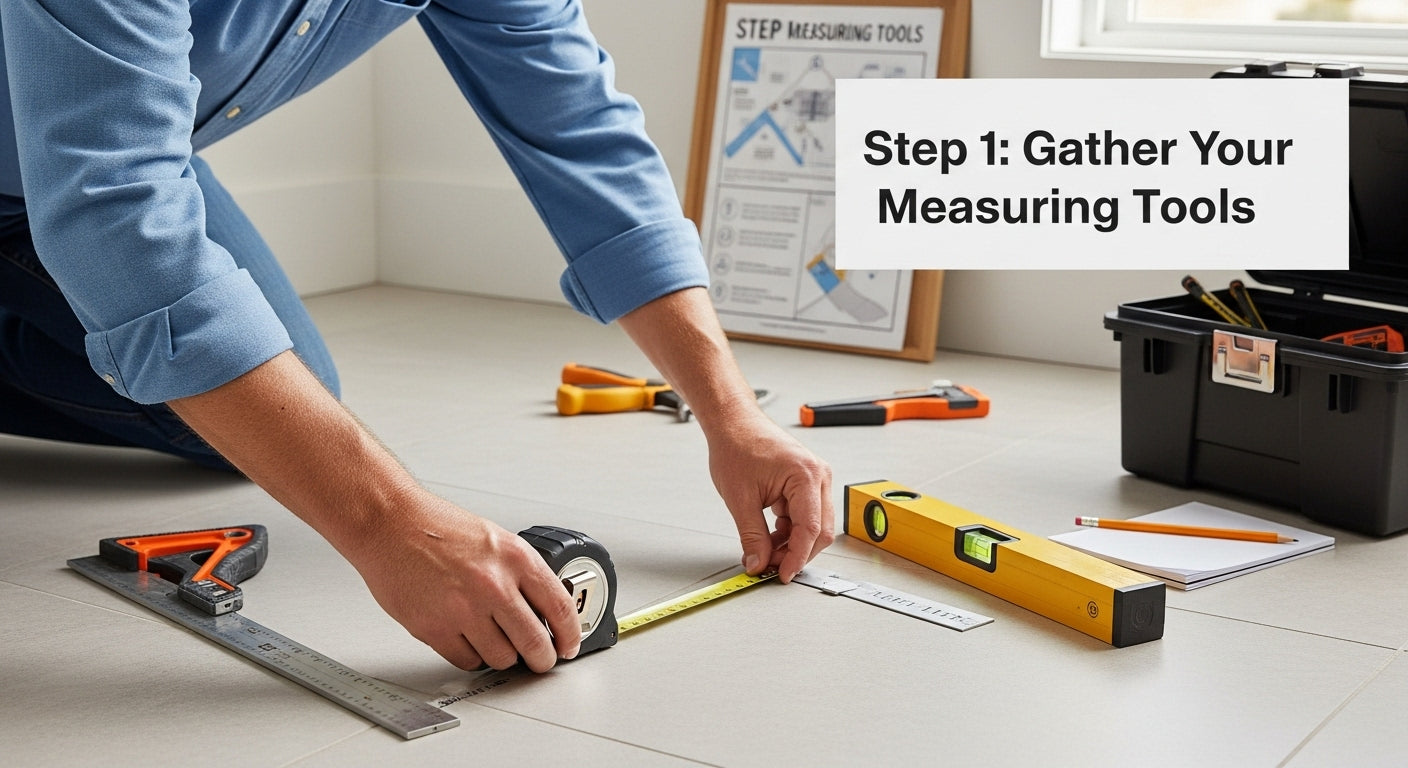
Step 1: Gather Your Measuring Tools
Before diving into tile installation, preparing the right measuring tools is crucial for achieving professional results. Accurate measurements serve as the foundation for a successful tiling project, preventing costly mistakes and ensuring a precise, visually appealing finish.
Professional tile installation requires a specific set of measuring instruments that will help you calculate surface areas, plan layouts, and verify alignment. Your essential measuring toolkit should include:
- A long metal tape measure (25 feet recommended) with clear, easy-to-read markings
- A carpenter’s square for checking perfect 90-degree angles
- A spirit level to confirm horizontal and vertical alignments
- A pencil for marking measurements
- A laser measure (optional but highly recommended for larger spaces)
When selecting your tape measure, prioritize durability and precision. Steel tape measures with both metric and imperial measurements provide maximum flexibility. The carpenter’s square helps you determine exact right angles critical for tile placement, while a spirit level ensures your tiles will be perfectly straight and aligned.
Measuring preparation involves more than just having tools. You will want to clear the workspace, remove any existing floor coverings, and ensure the surface is clean and dry. Take time to inspect the area for irregularities that might impact your tile layout. Professional contractors often recommend double-checking measurements before purchasing tiles to avoid waste and additional expenses.
Below is a summary table of essential measuring tools for tile installation, including their purpose and any relevant notes.
| Tool | Purpose | Notes |
|---|---|---|
| Metal Tape Measure | Measure length, width, and area | 25 feet recommended; look for clear markings |
| Carpenter’s Square | Check and mark 90-degree angles | Crucial for accurate tile placement |
| Spirit Level | Confirm horizontal and vertical alignment | Ensures tiles are installed straight and even |
| Pencil | Mark measurements and reference points | Sharp pencil recommended for accuracy |
| Laser Measure | Measure large or hard-to-reach areas (optional) | Increases precision in big or irregular spaces |
For those looking to enhance their tile installation skills, our guide on cutting ceramic tile can provide additional insights into precision techniques. Remember that investing time in thorough measurement and preparation will significantly improve your final tiling results.
Step 2: Evaluate the Space to be Tiled
Careful space evaluation is the critical bridge between gathering your measuring tools and executing a successful tile installation. This step transforms your project from abstract planning to concrete preparation, requiring meticulous attention to surface characteristics, room dimensions, and potential installation challenges.
Room assessment begins with understanding the specific surface you will tile. Different areas like bathrooms, kitchens, or entryways present unique considerations. Examine the existing surface carefully for structural integrity, moisture levels, and potential irregularities that could impact tile adhesion. Uneven surfaces, significant cracks, or moisture problems must be addressed before tile installation to prevent future complications.
Measure the length and width of the space systematically, recording precise dimensions. For rectangular rooms, multiply length by width to calculate total square footage. Complex spaces with irregular shapes require breaking the area into smaller geometric sections for accurate measurement. Pro tip: Always add 10% extra tiles to account for cuts, breakage, and future replacements.
Pay special attention to architectural features that might complicate tile installation. Alcoves, corners, windows, and built-in fixtures will require careful planning and potentially custom tile cuts. Inspect baseboards, electrical outlets, and plumbing fixtures to anticipate potential challenges. If you are interested in creative design possibilities, explore mixing tile patterns for stunning spaces to inspire your project approach.
Finalize your evaluation by creating a rough sketch of the space, marking precise measurements, architectural features, and potential tile layout strategies. This visual reference will serve as a crucial planning tool, helping you anticipate potential installation complexities and make informed decisions about tile selection and placement.
Step 3: Measure Length and Width Precisely
Precision is the cornerstone of successful tile installation, and measuring length and width accurately will determine the overall success of your project. This step transforms your preliminary room evaluation into concrete numerical data that guides tile selection, layout, and cutting strategies.
Start by clearing the entire surface, removing any furniture, rugs, or obstacles that might interfere with your measurements. Using your metal tape measure, begin at one wall and extend the tape to the opposite wall, ensuring the tape remains straight and taut. For rectangular rooms, measure the length first by running the tape along the longer wall, then measure the width by running the tape perpendicular to the first measurement.
When measuring irregular spaces, break the area into smaller rectangular sections. If a room has alcoves or unusual angles, measure each section separately and calculate the total area by adding these individual measurements. Always measure twice to confirm accuracy. Small measurement errors can compound quickly, potentially resulting in significant tile waste or misalignment.
Consider using a laser measure for larger spaces or areas difficult to access with a traditional tape measure. These digital tools provide extraordinary precision and can instantly calculate square footage, reducing human error. For rooms with multiple angles or complex layouts, creating a detailed sketch with exact measurements can help visualize the tile placement and anticipate potential cutting requirements.
If you are interested in exploring creative design possibilities that go beyond standard measurements, our guide on understanding geometric tile shapes can provide additional inspiration for your project. Remember that accurate measurements are not just about numbers, but about creating a foundation for a beautiful, professional-looking tile installation that will enhance your space for years to come.
Step 4: Calculate the Total Area for Tiles
Calculating the total area for tile installation transforms your precise measurements into a strategic plan for purchasing materials and planning your project. This critical step ensures you purchase the correct number of tiles while minimizing waste and unexpected expenses.
Calculating tile area requires systematic multiplication of length and width measurements. For standard rectangular rooms, multiply the length by the width to determine total square footage. If your space includes multiple areas or irregular shapes, break the room into smaller geometric sections and calculate each section separately before adding the totals together. Always round up your calculations to the nearest whole number to account for potential cutting and waste.
The standard industry practice recommends purchasing 10% to 15% more tiles than your calculated area. This extra percentage provides crucial allowances for cuts, breakage, future replacements, and potential pattern matching. Complex tile layouts or rooms with many obstacles like cabinets, appliances, or unique architectural features might require up to 20% additional tiles.
Special considerations emerge for different installation areas. Bathrooms and wet areas demand extra precision, as tile placement impacts water resistance and overall durability. Explore our guide on waterproofing bathroom tiles to understand how proper area calculation contributes to long-term tile performance.
After calculating your total area, double-check your measurements and perform a final verification. Create a simple worksheet listing each room or section, its dimensions, calculated area, and the recommended tile quantity. This documentation serves as a valuable reference during purchasing and installation, helping you communicate effectively with suppliers and installers.
 Remember that accurate area calculation is not just about numbers, but about creating a foundation for a beautiful, functional tiled space that meets your design and practical requirements.
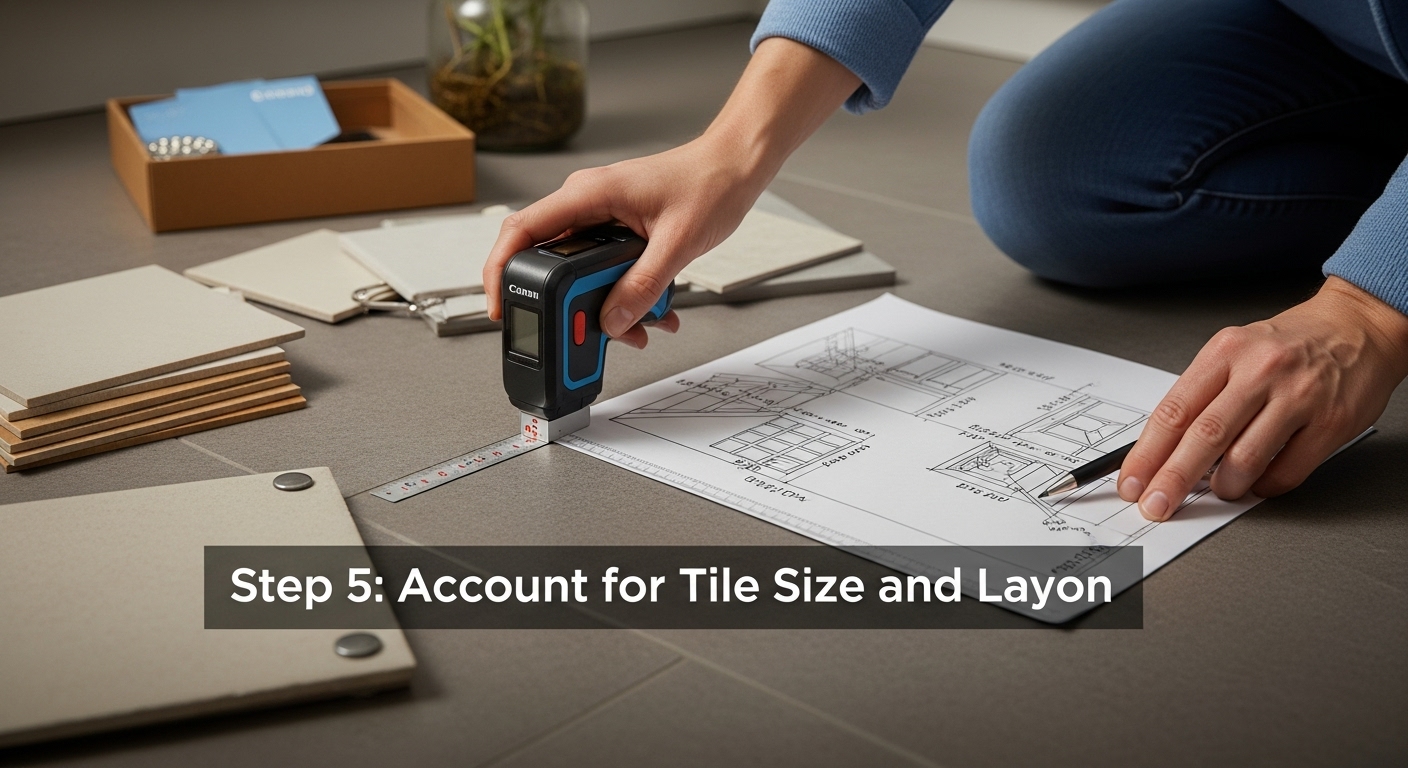
Step 5: Account for Tile Size and Layout
Selecting the right tile size and planning a strategic layout transforms a basic installation into a professional-looking design. This critical step bridges your precise measurements with aesthetic and practical considerations that impact the entire project’s visual appeal and functionality.
Tile size dramatically influences room perception and installation complexity. Larger tiles can make small spaces appear more expansive, while smaller tiles offer more flexibility around obstacles and curved surfaces. Consider the room’s dimensions when selecting tile size. Spacious areas accommodate larger tiles beautifully, whereas smaller rooms might benefit from medium or smaller format tiles that create a sense of visual depth and movement.
Grout lines play a crucial role in tile layout and should be strategically planned. Professional installers recommend maintaining consistent grout line widths, typically between 1/8 to 1/4 inch, depending on tile size and type. Wider grout lines can help compensate for slight variations in tile dimensions, while narrower lines create a more seamless appearance. Pay special attention to tile edges and potential cutting requirements, as complex layouts might necessitate more precise cuts and additional planning.
Different layout patterns can transform a space’s visual dynamics. Standard grid layouts provide a classic, uniform look, while diagonal or herringbone patterns introduce visual interest and can make rooms appear larger. Offset patterns like brick or subway layouts offer subtle sophistication and can help disguise minor surface imperfections.
For those seeking design inspiration beyond traditional approaches, explore our guide on mixing tile patterns for stunning spaces to unlock creative potential. Remember that your tile layout is not just about coverage, but about creating a cohesive design that enhances the overall aesthetic of your space. Take time to experiment with different arrangements, using your preliminary measurements as a guide to visualize the final result.
Step 6: Double-Check Your Measurements
Measurement verification is the final quality control checkpoint that separates successful tile installations from potential costly mistakes. This crucial step transforms your preliminary work into a reliable blueprint for your entire project, ensuring accuracy that will impact every subsequent phase of tile installation.
Systematic measurement verification requires a methodical approach. Begin by reviewing your initial measurements, comparing them against your original room sketch and documented calculations. Use different measuring tools to cross-reference your initial measurements. A metal tape measure, laser measure, and carpenter’s square can provide multiple confirmation points. Pay special attention to areas with architectural complexities like corners, alcoves, or rooms with irregular shapes.
Create a comprehensive verification worksheet that documents each measurement, breaking down the space into individual sections. Note the length, width, and calculated area for each segment. Highlight any discrepancies of more than 1/4 inch, as these small variations can significantly impact tile placement and overall project success. Measure from multiple reference points to ensure consistency, checking both parallel and perpendicular dimensions to confirm square and level surfaces.
Consider potential measurement variables that might affect your tile installation. Factors like baseboards, uneven flooring, wall irregularities, and architectural features can introduce subtle measurement challenges. Take multiple readings at different points along walls and floors, recording the variations. This detailed approach helps anticipate potential installation complexities and prepares you for necessary adjustments.
Here is a quick reference checklist to verify your tile measurements and avoid costly errors during installation.
| Verification Step | Action Required | Notes |
|---|---|---|
| Review all initial measurements | Compare measurements with original sketches | Use multiple tools for confirmation |
| Cross-check with different tools | Use tape measure, laser measure, and square | Confirms consistency in complex areas |
| Break down space into sections | Document measurements for each area | Helps manage rooms with alcoves or angles |
| Highlight discrepancies over 1/4 inch | Investigate and resolve any inconsistencies | Small errors can become big issues |
| Measure from multiple points and angles | Confirm both parallel and perpendicular distances | Ensures room is square and level |
| Record baseboard and surface variations | Note any irregularities or slope | Allows for adjustments during tile placement |
If you are planning a complex tile project with unique design considerations, check out our guide on understanding geometric tile shapes for additional insights. Remember that thorough measurement verification is not about perfection, but about minimizing risks and setting a solid foundation for a professional-looking tile installation that will look beautiful and perform exceptionally for years to come.
Measure Right. Tile with Confidence.
You have just learned how precise measurements and careful planning can make or break your tile project. Whether you are worried about buying too many tiles, ending up with unsightly gaps, or facing unexpected waste from poor calculations, getting it right the first time matters. This guide’s emphasis on accurate surface evaluation, area calculation, and layout strategy is your roadmap to a flawless finish. But sourcing the right tiles should never add more stress to your project.

Why not extend your confidence from planning to purchase? TileChoices.com makes it easy to match your exact measurements and design vision with a curated selection of high-quality tiles. Request samples, use our resources to explore trends like mixing tile patterns, or get more tips for cutting ceramic tile with professional accuracy. Start your project today and see how the right tools, knowledge, and materials can help you achieve lasting results. Visit TileChoices.com now for stylish tiles and real project support.
Frequently Asked Questions
How do I accurately measure a room for tile installation?
To accurately measure a room for tile installation, you should clear the area, then use a long metal tape measure to measure the length and width of the space. For rectangular rooms, multiply these two measurements to calculate the total square footage. For irregular spaces, break the area into smaller sections and measure each separately.
What should I do if my measurements are inconsistent?
If your measurements are inconsistent, double-check them using multiple measuring tools, such as a tape measure and a laser measure. Make sure to measure from multiple points and angles in the room to ensure accuracy, particularly in complex areas with alcoves or irregular shapes.
Why is it important to account for extra tiles in my calculations?
Accounting for extra tiles is important to cover potential cuts, waste, and breakage during installation. It is generally recommended to purchase an additional 10% to 15% of tiles beyond your calculated area to ensure you have enough materials for any unexpected issues that may arise.
How does tile size affect my measurement process?
Tile size affects the measurement process as larger tiles can require different strategies for layout and installation, especially in smaller spaces. Larger tiles typically reduce the number of grout lines, while smaller tiles may offer more flexibility in dealing with irregular surfaces. Consider the room’s dimensions and layout when choosing tile size to ensure a visually appealing and functional design.