Installing fish scale tiles—also known as mermaid tiles or scallop tiles—can transform your space with a unique, flowing design. While these tiles create a stunning visual impact, their curved shape requires careful planning and precision during installation.
In this step-by-step guide, you’ll learn how to properly install fish scale tile, including layout techniques, cutting tips, grout selection, and expert advice to achieve a professional finish.
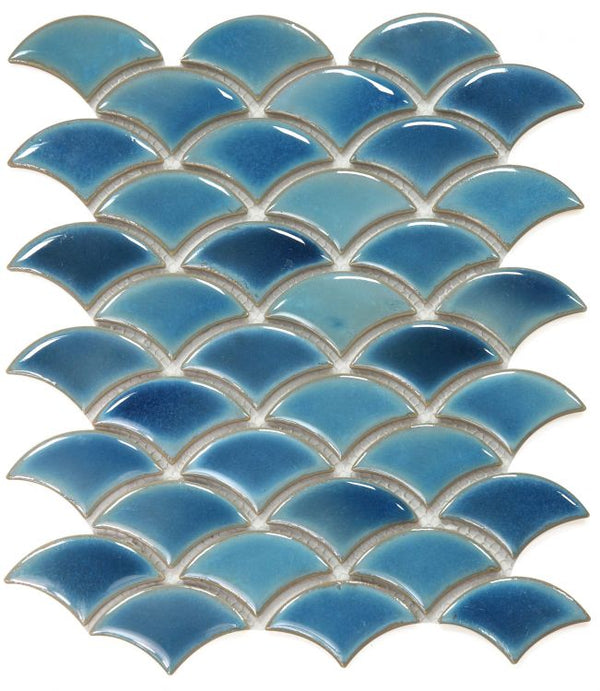
Before you begin, explore our full range of fish scale tiles to choose the right style for your project.
Table of Contents
- Tools & Materials Needed
- Surface Preparation
- Dry Layout & Planning
- Step-by-Step Installation
- How to Cut Fish Scale Tiles
- Grouting Tips
- Common Mistakes to Avoid
Tools & Materials Needed
- Fish scale tile sheets
- Tile adhesive (thin-set mortar)
- Notched trowel
- Tile spacers
- Wet saw or tile cutter
- Grout and grout float
- Level and measuring tape
- Sponge and bucket
For best results, pair your tile with high-quality materials from our backsplash tile collection.
Surface Preparation
Proper surface preparation is critical for a successful installation. Make sure the surface is:
- Clean and free of dust or grease
- Flat and level
- Dry and structurally sound
For wet areas like showers, ensure proper waterproofing before installing tile. You can browse suitable options in our shower wall tile collection.
Dry Layout & Planning
Before applying adhesive, always perform a dry layout. This step is especially important for fish scale tiles due to their unique shape.
Why Dry Layout Matters
- Ensures proper alignment of curved edges
- Helps avoid awkward cuts at edges
- Allows you to visualize the final design
Layout Tips
- Start from the center of the wall for balance
- Use a level line as your guide
- Adjust sheets to maintain consistent spacing
Need design inspiration? Check out these fish scale tile backsplash ideas.
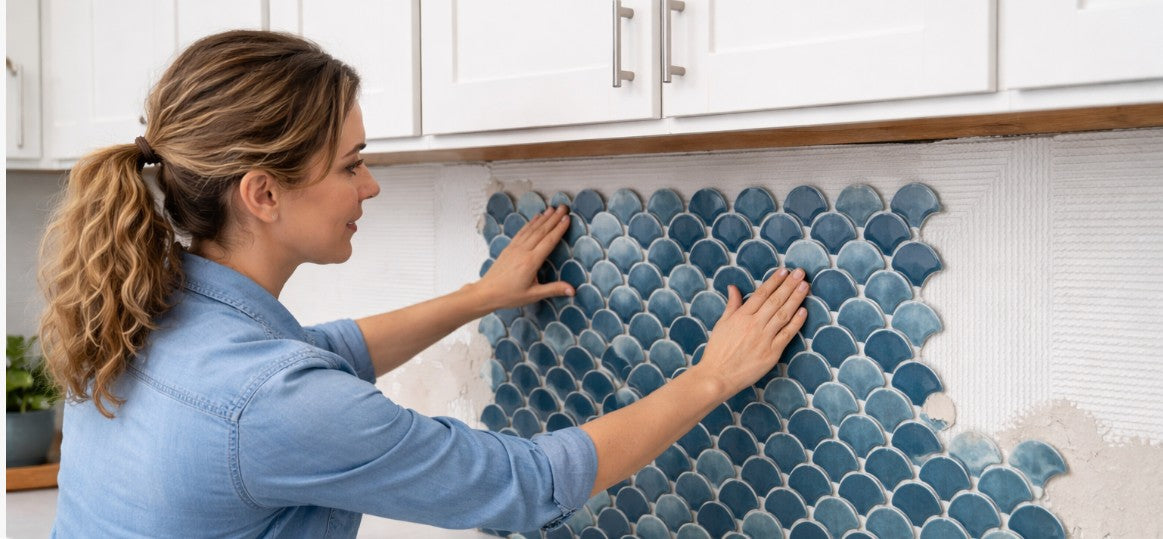
Step-by-Step Installation
Step 1: Apply Adhesive
Use a notched trowel to spread thin-set mortar evenly across a small section of the wall.
Step 2: Place Tile Sheets
Press the fish scale tile sheets into the adhesive, ensuring proper alignment of the scallop pattern.
Step 3: Adjust & Level
Use spacers and a level to keep tiles even and consistent across the surface.
Step 4: Continue Installation
Work in small sections, repeating the process while maintaining alignment between sheets.
Step 5: Allow to Set
Let the adhesive cure according to manufacturer instructions before grouting.
How to Cut Fish Scale Tiles
Cutting fish scale tiles can be more challenging than standard shapes due to their curves.
Best Tools for Cutting
- Wet saw with a diamond blade (recommended)
- Tile nippers for small adjustments
Cutting Tips
- Mark cuts carefully before cutting
- Cut slowly to avoid chipping
- Use edge pieces in less visible areas
Grouting Tips for Fish Scale Tile
Grout plays a major role in the final look of your installation.
Grout plays a major role in your final look—read our full guide on choosing the best grout for fish scale tile.
- Light grout: Creates a seamless, soft appearance
- Dark grout: Highlights the scallop pattern
- Epoxy grout: Ideal for kitchens and wet areas due to stain resistance
For more design inspiration, check out our mosaic tile collection.
Common Mistakes to Avoid
- Skipping the dry layout process
- Using inconsistent grout spacing
- Not aligning tile sheets properly
- Rushing cuts around edges and outlets
- Choosing the wrong grout color
Explore More Tile Options
Final Thoughts on Installing Fish Scale Tile
Installing fish scale tile requires attention to detail, but the results are well worth the effort. With proper planning, the right tools, and careful execution, you can achieve a stunning, professional-looking finish.
Ready to get started? Browse our fish scale tile collection to find the perfect style for your project.