
Waterproofing a bathroom seems simple—slap on some sealant and you are done. Yet one missed gap can let in enough moisture to create hundreds of dollars in water damage repairs. Most people only realize this after mold shows up behind the tiles or under the tub. A careful, step-by-step approach reveals where the real threats hide and how a little extra work upfront can save you major headaches later.
Table of Contents
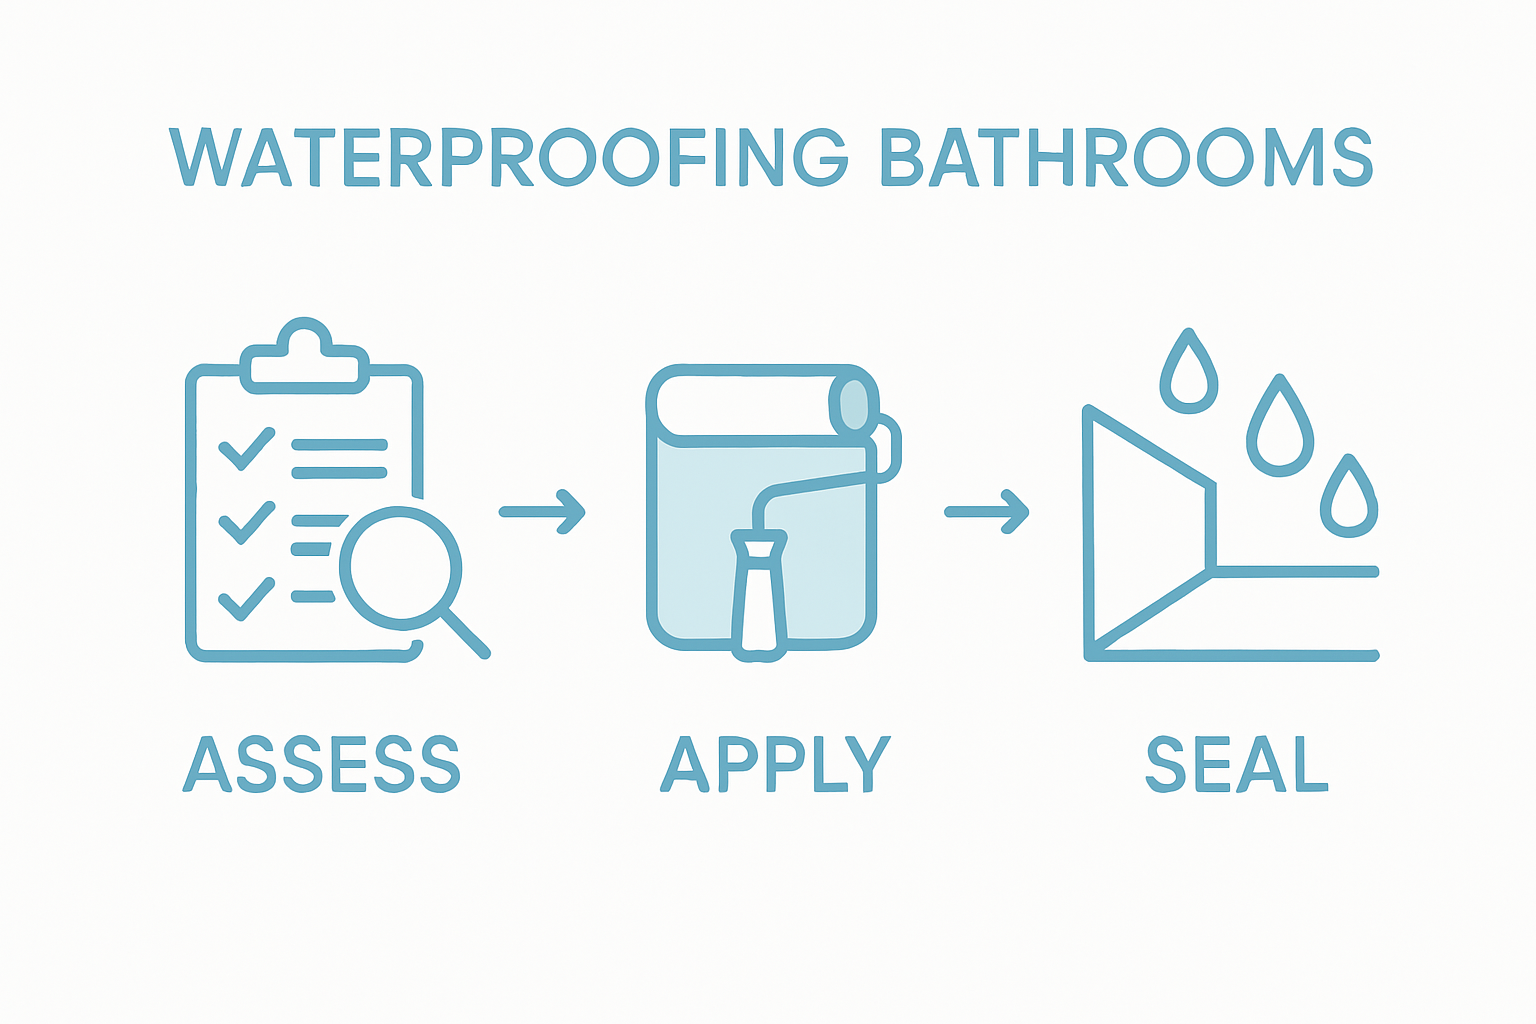
- Step 1: Assess Your Current Bathroom Structure
- Step 2: Choose Appropriate Waterproofing Materials
- Step 3: Prepare The Surface For Waterproofing
- Step 4: Apply Waterproofing Membrane Or Coating
- Step 5: Seal All Joints And Penetrations
- Step 6: Conduct A Leak Test And Verify Effectiveness
Quick Summary
| Key Point | Explanation |
|---|---|
| 1. Conduct a thorough structural assessment | Inspect surfaces and junctions for vulnerabilities and signs of water damage before waterproofing to identify areas needing attention. |
| 2. Choose the right waterproofing materials | Select compatible, durable, and effective membranes or coatings tailored to your bathroom’s specific environment and materials. |
| 3. Properly prepare surfaces before application | Clean, repair, and condition all surfaces to ensure optimal adhesion and longevity of waterproofing materials. |
| 4. Apply waterproofing membranes correctly | Follow manufacturer instructions for application, ensuring even coverage and addressing all critical junctions for maximum protection. |
| 5. Seal joints and penetrations thoroughly | Use high-quality sealants to cover all gaps around fixtures and junctions to prevent water entry and protect your waterproofing system. |
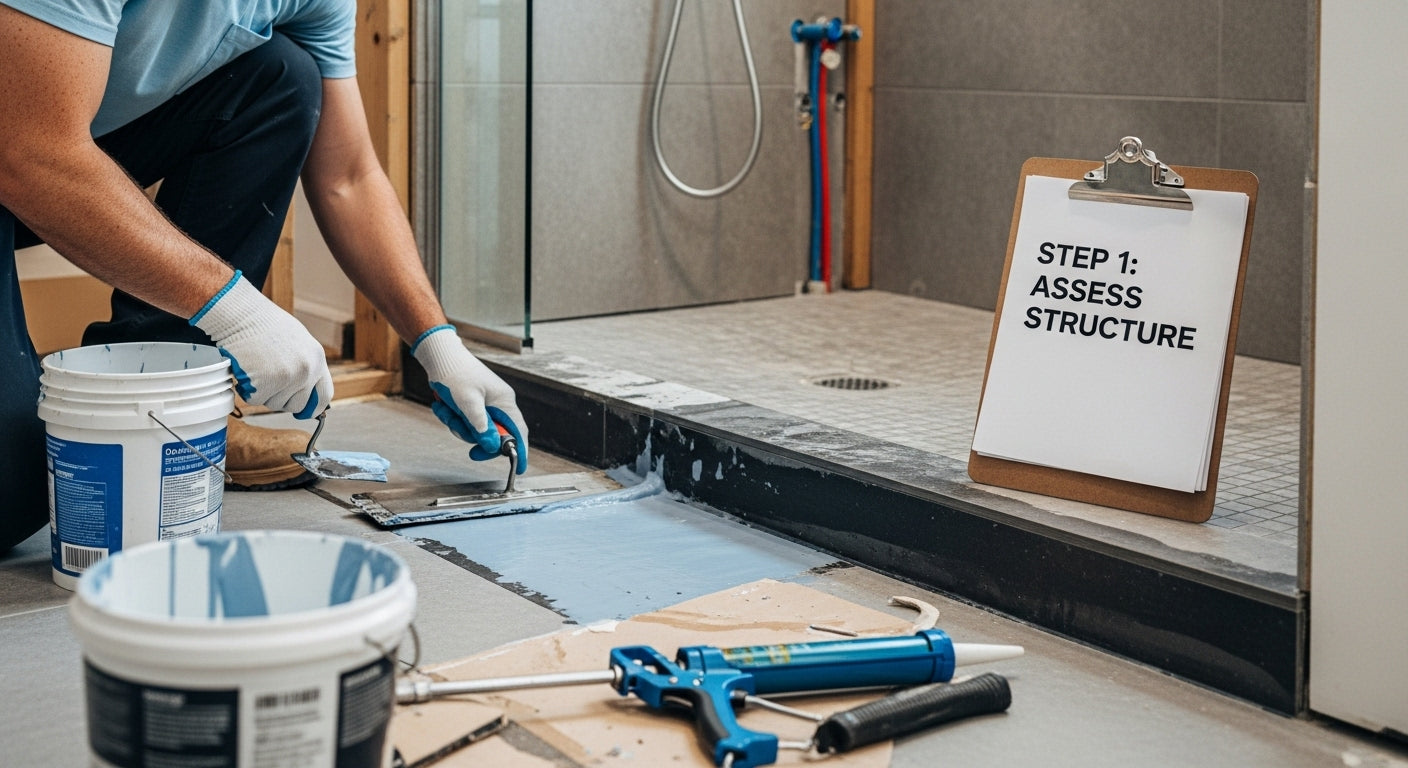
Step 1: Assess Your Current Bathroom Structure
Waterproofing for bathrooms begins with a comprehensive structural assessment that reveals potential vulnerabilities and critical areas requiring protection. Before applying any waterproofing materials, you must conduct a thorough examination of your bathroom’s existing conditions to develop an effective strategy.
Start by carefully inspecting every surface and junction where water might penetrate. Focus on areas prone to moisture accumulation such as around the shower, bathtub, toilet base, and sink. Look for signs of existing water damage like discoloration, soft or warped surfaces, peeling paint, or subtle mold growth. These indicators suggest potential structural weaknesses that demand immediate attention.
Your assessment should include measuring surface flatness and checking for any structural irregularities. Uneven surfaces can create water pooling zones that compromise waterproofing effectiveness. Use a long level or straightedge to identify subtle dips or rises in flooring and wall surfaces. Pay special attention to grout lines, tile edges, and corners where water can easily seep through microscopic gaps.
our comprehensive waterproofing bathroom tiles guide recommends documenting every potential moisture entry point during this initial inspection. Take detailed photographs and create a written record of observed issues. This documentation will serve as a critical reference when selecting appropriate waterproofing solutions and tracking repair progress.
Key areas requiring meticulous examination include:
- Shower and bathtub perimeters
- Floor to wall transitions
- Plumbing fixture connections
- Window and door frame interfaces
- Ceiling and wall intersections
Understanding your bathroom’s current structural condition provides the foundation for a successful waterproofing project. By conducting a systematic and thorough assessment, you’ll be prepared to select the most appropriate materials and techniques to protect your space from potential water damage.
Step 2: Choose Appropriate Waterproofing Materials
Selecting the right waterproofing materials is a critical step in protecting your bathroom from moisture damage. Your choices will determine the long term effectiveness of your waterproofing strategy, directly impacting the durability and integrity of your bathroom surfaces.
Liquid waterproofing membranes represent an excellent solution for many bathroom environments. These paint like substances create a seamless protective barrier that can be applied directly to surfaces like concrete, cement board, and existing tile. Professional contractors often recommend these membranes for their flexibility and ability to seal small cracks and imperfections. When applying liquid membranes, ensure complete coverage by using specialized rollers or brushes designed for even application.
Sheet membranes offer another robust waterproofing option, particularly for areas with high moisture exposure. Typically constructed from materials like polyethylene or chlorinated polyethylene, these prefabricated sheets provide a rigid protective layer. They work exceptionally well in shower areas and around wet room installations. Installation requires precise cutting and careful overlapping to prevent potential water infiltration points.
luxury bathroom tile ideas to complement your waterproofing project can help you understand how different waterproofing materials interact with various design aesthetics. Consider materials that not only protect but also enhance your bathroom’s visual appeal.
Ceramic tile sealants and penetrating water repellents provide an additional layer of protection for grout lines and tile surfaces. These products penetrate deep into porous materials, creating an invisible barrier that prevents water absorption. Select sealants specifically formulated for bathroom environments, ensuring they can withstand constant moisture and temperature fluctuations.
Key criteria for selecting waterproofing materials include:
- Compatibility with existing surface materials
- Durability and expected lifespan
- Ease of application
- Resistance to mold and mildew
- Cost effectiveness
By carefully evaluating these factors and understanding the unique characteristics of different waterproofing materials, you can create a comprehensive moisture protection strategy that safeguards your bathroom against potential water damage.
Below is a table comparing the main types of waterproofing materials discussed, helping you quickly evaluate their features and best use cases.
| Material Type | Description | Best Uses | Key Advantages |
|---|---|---|---|
| Liquid Waterproofing Membrane | Paint-like seamless barrier | Concrete, cement board, tile surfaces | Flexible, seals small cracks |
| Sheet Membrane | Prefabricated sheets (polyethylene, CPE) | High-moisture zones, showers, wet rooms | Rigid, reliable coverage |
| Tile Sealant | Penetrating protective sealant for tiles | Grout lines, porous tile surfaces | Invisible, mold-resistant |
| Penetrating Water Repellent | Deep-absorbing barrier for porous materials | Stone, unglazed tile, grout | Long-lasting, prevents stains |
Step 3: Prepare the Surface for Waterproofing
Surface preparation is the foundation of a successful waterproofing project, determining the effectiveness and longevity of your moisture protection strategy. Properly preparing bathroom surfaces requires meticulous cleaning, repairing, and conditioning to ensure optimal adhesion and performance of waterproofing materials.
Begin by thoroughly cleaning all surfaces with a professional grade degreasing solution that removes soap scum, mineral deposits, and any residual cleaning chemicals. Use a non abrasive scrub brush or sponge to avoid damaging surface materials. Pay special attention to grout lines, tile edges, and corners where contaminants frequently accumulate. Rinse surfaces completely and allow them to dry entirely before proceeding with further preparation.
Inspect the entire area for structural imperfections such as cracks, chips, or uneven surfaces. Small hairline cracks can compromise your waterproofing efforts, so address these issues before applying any protective materials. Use specialized repair compounds designed for bathroom environments to fill and smooth these imperfections. For larger damage areas, you might need to replace damaged tiles or sections of cement board to create a solid, uniform surface.
mixing tile patterns for stunning spaces can provide inspiration for how to approach surface repairs while maintaining aesthetic appeal. Consider how your repair work integrates with your overall bathroom design.
Sanding becomes crucial for creating an optimal surface for waterproofing material adhesion. Use medium grit sandpaper to lightly roughen smooth surfaces, which helps waterproofing membranes bond more effectively. Be cautious not to over sand, as this can damage underlying materials. After sanding, thoroughly remove all dust using a tack cloth or vacuum with a fine particle filter.
Essential preparation tools include:
- Professional degreasing cleaner
- Non abrasive scrub brush
- Repair compounds
- Medium grit sandpaper
- Tack cloth or vacuum with fine filter
- Protective gloves and safety glasses
A well prepared surface ensures that your waterproofing materials can perform their critical moisture protection function, creating a robust barrier against potential water damage in your bathroom.
This table summarizes essential tools and materials for surface preparation, so you can gather everything needed for effective, long-lasting waterproofing.
| Tool/Material | Purpose | Special Notes |
|---|---|---|
| Professional degreasing cleaner | Removes soap scum, mineral deposits, chemicals | Use non-abrasive for surface safety |
| Non-abrasive scrub brush | Cleans surfaces without scratching | Focus on grout and corners |
| Repair compounds | Fills cracks, chips, and imperfections | Choose bathroom-specific formula |
| Medium grit sandpaper | Lightly roughens surfaces for better membrane adhesion | Avoid over-sanding |
| Tack cloth/vacuum | Removes dust after sanding | Use fine filter for dust cleanup |
| Protective gloves/glasses | Ensures personal safety during preparation | Use when handling chemicals |
Step 4: Apply Waterproofing Membrane or Coating
Applying the waterproofing membrane represents the most critical phase in protecting your bathroom from moisture damage. Your precise application technique will determine the effectiveness of your waterproofing strategy, creating an impenetrable barrier against potential water intrusion.
Begin by carefully reading the manufacturer’s instructions for your chosen waterproofing material. Different products require specific application techniques, and deviating from recommended guidelines can compromise the membrane’s protective capabilities. Start by working in small, manageable sections to ensure complete and even coverage. Use specialized rollers or brushes designed specifically for membrane application, which help create a smooth, consistent layer without air bubbles or gaps.
When applying liquid membranes, maintain a consistent thickness across all surfaces. Most manufacturers recommend applying two thin coats rather than a single thick layer. Allow the first coat to dry completely before applying the second, typically waiting the specific time interval specified in the product instructions. Pay extra attention to corners, edges, and transition areas where water is most likely to penetrate. Use reinforcing fabric or special corner patches in these critical zones to provide additional protection.
our comprehensive waterproofing bathroom tiles guide can offer additional insights into creating a seamless protective layer. Consider the specific challenges of your bathroom layout when applying the membrane.
For sheet membranes, precise cutting and alignment are crucial. Ensure complete overlap between membrane sheets, typically by at least 2 inches, and use manufacturer recommended adhesives or seam tapes to create a continuous protective barrier. Carefully press out any air pockets during installation, using a specialized roller to ensure maximum adhesion and eliminate potential weak points.
Key application considerations include:
- Maintaining consistent membrane thickness
- Ensuring complete surface coverage
- Addressing critical junction points
- Following manufacturer specified drying times
- Checking for any missed spots or imperfections
After application, allow the waterproofing membrane to cure completely before proceeding with additional bathroom renovation steps. A thorough visual inspection will help identify any areas that might require touch up or additional attention, ensuring comprehensive moisture protection for your bathroom space.
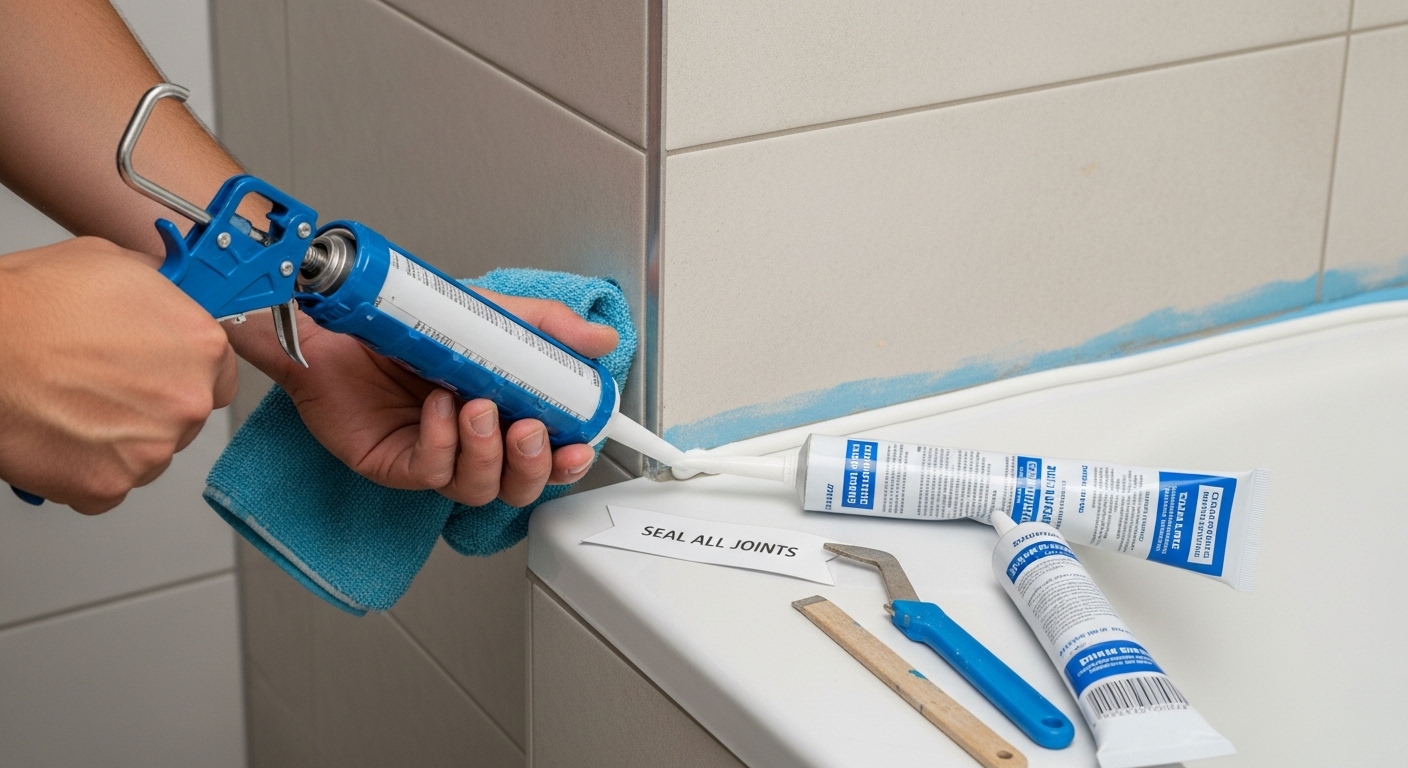
Step 5: Seal All Joints and Penetrations
Sealing joints and penetrations represents the final critical defense against moisture intrusion in your bathroom waterproofing strategy. Even the most carefully applied waterproofing membrane can fail if small gaps and openings remain unaddressed, potentially allowing water to compromise your entire protective system.
Begin by meticulously identifying every potential point of water entry. Examine areas around plumbing fixtures, electrical outlets, shower heads, and any pipe or cable penetrations through walls or floors. These seemingly minor openings can become significant sources of water damage if not properly sealed. Use a bright flashlight and carefully run your fingers along surfaces to detect even the smallest gaps or irregularities that might allow moisture penetration.
Select a high quality silicone based sealant specifically designed for bathroom environments. These specialized sealants offer superior water resistance and flexibility, allowing for slight movement without cracking. When applying the sealant, use a caulking gun with precise control, ensuring a continuous and smooth bead along all joint lines. Work slowly and deliberately, maintaining consistent pressure to create an even seal that fully closes potential water entry points.
luxury bathroom tile ideas to complement your waterproofing project can provide inspiration for how to integrate your sealing work seamlessly with your bathroom’s overall design aesthetic. Consider how your sealant color and application technique can enhance rather than detract from your bathroom’s visual appeal.
Pay special attention to corner joints where walls meet floors and where different surface materials intersect. These transition zones are particularly vulnerable to water infiltration. Use a professional grade sealant that matches the color of surrounding materials to create a clean, intentional look while providing robust moisture protection.
Critical sealing areas include:
- Shower and bathtub perimeter joints
- Pipe and fixture penetrations
- Electrical outlet boxes
- Floor to wall transition areas
- Window and door frame interfaces
After applying the sealant, allow sufficient time for complete curing as specified by the manufacturer. Conduct a final visual inspection, checking for any missed spots or uneven application. Run your finger gently along sealed areas to ensure a smooth, continuous protective barrier that will safeguard your bathroom against potential water damage.
Step 6: Conduct a Leak Test and Verify Effectiveness
The final and most crucial step in your waterproofing journey involves systematically testing the integrity of your newly sealed bathroom surfaces. This comprehensive leak test will confirm the effectiveness of your waterproofing efforts and identify any potential vulnerabilities before they can cause significant damage.
Begin by preparing the testing area carefully. Block all drain openings using specialized waterproof drain plugs or temporary sealing materials. You want to create a controlled environment that allows water to remain stationary and reveal any potential leak points. Use clean water at room temperature to avoid thermal expansion that might mask potential weaknesses in your waterproofing membrane.
Carefully flood low areas of your bathroom floor first, gradually building water levels to approximately one inch deep. Maintain this water level for a minimum of 24 hours, which allows sufficient time to detect even the most subtle moisture penetration. During this testing period, observe the entire area meticulously, checking walls, floor junctions, and any previously identified vulnerable zones. Look for any signs of moisture seepage, discoloration, or dampness that might indicate a compromised waterproofing system.
mixing tile patterns for stunning spaces can provide additional insights into creating visually appealing yet functionally robust bathroom designs. Consider how your leak testing process integrates with your overall bathroom aesthetic.
Use a moisture meter for precise detection of water intrusion. These professional tools can identify moisture levels in materials even before visible signs of water damage appear. Move the moisture meter systematically across walls, floors, and critical junction points, recording any significant readings that might suggest potential leak sources.
Critical leak test verification points include:
- Floor to wall transition areas
- Corners and joint intersections
- Pipe and fixture penetrations
- Shower and bathtub perimeters
- Electrical outlet surrounding areas
If you discover any areas of moisture penetration, carefully mark these locations and plan immediate remediation.
Use this checklist table to verify your waterproofing system with the key locations and actions required for a thorough leak test.
| Area to Check | Verification Action | Signs to Watch For |
|---|---|---|
| Floor to wall transitions | Observe for moisture after flooding | Dampness, discoloration |
| Corners and joint intersections | Inspect using moisture meter | Elevated moisture readings |
| Pipe and fixture penetrations | Check for leaks around pipes | Water drops, stains |
| Shower and bathtub perimeters | Monitor base for seepage | Soft spots, color change |
| Electrical outlet surrounds | Test with moisture meter | Mold, unusual readings |
Transform Your Bathroom with Worry-Free, Waterproof Style
Tired of worrying about water damage every time you use your bathroom? This guide breaks down step-by-step ways to prevent leaks and costly repairs, yet finding high-quality, trustworthy materials can feel overwhelming. If you need stylish tiles and dependable products that make waterproofing simple and effective, TileChoices.com is your ideal partner. From liquid membranes to durable tiles, we help you seal every joint and penetration with confidence.

Ready to protect your investment and design a bathroom that is both functional and visually stunning? Visit our landing page now to explore a curated selection of bathroom tiles and waterproofing solutions designed for long-lasting performance. Your peace of mind starts with quality materials and expert guidance. Choose TileChoices.com today because your bathroom deserves lasting protection and style. Get started—and take the first step toward a leak-proof, beautiful space.
Frequently Asked Questions
What are the key steps in waterproofing a bathroom?
Waterproofing a bathroom involves several essential steps: assessing the current structure, choosing appropriate waterproofing materials, preparing the surface, applying the waterproofing membrane or coating, sealing all joints and penetrations, and conducting a leak test to verify effectiveness.
What types of waterproofing materials are recommended for bathrooms?
Recommended waterproofing materials for bathrooms include liquid waterproofing membranes, sheet membranes, ceramic tile sealants, and penetrating water repellents. These options provide various levels of protection against moisture damage, depending on the specific needs of your bathroom environment.
How do I prepare my bathroom surfaces for waterproofing?
Surface preparation involves cleaning surfaces with a degreaser, repairing any structural imperfections like cracks, sanding smooth surfaces for better adhesion, and ensuring the area is dry before applying waterproofing materials. This thorough preparation is crucial for the effectiveness of the waterproofing system.
How can I test the effectiveness of my waterproofing efforts?
To test the effectiveness of your waterproofing, block all drain openings and flood low areas of your bathroom to approximately one inch deep for at least 24 hours. Observe for any signs of moisture or discoloration at critical junctions and use a moisture meter to detect any hidden water intrusion.
Recommended
- Achieve Effective Waterproofing Bathroom Tiles in 2025 – Tile Choices
- 8 Luxury Bathroom Tile Ideas for a Stunning Makeover – Tile Choices
- Understanding Porcelain vs Ceramic Tiles: A Comprehensive Guide – Tile Choices
- Understanding Matte vs Glossy Tiles: Key Differences Explained – Tile Choices
- Bathroom Remodel Plumbing Tips For Sacramento Area Homes 2025 - Legacy Plumbing & Drain - Emergency Plumbers Of Sacramento
- Waterproofing Your Home: The Ultimate Guide


