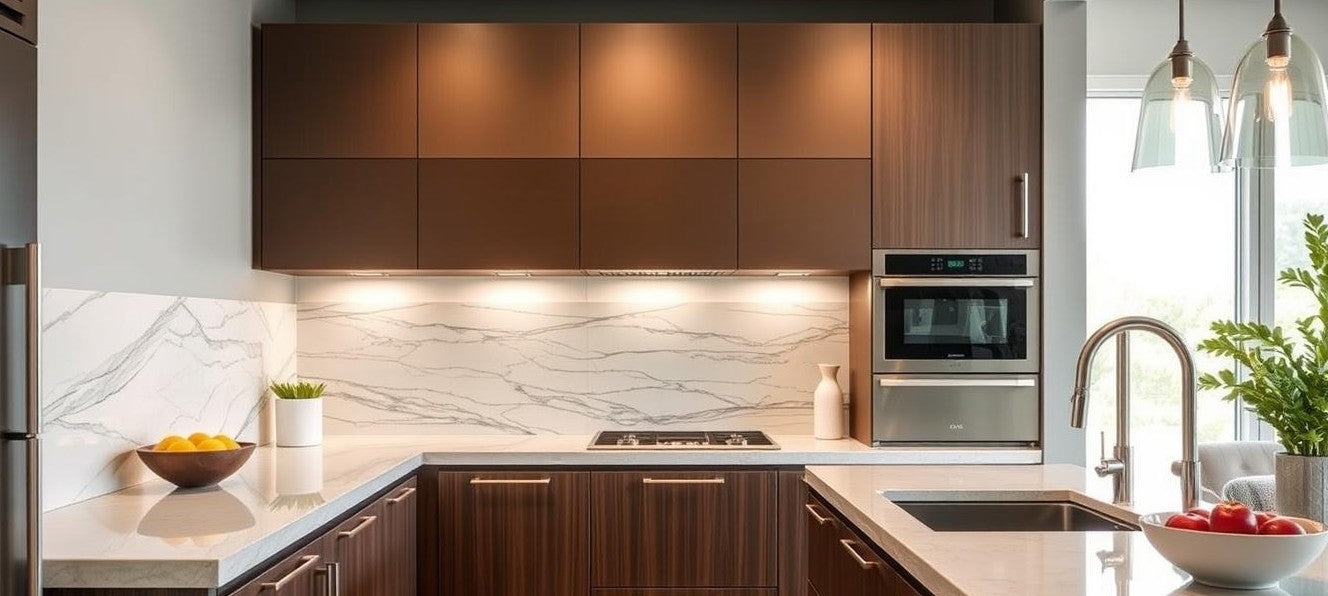
Ever walked into a kitchen and thought the tile seemed off? A clean cut-off point can make a big difference. Designers like Carla Aston say matching the tile to your upper cabinets or a clear wall is key. If the tile goes too far, it can mess up the look.
For a neat kitchen, make sure the tile meets natural breaks. This avoids a messy feel. Seeing how others do it shows the importance of planning. If you're wondering where to end your kitchen backsplash tiles, you're in the right spot.
Key Takeaways
- Identify a clear stopping point that aligns with your cabinet edge.
- Monitor how far the tile extends to prevent a cluttered look.
- Gather inspiration from design pros such as Carla Aston.
- Avoid mismatched sections by matching tile with upper cabinetry.
- Keep your layout simple to achieve a balanced backsplash design.
- Choose a boundary that feels intentional and appeals to the eye.
Understanding Kitchen Backsplash Boundaries
Setting clear limits for your tile can make your kitchen look better. Walls, corners, or cabinet edges are good places to stop. This keeps your kitchen looking neat and unified.

If your kitchen has odd plumbing or design features, you might need to adjust. Placing your tiles carefully can make your design look smooth and impressive. Using kitchen backsplash design tips helps avoid messy edges or gaps.
Smart transitions can connect countertops and walls nicely. A clean line near trim or overhangs keeps things balanced. It also highlights your favorite tiles and shows off your creativity.
| Boundary Areas | Key Benefits |
|---|---|
| Cabinet Edges | Helps align tiles for a tidy finish |
| Wall Corners | Provides a natural stopping point for visual flow |
| Trim Pieces | Prevents abrupt tile endings for a neat border |
Where to End Kitchen Backsplash Tiles
You might want a clean finish for your tile design. This ensures your kitchen looks cohesive and purposeful. A smooth transition from countertop to wall is key.
Common Endpoints for Your Design
Many choose to end their backsplash where cabinets stop or countertops end. This makes your wall space organized and every tile intentional. Stopping near windows also keeps the framing clean.
Aligning with Cabinet Lines
Ending at cabinet edges creates a clear boundary. It avoids awkward cuts behind appliances. Brands like Schluter offer trims to keep your backsplash polished.
Avoiding Visual Clutter
Going too far can clutter your walls. Stopping near cabinets or corners prevents breaks. Matching trim pieces add style to each edge. This keeps your backsplash focused and elegant.
Choosing the Right Tile Installation Approach
Your kitchen can change with different styles based on the backsplash layout. Using new design ideas helps keep the walls safe behind cooking areas. Look at the many backslash tile termination options to find the perfect fit for your taste and space.
Flush Endings for a Minimalist Look
Matching the tile edge with upper cabinets gives a clean look. This method works well with modern tile finishes from brands like Daltile. It makes cleaning easier and focuses on your appliances.
Extending Beyond the Cabinet for a Seamless Transition
Going beyond the cabinet line creates a smooth look. A bit more tile can connect open corners or nearby walls. This method also protects paint from steam or splashes. Many options use trim pieces for a clean edge, keeping your style looking great for years.
How to Determine Your Own Stopping Point
Choosing where your backsplash ends can change your kitchen's whole look. It's important to plan carefully where to stop on each wall, corner, or cabinet face. Take time to walk through your kitchen and look at every spot where tile might look out of place.
Begin by thinking about the natural edges of your cabinets. This helps clear up any doubts about where tiles should stop. Some people use pencil lines or masking tape to see how the design will look.
- Measure the vertical distance to find logical cutoff points.
- Lay out a few sample tiles along the proposed end line.
- Assess angles around tricky corners for a smooth alignment.
Think about your kitchen's personality and how it flows. Stopping the backsplash at cabinets creates a clean look and avoids awkward overlaps. This balance makes your kitchen both functional and beautiful.
Tips for Aligning Backsplash with Cabinet Edges
Getting your tiles right can make your kitchen look amazing. Whether you pick simple subway tiles or something more fancy, plan carefully. This way, you can avoid any mistakes like chipped or crooked tiles.
Many people use special finishing touches at the edges. These can be bullnose pieces or small trims. They help keep your backsplash looking perfect.
Measuring for a Clean Finish
Start by measuring and using a level to mark where the tiles should end. Check for any uneven spots on the wall. This step is key to a clean look.
Mark the tile's end with painter's tape. Double-check the spacing to ensure everything is even. This makes your backsplash look sharp and neat.
Avoiding Overlaps or Gaps
When tiles meet the cabinet edge, gaps can happen. Overlaps can make your surface look bumpy. To avoid this, lightly draw where each tile will go.
Use special finishing touches like aluminum profiles to protect the edges. This keeps your backsplash looking great for a long time.
Integrating Backsplash Tile with Countertops
Pairing backsplash tile with countertops creates harmony. This makes your kitchen look better and makes the backsplash transition smooth. The colors and textures depend on your countertop, like natural stone, Corian, or quartz.
Selecting Complementary Materials
Matching colors from your countertop with tile shades is a good start. You can also use contrasting finishes for a bold look. The choice depends on the feel you want in your space.
- Match stone with porcelain tiles for elegance
- Opt for ultrasmooth glass tiles to complement modern counters
- Experiment with a matte finish tile against polished granite
“Tile shape and countertop color must flow together seamlessly.” — Nate Berkus
Ensuring Proper Height and Coverage
Choosing the right backsplash height is key for balance and moisture protection. You can align it with upper cabinets or go higher for a dramatic look. Each height adds its own style and keeps the space looking good.
Backsplash Tile Edge Finishing Ideas
Finishing your tile edges is key to a cohesive design. Each corner or exposed side needs a neat border. This prevents damage and adds beauty.
A bullnose tile curves around corners for a polished look. Metal trims, like those from Schluter, are great for modern spaces. Decorative molding frames each section elegantly.
When you're finishing your backsplash, aim for smooth edges. Use border pieces or specialty profiles for durability and style. These ideas help you personalize your space while keeping it functional.
Optimizing Layout for Corner Spaces
Corner angles are key in your backsplash design. It's important to plan well so tiles fit right and avoid gaps. Use straight cuts when you can, and save space for bending techniques.
These steps are essential for a great kitchen backsplash. Inward and outward corners need extra attention. Choose trims that match your tile and color scheme.
Handling Inward Corners
Inward corners meet where two walls come together. A precise layout is best, leaving space for grout and minimal trimming. Here are some tips:
- Measure both walls and mark each tile section in pencil.
- Trim tiles to fit snugly without forcing awkward cuts.
- Use flexible corner trim from brands like Schluter or Daltile to protect edges.
Dealing with Outward Corners
An outward corner wraps around edges or peninsulas. This area might need stronger edge guards for both style and stability. Trim pieces help keep your tile pattern uniform, ensuring a cohesive look.
| Corner Type | Suggested Trim | Where to Find |
|---|---|---|
| Inward | Rigid corner rail | Home Depot |
| Outward | Rounded metal edge | Lowe’s |
Ensuring a Seamless Backsplash Transition
You want each tile section to flow into the next without gaps or unnatural breaks. Paying attention to how grout lines meet helps your backsplash feel polished. A carefully placed backslash tile stopping point sets the stage for a smooth blend around cabinets, corners, and countertops.
Minimizing Grout Line Breaks
Match tile patterns wherever surfaces join. This approach reduces visible interruptions and creates a cleaner design. Some homeowners prefer brands like Daltile for consistent tile sizes.
You might start planning transitions by marking key spots where cabinet edges or windows intersect. Smaller tiles or mosaics can be arranged to fill awkward spaces, so each joint aligns as one continuous unit.
Using Subtle Color Variations
A seamless transition depends on tone as much as layout. You can highlight select areas by shifting the grout from pure white to a soft neutral. This technique draws the eye without clashing or creating stark lines.
When the backslash tile stopping point moves around a corner, a gentle color contrast adds interest. Brands like Ann Sacks offer diverse shades that help your project stand out while fitting together smoothly.
Avoiding Common Backsplash Mistakes
It's easy to overlook the details that keep your kitchen backsplash looking balanced. One common mistake is ignoring outlets and switches. Shifting these before you start tiling helps avoid awkward protrusions or tile that goes beyond your cabinets.
Another mistake is rushing the end points. This can lead to abrupt stops that disrupt your kitchen's visual flow.
When choosing a backsplash tile layout, focus on harmony with existing elements. A well-organized approach prevents random cuts or edges that clash with your design. Start by measuring your space and plan where your tile will end without crowding corners or going too far behind appliances.
This careful planning saves time, money, and prevents misaligned lines. It keeps your kitchen looking seamless.
Final Touches for a Polished Look
You deserve a kitchen that feels complete from top to bottom. Paying attention to tile edges gives a crisp look. Ending the backsplash at cabinets adds a neat finish. A few simple steps keep everything protected from spills and everyday wear.
Details around corners or tight spots make a big difference. Avoid gaps where water can seep in. Keep your tile lines uniform for a flawless look.
Caulking and Sealing for Durability
A quality sealant, like DAP or GE-brand silicone, keeps moisture out and protects grout lines. Apply an unbroken moisture barrier along the junctions. Here are some tips:
- Clean surfaces thoroughly before adding sealant.
- Use painter’s tape to guide straight caulk lines.
- Wipe away excess with a damp cloth for a smooth edge.
Incorporating Decorative Trims
Metal rails from Schluter or other brands offer a sleek border. Trims keep exposed edges safe from chips and disguise any raw cuts. They look striking when used for ending kitchen backsplash at cabinets or around window sills for an eye-catching result.
Conclusion
You've learned how tile endings can make cabinet lines and corners stand out. This detail affects how light hits your countertops and walls. A clean edge is essential for a unified kitchen look.
There are many ways to decide where to end kitchen backsplash tiles. Some choose flush endings for a simple, modern look. Others prefer wrapping corners for a seamless, continuous feel. Both styles can enhance your kitchen's design.
Having a clear plan helps keep grout lines even and avoids last-minute changes. Even the best tile from Lowe’s or The Home Depot looks better with a defined edge. Make sure to measure well and step back to check how each line meets the next. With a solid plan, you can create a space you'll love.
FAQ
Where do I end kitchen backsplash tiles for a professional look?
Find a clear stopping point, like the edge of your upper cabinets or a natural wall boundary. This makes the design look planned, not random. Ending the backsplash at cabinets avoids awkward tile pieces at the edges.
Could you share some kitchen backsplash design tips to avoid a cluttered look?
Match the tile color with your countertops and cabinets. Measure carefully around outlets or windows. Stop the backsplash where it meets painted drywall for a clean look. Simple shapes and subtle contrasts help avoid visual noise.
How do I choose the right backsplash tile layout?
Think about symmetry, grout line alignment, and where cabinets end. Plan the tile pattern around outlets, windows, or peninsulas. This way, cut pieces won't look out of place.
What are common backsplash tile termination options?
You can stop the tile where cabinets or corners start. Or, wrap the tile slightly past the cabinet for a decorative finish. Adding a trim piece also works well for a polished look.
How should I handle tile edges for a neat finish?
Use bullnose tiles for smooth corners, metal edge trims for a modern look, or decorative border tiles. These details protect edges and give your backsplash a cohesive look.
What if I want a seamless backsplash transition around corners?
Cut tiles carefully to fit without gaps or uneven grout lines. Use accent tiles or corner trim pieces for a smooth transition. Proper planning ensures a seamless flow onto the wall or peninsula.
Are there any guidelines for installing a backsplash tile successfully?
Start with measuring the wall and marking key points. Verify the tile layout before applying adhesive. Follow the manufacturer's instructions for mortar or mastic. With careful planning, your installation will look intentional.
Why is it important to end the backsplash at cabinets?
Ending the backsplash at cabinets creates a crisp transition. It avoids awkward tile pieces in open wall areas. A neat boundary makes cleaning easier and protects the area behind your cooking zone.


